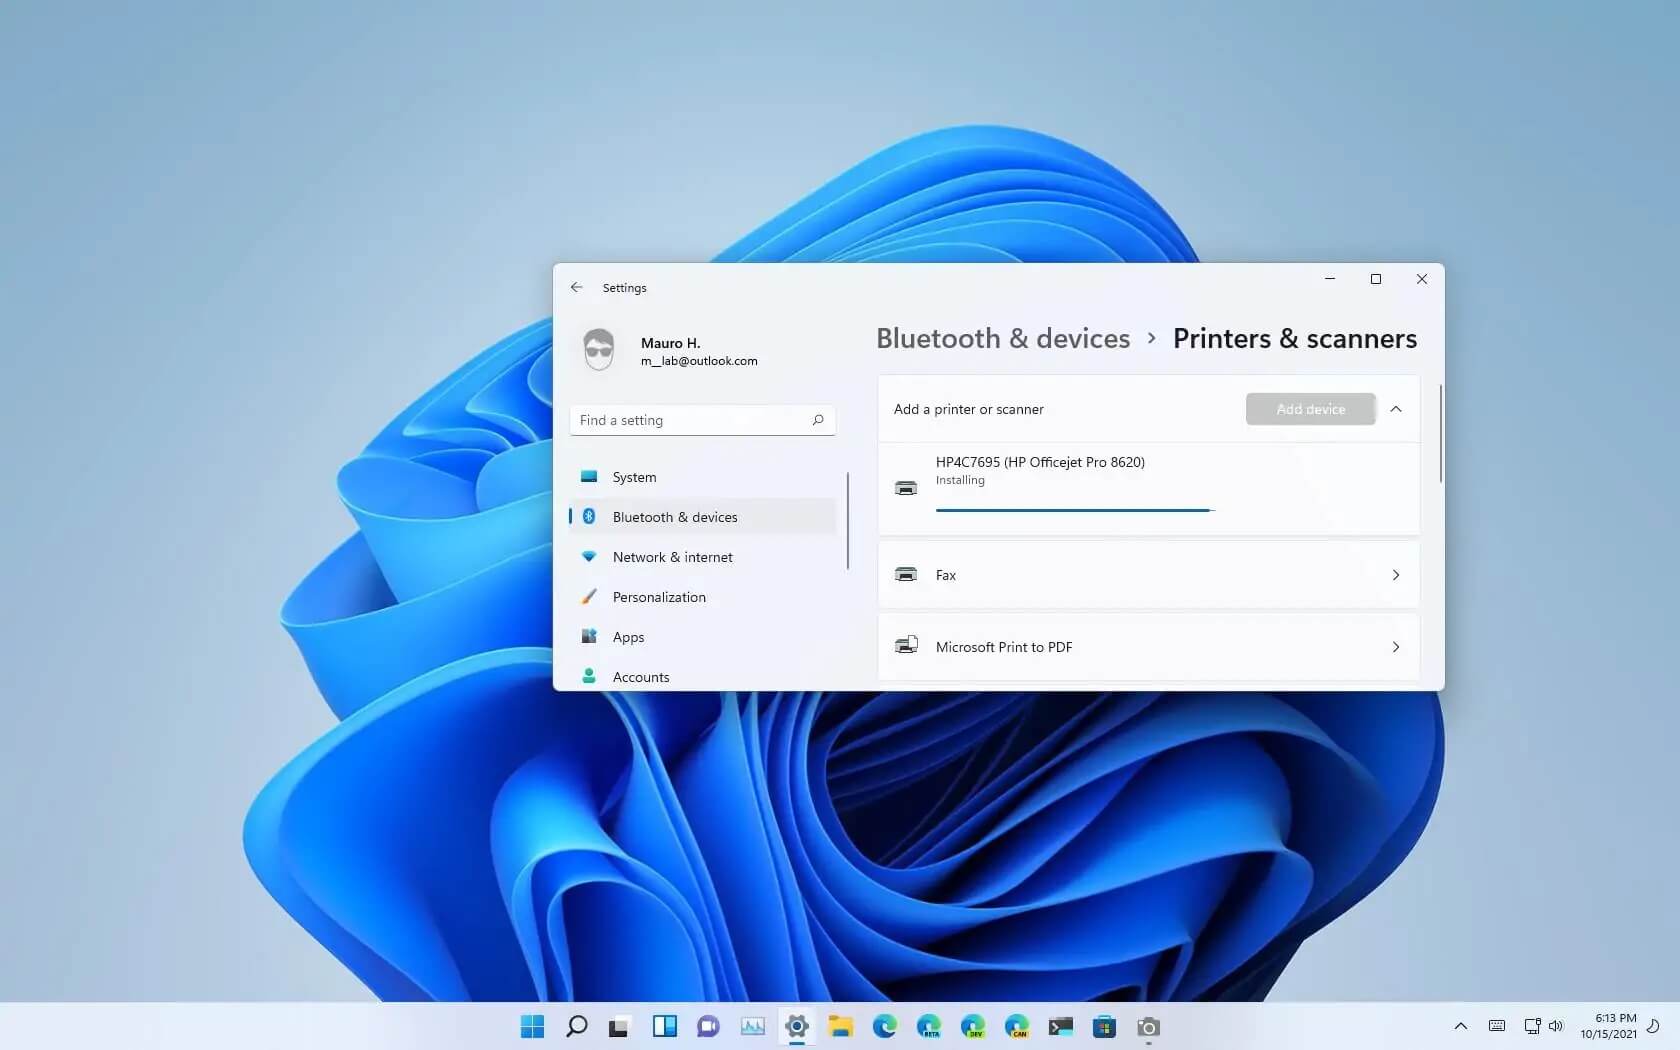
Often, you may need to remove and reconnect a printer to troubleshoot setup issues. In addition, clearing out old, unused devices helps keep your connected peripherals organized in Windows 11 and 10.
You can easily remove any connected printer directly through the Settings app. If that doesn't work, you can turn to Command Prompt and several other built-in tools to force a complete removal. Here is a step-by-step guide to the different ways you can uninstall printers from your Windows PC.
1. How to Remove a Printer in Windows via Settings
The Settings app offers the most straightforward way to add or remove devices. Here is how to do it:
1. Press Win + I to open Settings.
2. Select the Bluetooth & devices tab on the left.
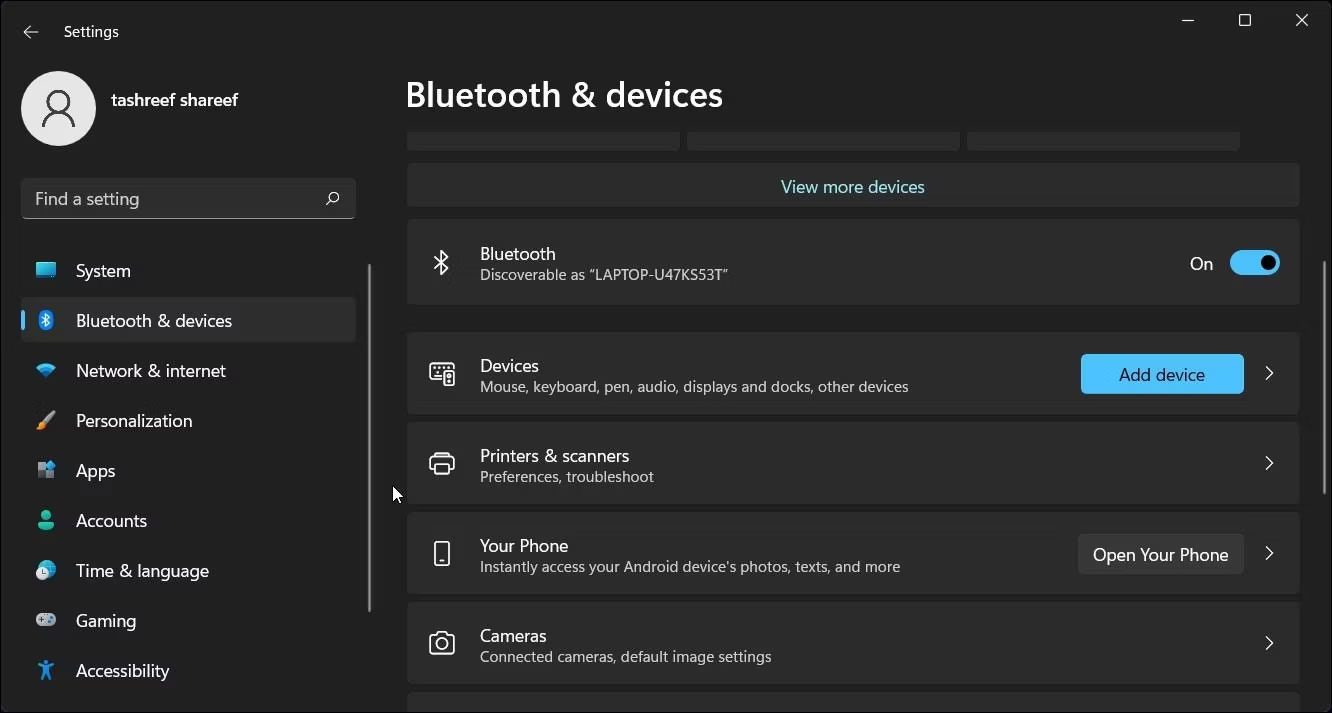
3. Scroll down and click Printers & scanners to view all devices connected to your computer.
4. Click the device you want to remove.
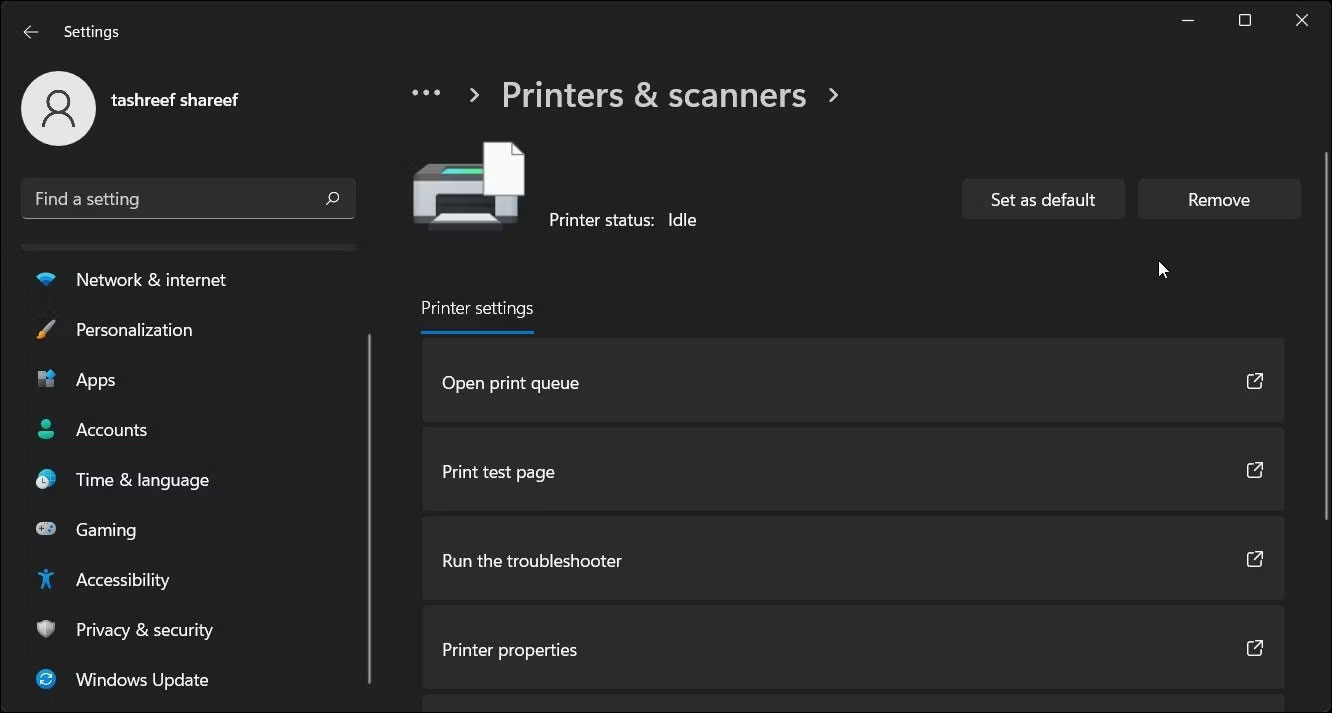
5. Click the Remove button in the top-right corner, then click Yes to confirm.
If you encounter an error, stop the Print Spooler service in Services and try again.
2. Uninstall Printer Software for a Complete Cleanup
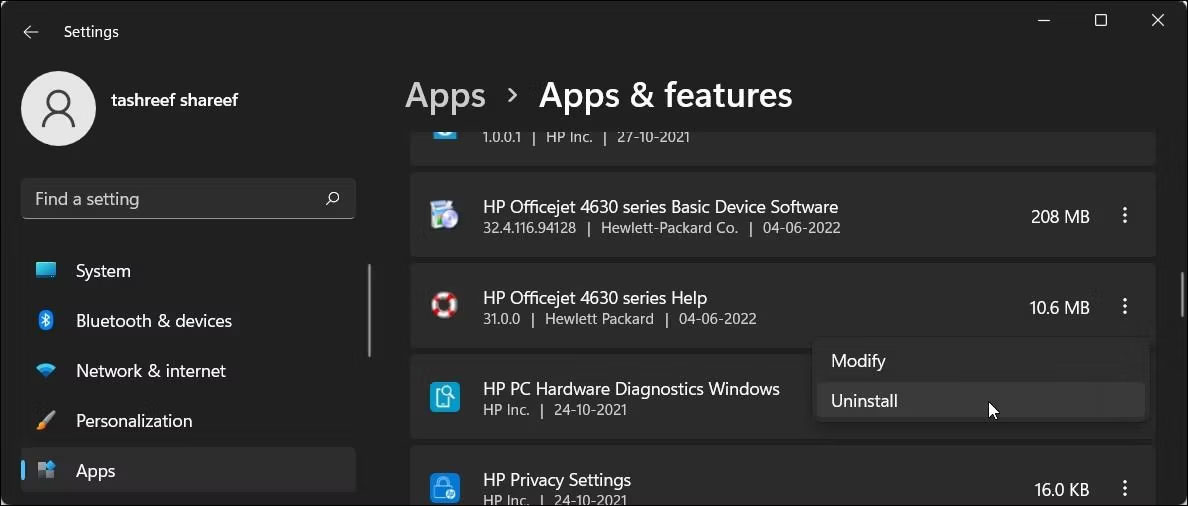
If a deleted device continues to appear, you may need to uninstall its associated printer driver software to remove it entirely. You can do this from the Installed apps (or Apps & features) section in Windows 10 and 11.
To uninstall printer drivers and software:
- Press Win + I to open Settings.
- Click the Apps tab on the left, then select Installed apps. The list may take a few seconds to populate.
- Under the app list, scroll through or search for your printer's software suite or driver package.
- Click the three-dot menu next to the software.
- Select Uninstall, then click Uninstall again to confirm.
- Follow the on-screen prompts to complete the process, then check for any other companion software packages and remove them as well.
- Once finished, restart your PC.
3. Remove a Printer Using Control Panel
You can also use the classic Control Panel to manage connected hardware. Removing a printer here is particularly effective if the device failed to uninstall properly through Settings.
To remove a printer via Control Panel:
1. Press Win + R to open the Run dialog box.
2. Type control and click OK (or press Enter) to open Control Panel.
3. In Control Panel, navigate to Hardware and Sound.
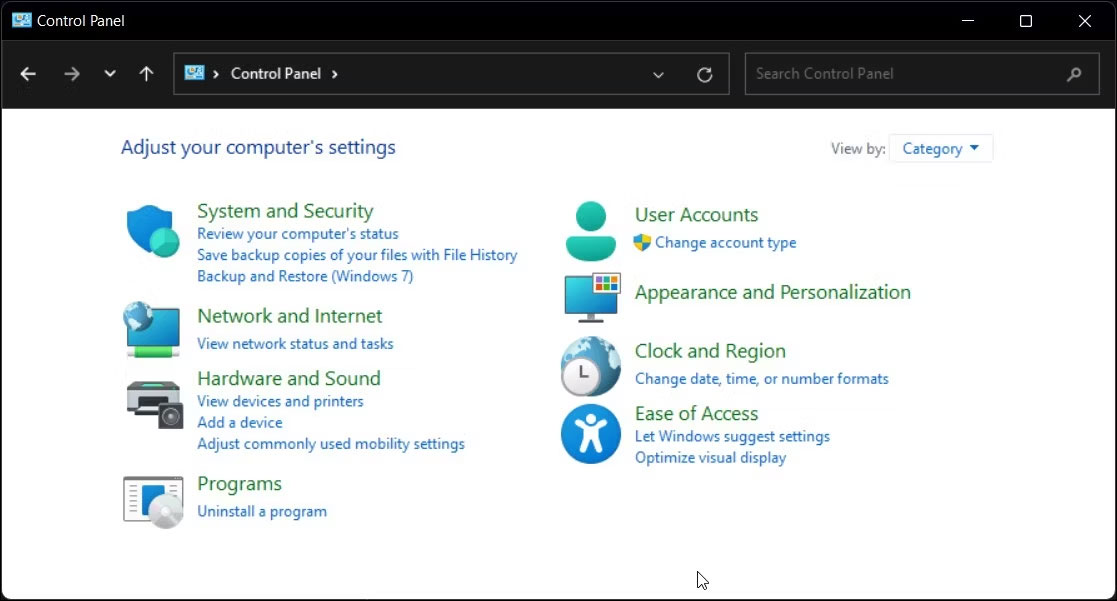
4. Click Devices and Printers.
5. Under the Printers section, locate the device you want to remove.
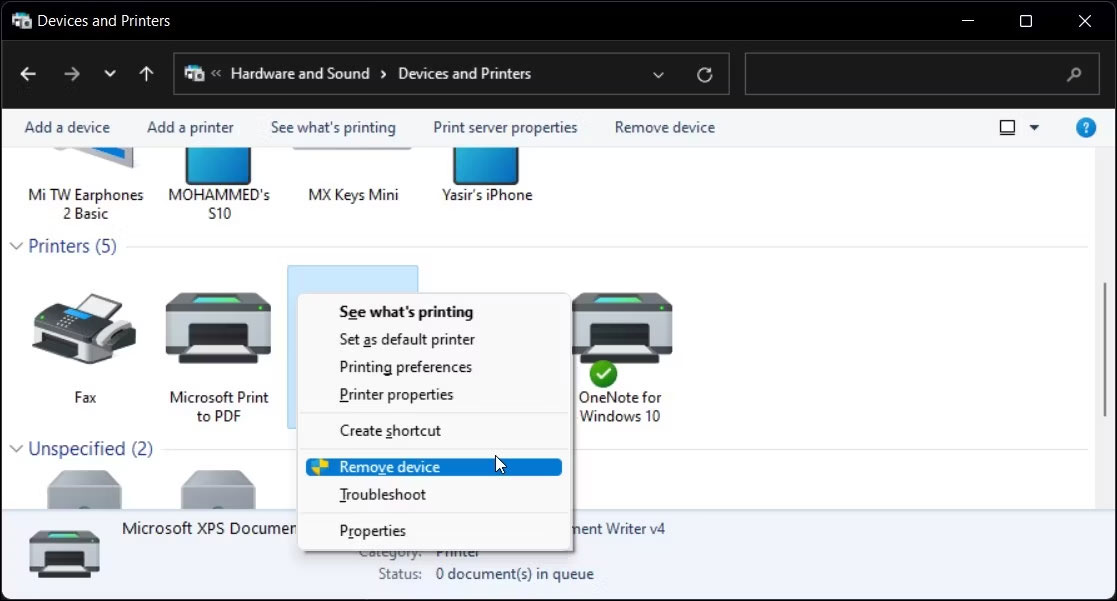
6. Right-click the printer and select Remove Device.
7. Click Yes to confirm.
4. Remove a Printer via Print Server Properties
Removing a device icon doesn't always delete the underlying driver files, which can cause configuration issues later on. In this scenario, you can use the Print Server Properties dialog to purge installed printer drivers.
To remove an installed driver:
1. Press Win + R to open Run.
2. Type control and click OK.
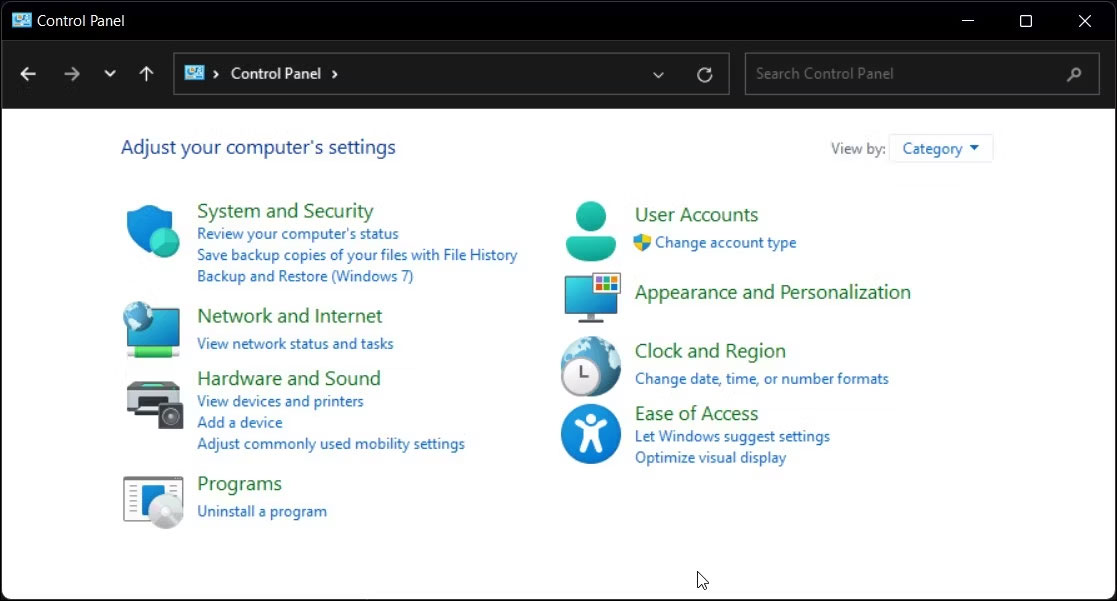
3. In Control Panel, go to Hardware and Sound > Devices and Printers.
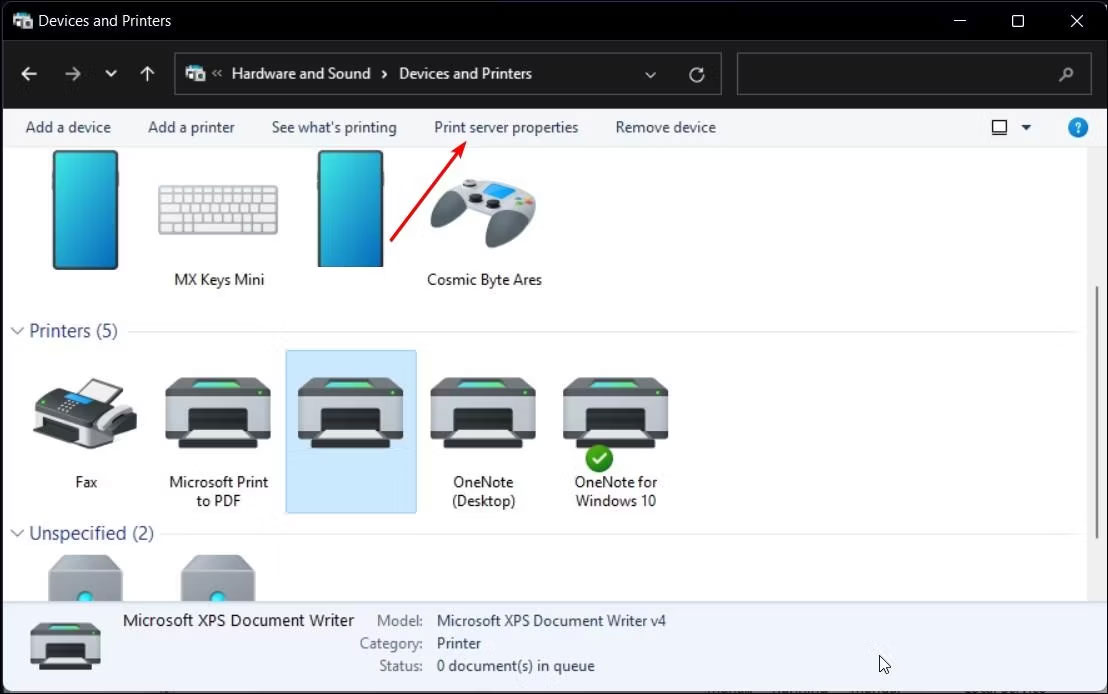
4. Select any available printer on the screen, then click Print server properties on the top toolbar.
5. Switch to the Drivers tab in the Print Server Properties dialog.
6. Under Installed printer drivers, select the driver you wish to remove and click Remove.
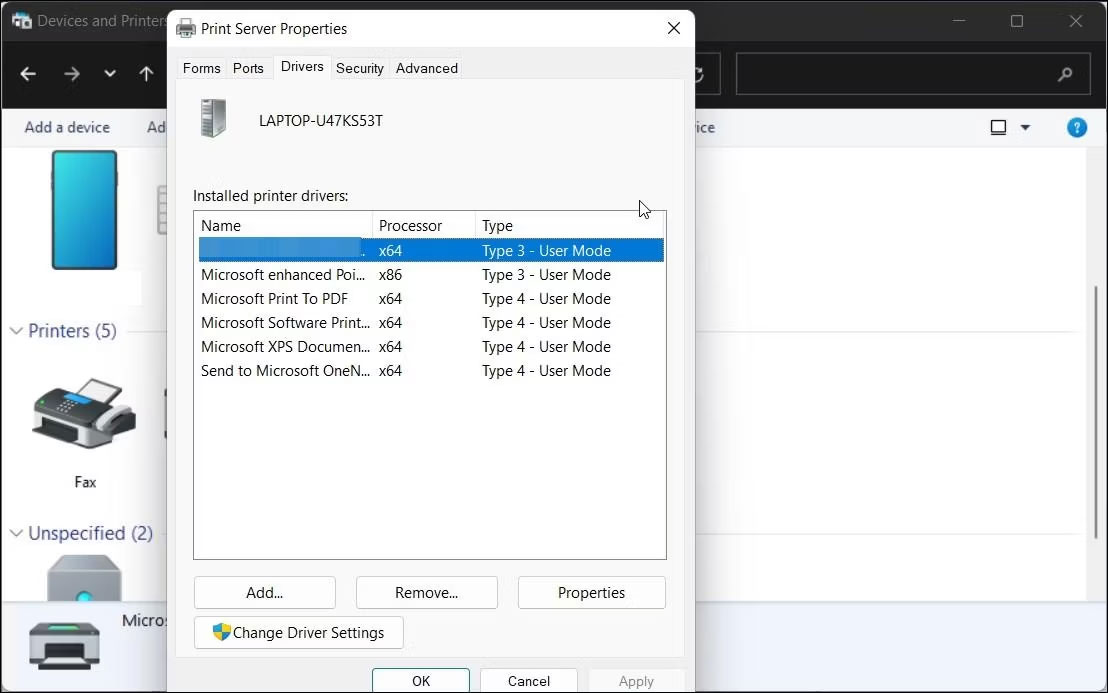
7. Select Remove driver and driver package.
8. Click OK to confirm and delete the package.
9. Restart your PC to finalize the removal.
5. Uninstall a Printer Using Device Manager
Device Manager lets you manage all internal components and external peripherals connected to your system. You can use it to troubleshoot hardware, update drivers, configure new devices, and delete existing ones.
To uninstall a printer using Device Manager:
1. Press Win + X to open the Power User menu.
2. Select Device Manager from the list.
3. Click View in the top menu and select Show hidden devices.
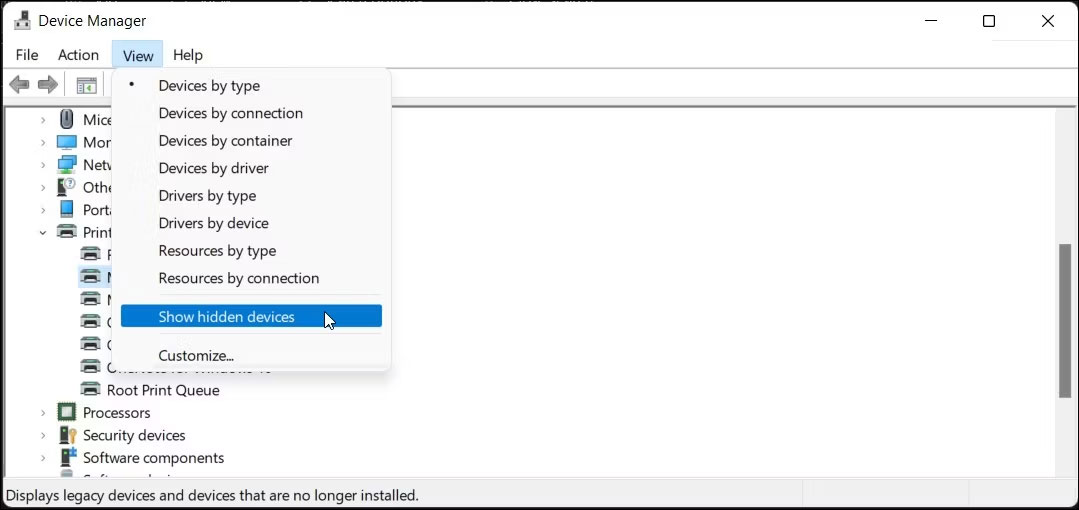
4. Expand the Printers category to locate your device.
5. Right-click the printer and choose Uninstall device.
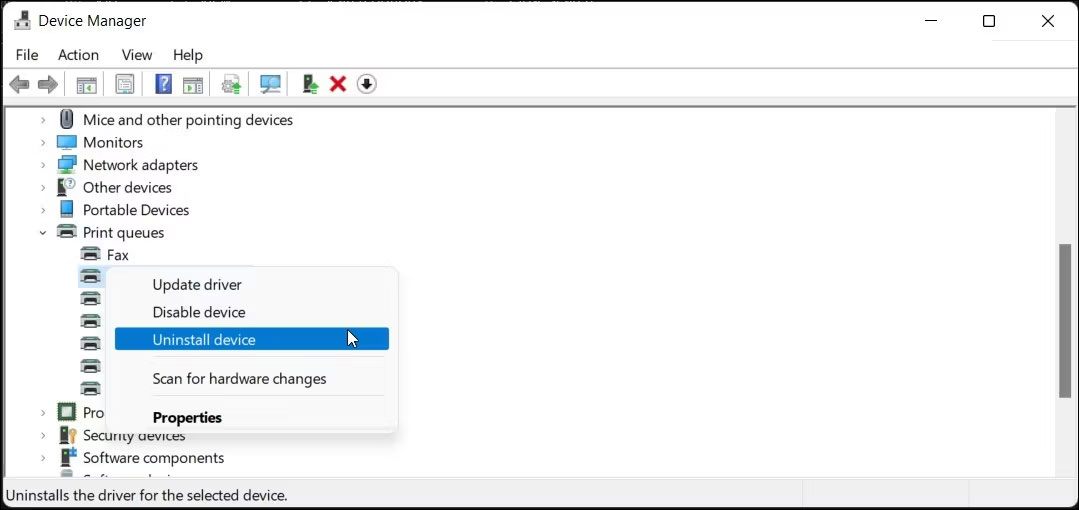
6. If available, check Delete the driver software for this device and click Uninstall.
7. If the Printers category does not appear, expand Print queues instead and repeat the same steps.
8. Close Device Manager and restart your computer.
6. How to Uninstall a Printer Using Command Prompt
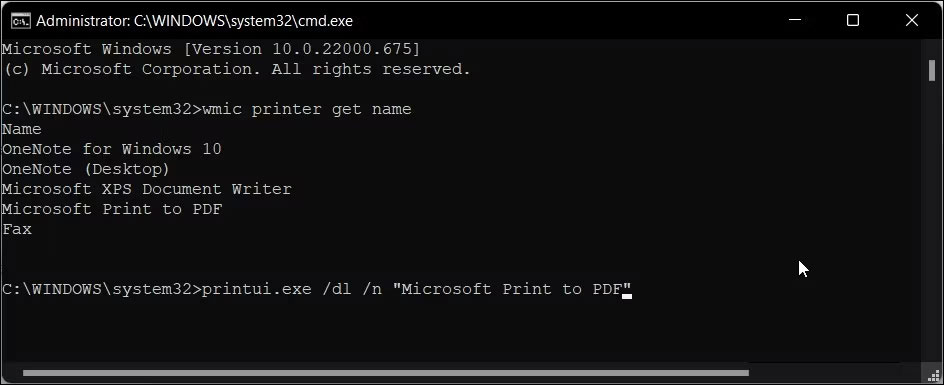
If you prefer using the command line over graphical menus, you can delete any installed printer using the printui utility.
To remove a device via Command Prompt:
- Press the Win key and type cmd.
- Right-click Command Prompt and choose Run as administrator.
- In the Command Prompt window, run the following command to list all installed printers:
wmic printer get name - To delete a specific printer, execute the following command:
printui.exe /dl /n "Your_Printer_Name" - Replace Your_Printer_Name with the exact name of the printer as listed in the previous step.
- Press Enter to run the command.
7. Remove a Printer Driver Using Print Management
Print Management is an administrative Windows tool designed to oversee printers, drivers, ports, and print servers. You can use it to thoroughly delete printer drivers from your system. Note that Print Management is not available on Windows Home editions.
To delete a printer driver with Print Management:
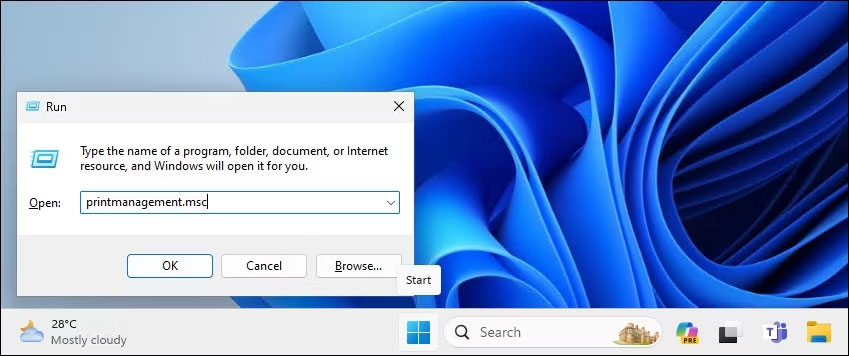
1. Press Win + R to open Run.
2. Type printmanagement.msc and click OK.
3. In the left navigation pane, expand Print Servers.
4. Click your local machine name to expand it.
5. Select Printers to see all installed devices.
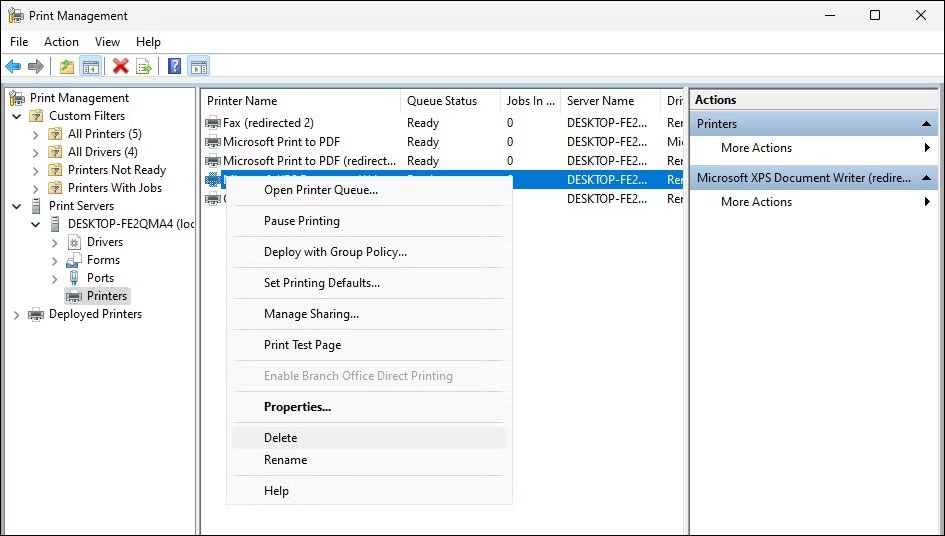
6. In the center pane, right-click the printer you want to remove.
7. Click Delete and confirm with Yes.
8. Remove Printer Drivers with PowerShell
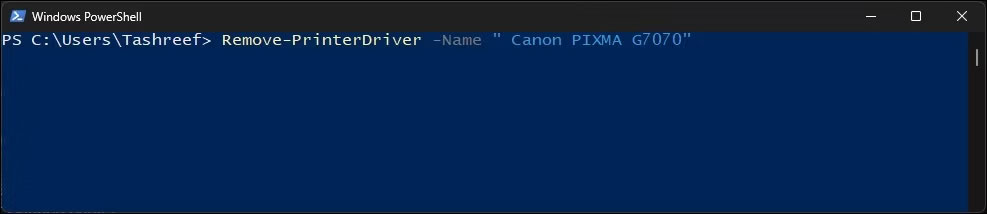
You can also use PowerShell to strip out installed driver packages directly, which is especially useful on Windows Home editions where Print Management is missing.
To remove a printer driver using PowerShell:
- Press the Win key and type powershell.
- Right-click Windows PowerShell and choose Run as administrator.
- In the PowerShell terminal, enter the following command and press Enter to list installed drivers:
Get-PrinterDriver | Format-List Name - Once you find the driver name, run the following command to remove it:
Remove-PrinterDriver -Name "Printer-Name" - Replace Printer-Name with the exact name shown in the output above.
Source: Quantrimang