


To find information about Intel processor generations on Windows devices, just a few clicks are all you need. In this article, we will guide you on how to find processor information and explain the specifications.
1. How to check Intel processor generation using System Settings
On Windows, you can quickly check your Intel processor generation through System Settings. To do this, open Settings.
In the Settings window, click on the System option to open it. Next, on the right control panel, scroll down and click on About to view your System Information.
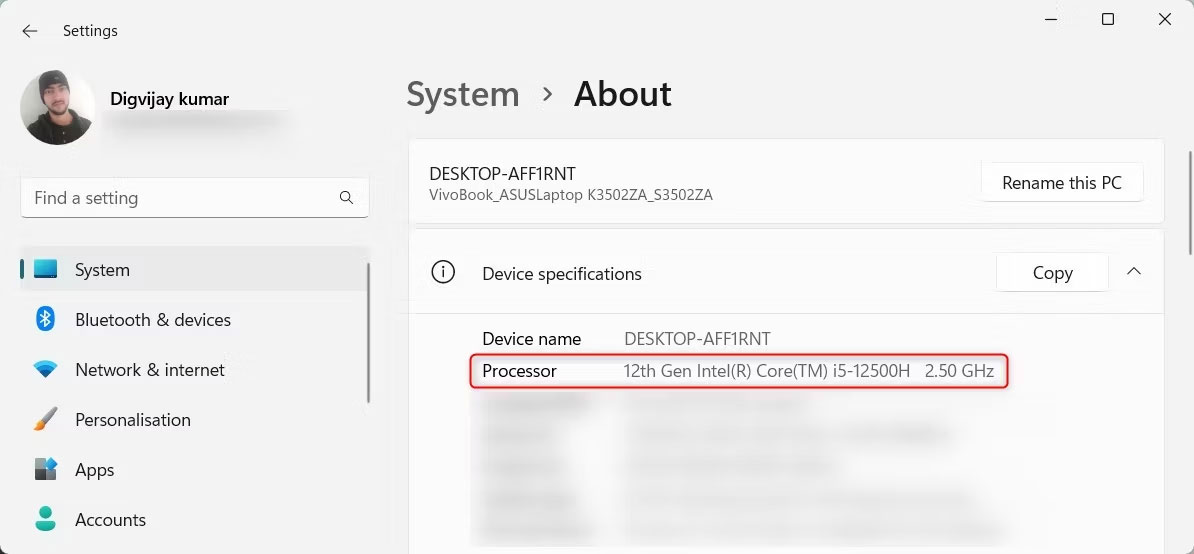
Here, you will find the processor name and Intel processor generation. You can also check additional technical specifications such as RAM version and operating system here.
2. How to check Intel processor generation using Device Manager
Another way to check your Intel processor generation is through Device Manager. To do this, right-click on Start and select Device Manager from the list of options. You will find a list of various devices and hardware in the Device Manager window. Expand the Processors section to see the name and generation of your Intel processor.
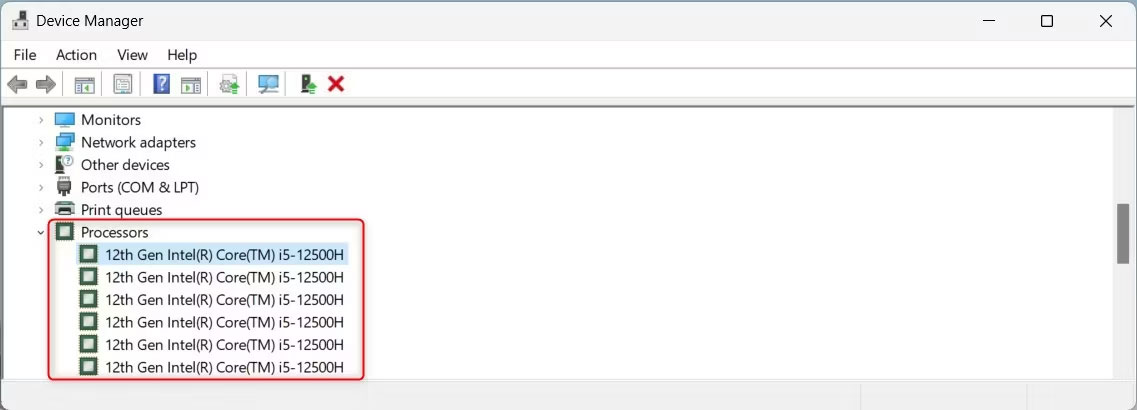
Here, you can also check other details such as hardware ID, manufacturer, and driver provider. To view them, right-click on your processor and select Properties. Then, go to the Details tab and click on the Property drop-down menu.
3. How to check Intel processor generation using System Information tool
You can use the System Information tool to get a comprehensive report of your system. This tool provides more than just Intel processor generation information; it provides in-depth details about installed drivers, system model, BIOS version, Windows version, memory, etc.
To open this tool, type System Information into the Windows search bar. Then, select it from the search results. You can also use Win + R to open the Run command, type msinfo32, and press Enter.
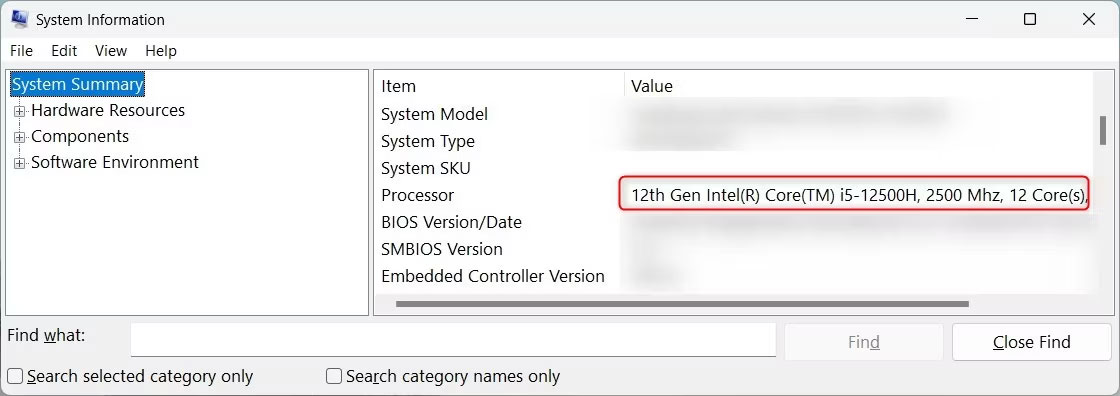
Your processor name is located in the System Summary section on the right control panel.
4. How to check Intel processor generation using File Explorer
If you are using Windows File Explorer, you can also check your Intel processor generation right there. You can check your Intel processor generation directly from the File Explorer window.
To do this, click on This PC from the left control panel, then select Properties.
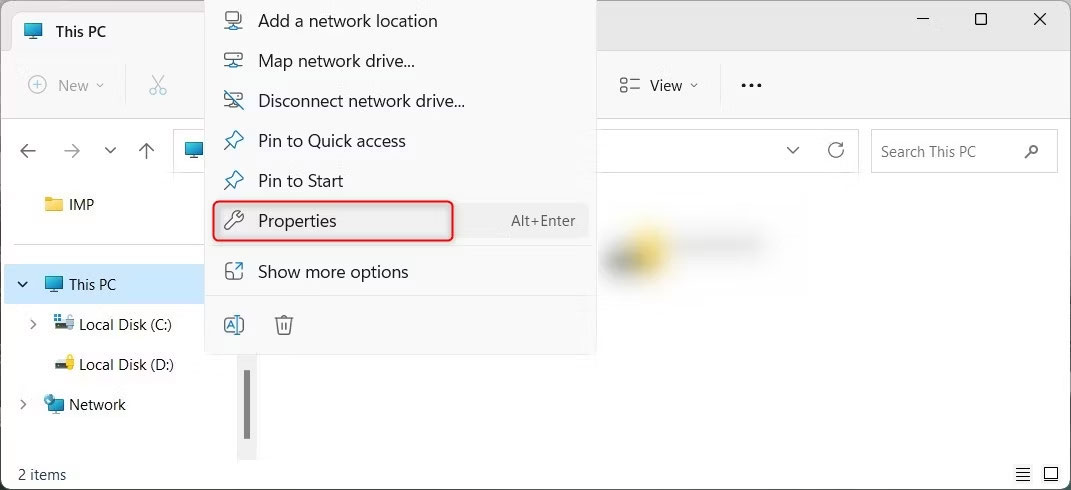
You will find the Intel processor generation in the Device specifications section.
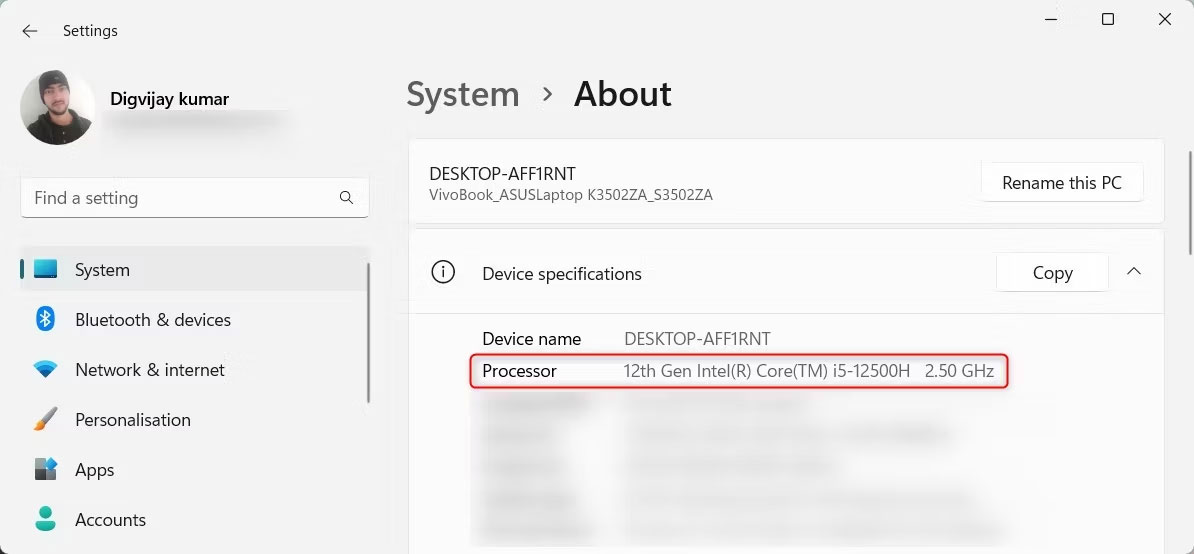
This screen also displays the Windows version, OS build, system type, and other details.
5. How to check Intel processor generation using Task Manager
Task Manager is a native Windows tool that shows which programs and services are running on your computer. To open it, right-click on an empty space on the taskbar and select Task Manager from the menu that appears. Alternatively, you can press Ctrl + Shift + Esc to open it directly.
You will see many tabs in the Task Manager window such as Processes, Performance, App history, etc. Click on the Performance tab and expand the CPU section.
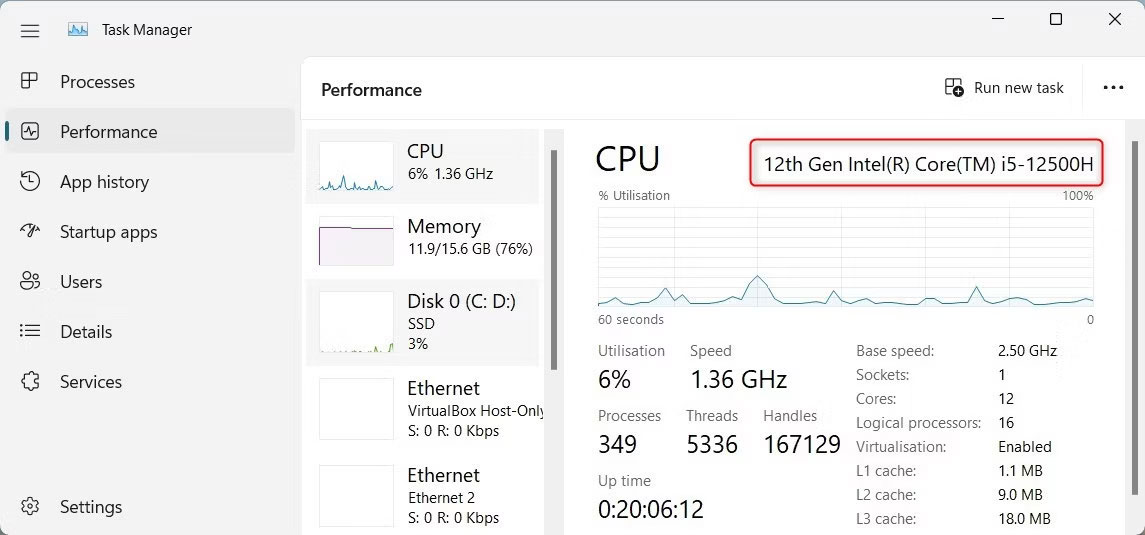
Here, you will find the processor name and Intel processor generation. For example, if you see Intel(R) Core(TM) i5-12500H, it is a 12th generation Intel Core i5 processor.
6. How to check Intel processor generation using DirectX Diagnostic Tool
DirectX Diagnostic Tool is another Windows utility that provides detailed information about system configuration and hardware. This tool is designed to troubleshoot DirectX audio and video issues, but you can also check your Intel processor generation.
To open this tool, right-click on Start and select Run. Type dxdiag into the input field and click OK or press Enter. This command opens the DirectX Diagnostic Tool.
In the DirectX Diagnostic Tool window, click on the System tab. Look for the Processor line in the System Information section to find your processor name and generation.
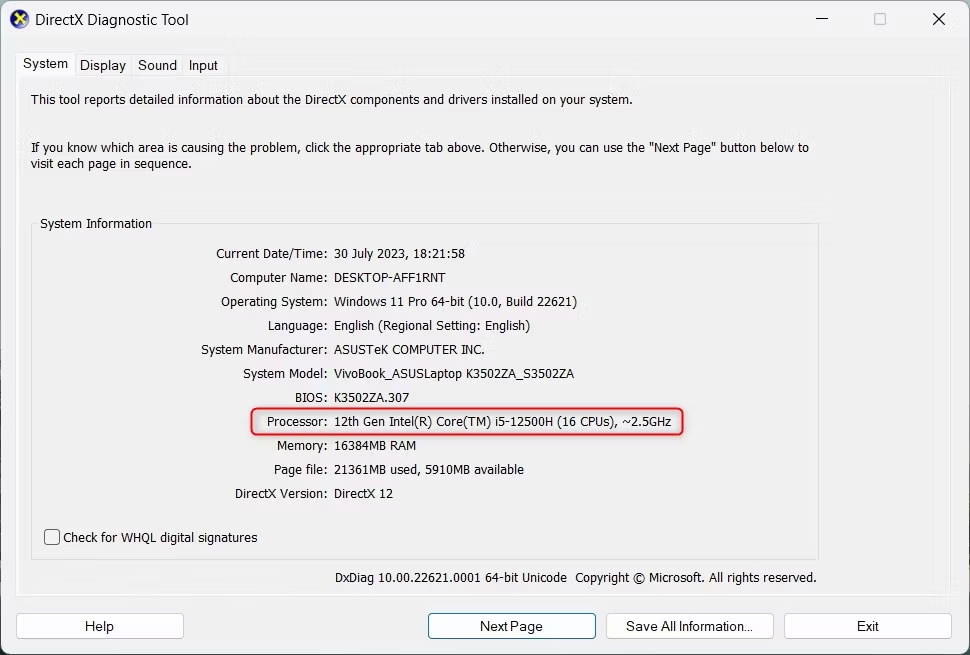
The screenshot above shows an example system with a 12th generation Intel Core i5-12500H processor.
This information is very important when troubleshooting and upgrading computer components. You can also compare performance differences between different Intel processor generations.
7. How to check Intel processor generation using Command Prompt
If you are a tech-savvy person, you can also use Command Prompt to check your Intel processor generation. To do this, type CMD into the Windows search bar and select the Command Prompt application from the search results.
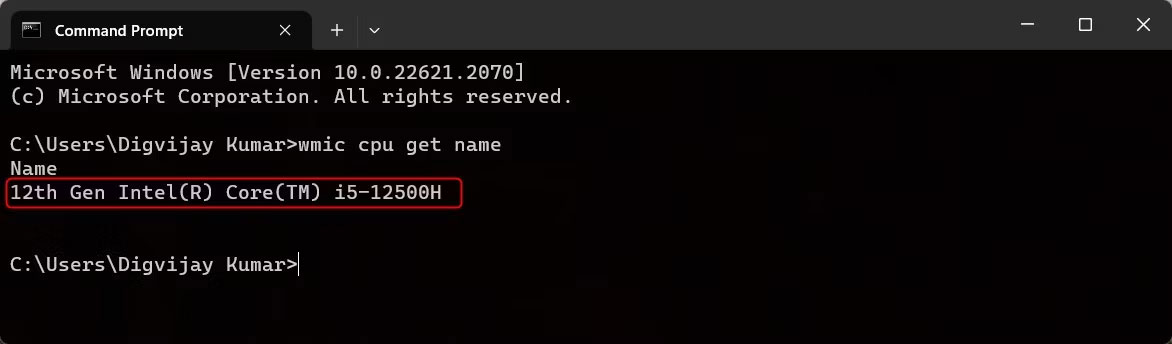
In the Command Prompt window, type wmic cpu get name and press Enter. You will see your processor name along with its Intel processor generation.
8. How to check Intel processor generation using Windows PowerShell
PowerShell is similar to Command Prompt but with additional features and functions. Therefore, if you want a more advanced system report including your Intel processor generation, using PowerShell is the best choice.
To open PowerShell, right-click the Start button and select Terminal from the list of options. Alternatively, if Command Prompt opens, click the down arrow and select Windows PowerShell from the list. Additionally, you can use the Ctrl + Shift + 1 keys to open the PowerShell window directly.
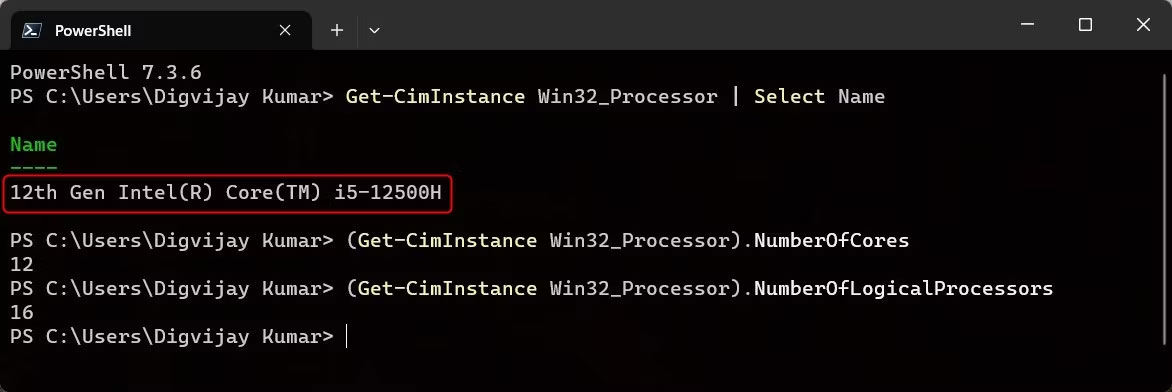
In the PowerShell window, type the following command and press Enter. You will receive the processor name and Intel processor generation.
Get-CimInstance Win32_Processor | Select NameTo find the total number of cores and threads in your processor, type the following command into the PowerShell window and press Enter. You will see the current number of cores for your CPU.
(Get-CimInstance Win32_Processor).NumberOfCoresSimilarly, type the following commands and press Enter to get the total number of logical processors.
(Get-CimInstance Win32_Processor).NumberOfLogicalProcessorsThese are some ways to check your Intel processor generation. Now, you can use these tips before buying a new CPU or upgrading an old CPU to check the Intel processor generation.
Source: Quan tri mang











