

When buying a new PC-whether it's a high-end gaming rig or a budget laptop-you expect it to be "clean" right out of the box. However, Windows 11 often comes with at least a few unwanted pre-installed applications, known as bloatware. How should you remove bloatware from your PC?
Uninstall Bloatware using Windows 11 Settings
The easiest way to remove bloatware is through the Windows 11 Settings app. As long as you know where to go, uninstalling bloatware (or any application) on Windows 11 is quick and simple:
1. Press Win + I or click the Cog icon on the Start menu to open Settings.
2. In the sidebar, click Apps, then select Installed apps.
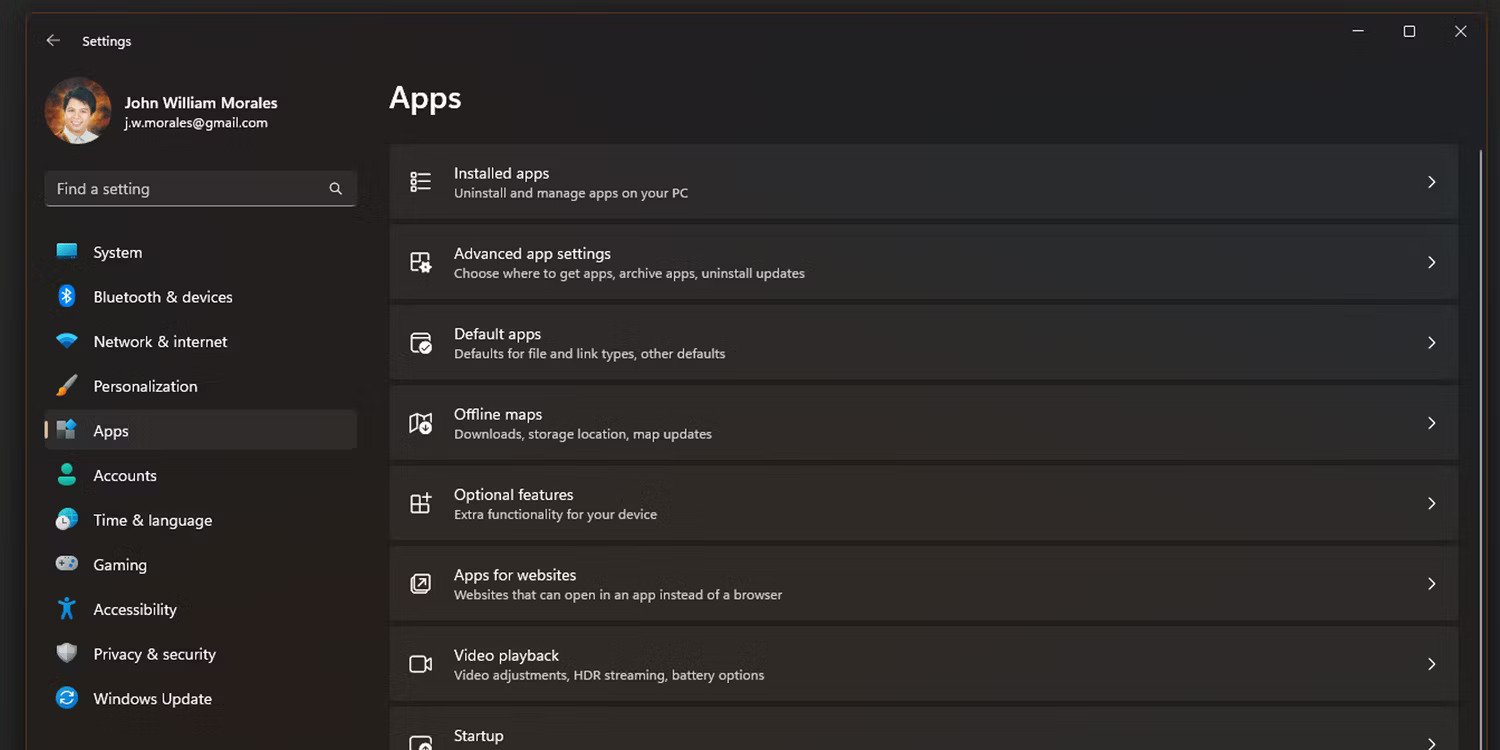
3. In the Installed apps window, find the application you want to remove.
4. Once you have found the application you want to delete, click the three-dot menu and select Uninstall.
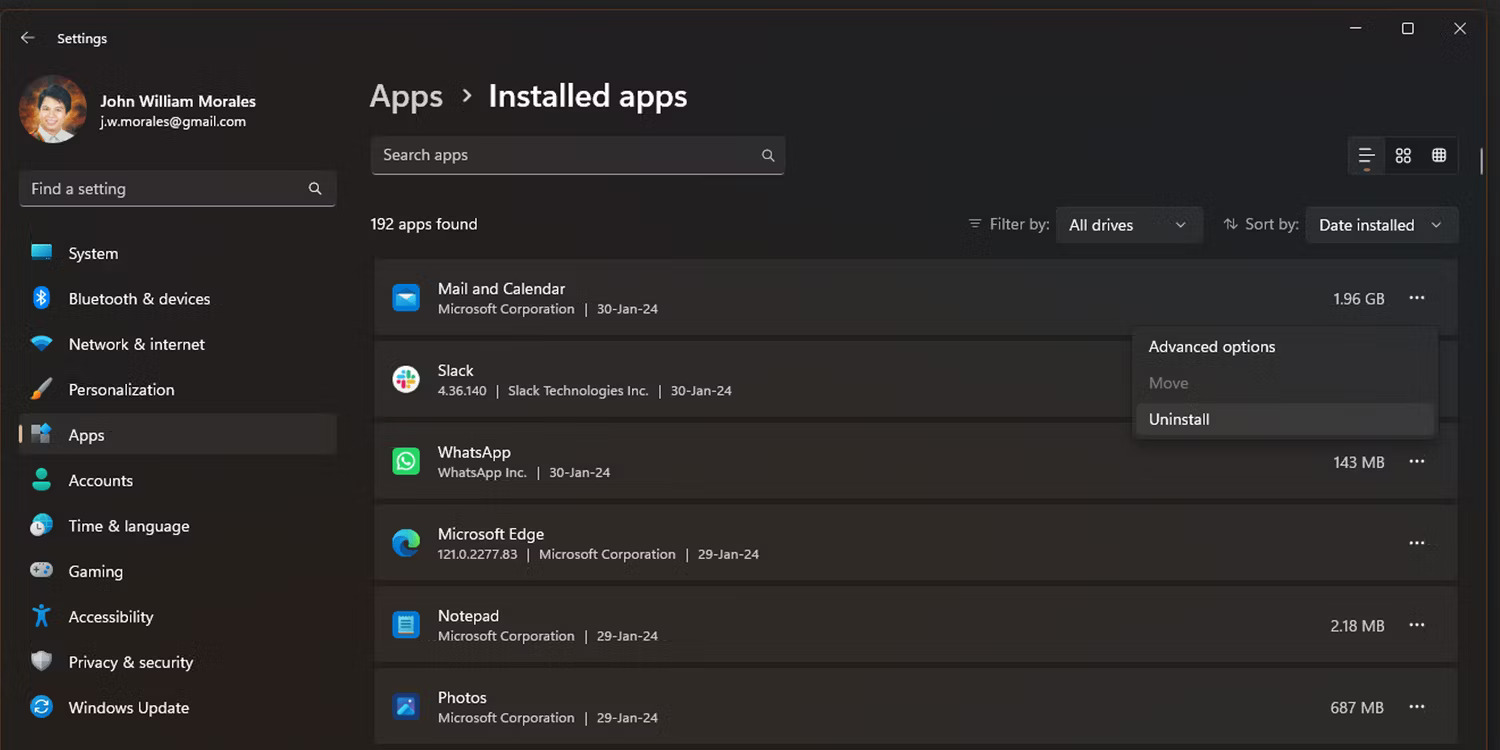
5. A small pop-up window will appear after you click Uninstall; click Uninstall once more to confirm your choice.
With this feature, you can quickly remove pre-installed applications manually because the Settings window does not close after uninstalling an app. Note that you cannot remove certain applications like Photos and the Microsoft Store using this method.
Remove pre-installed Windows 11 apps from the Start menu
Another way to remove unwanted applications is to delete them directly from the Start menu. While it might be tedious if you intend to delete many programs, it is very fast if you only need to uninstall one or two apps:
1. Open the Start menu and click All apps in the top right corner.
2. Find the application you want to remove by scrolling through the list or typing the app name into the search bar.
3. Right-click the application and select Uninstall.
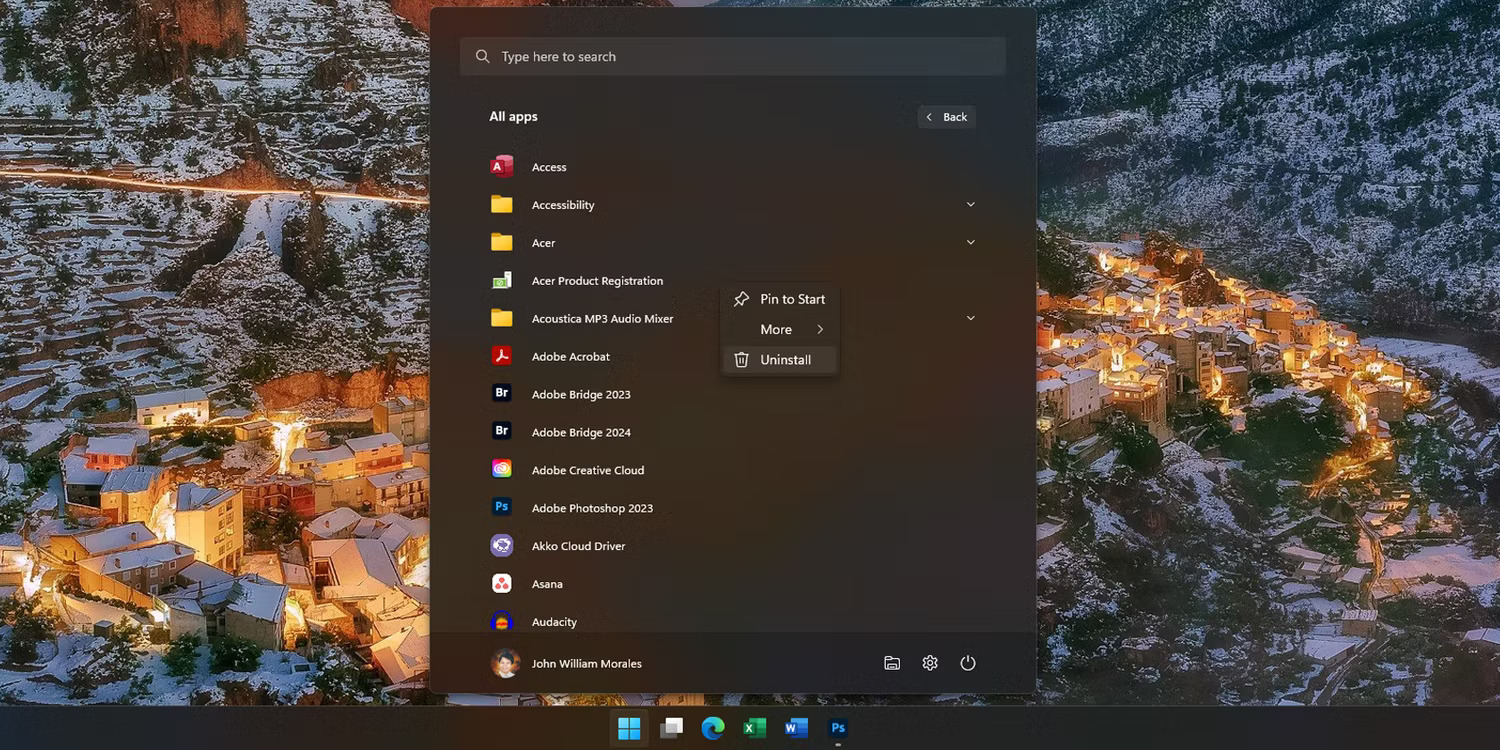
4. A pop-up box will then appear asking you to confirm the uninstallation; click Uninstall again and the application will be removed.
This is great if you notice an app you don't use while scrolling through the Start menu, as you don't have to dive deep into the Settings app to uninstall it.
Remove Bloatware with Win11Debloat
Manually selecting and uninstalling bloatware is easy for those familiar with such applications. However, if you are unsure which apps to delete or want to remove bloatware automatically, the Win11Debloat application will help you:
1. Download the Win11Debloat script from GitHub.
2. Go to the folder where you downloaded it and extract the ZIP file.
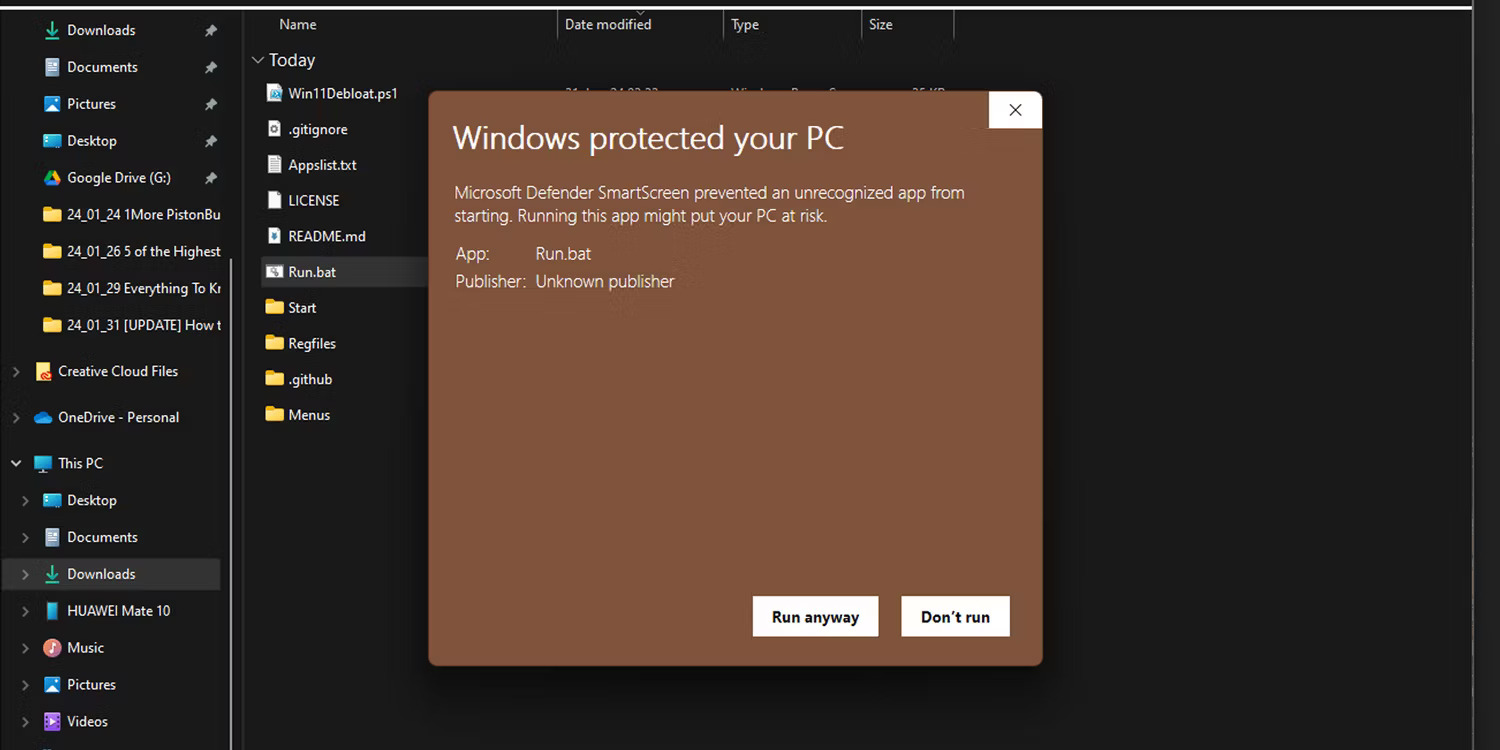
3. After extracting, open the Win11Debloat folder and double-click the Run.bat. file.
4. Windows Defender may warn you about running an unrecognized app. If so, click More Info, then select Run anyway.
5. Next, User Account Control will ask if you want to allow the app to make changes to your device; select Yes to run it.
6. Win11Debloat - Setup will then open in a new Windows PowerShell window. Enter 1 or 2 to choose the bloatware removal method, then press Enter.
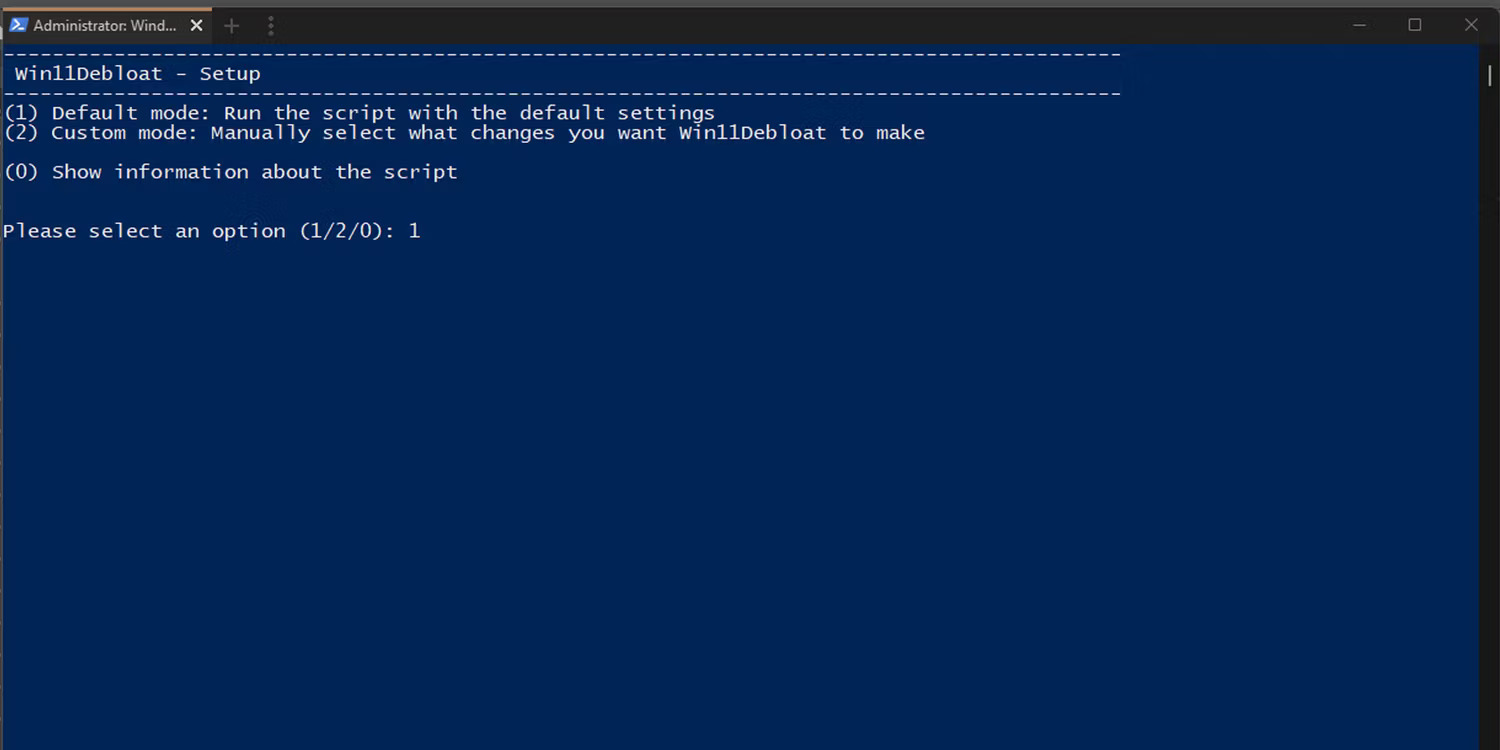
7. Once you have made your selection, remember to follow the on-screen instructions to complete the uninstallation process successfully.
Win11Debloat is a third-party script that automates the PC cleanup process, making it useful if you want to remove several apps or if you are setting up multiple PCs.
Try a clean install of Windows 11!
If your computer has an exceptionally severe case of bloatware and you find that Win11Debloat isn't working, a clean installation of Windows 11 will remove most unwanted applications. This is especially true if your computer comes with many third-party apps added by your PC manufacturer.
A clean Windows 11 Settings setup is a great option if you haven't installed any apps yet or hardly use your PC. However, if you have already started configuring the system to your liking, this will be inconvenient as you will have to reinstall all your desired applications.
If you are ready for a clean install of Windows 11, here is how to do it:
1. Open the Windows Settings app.
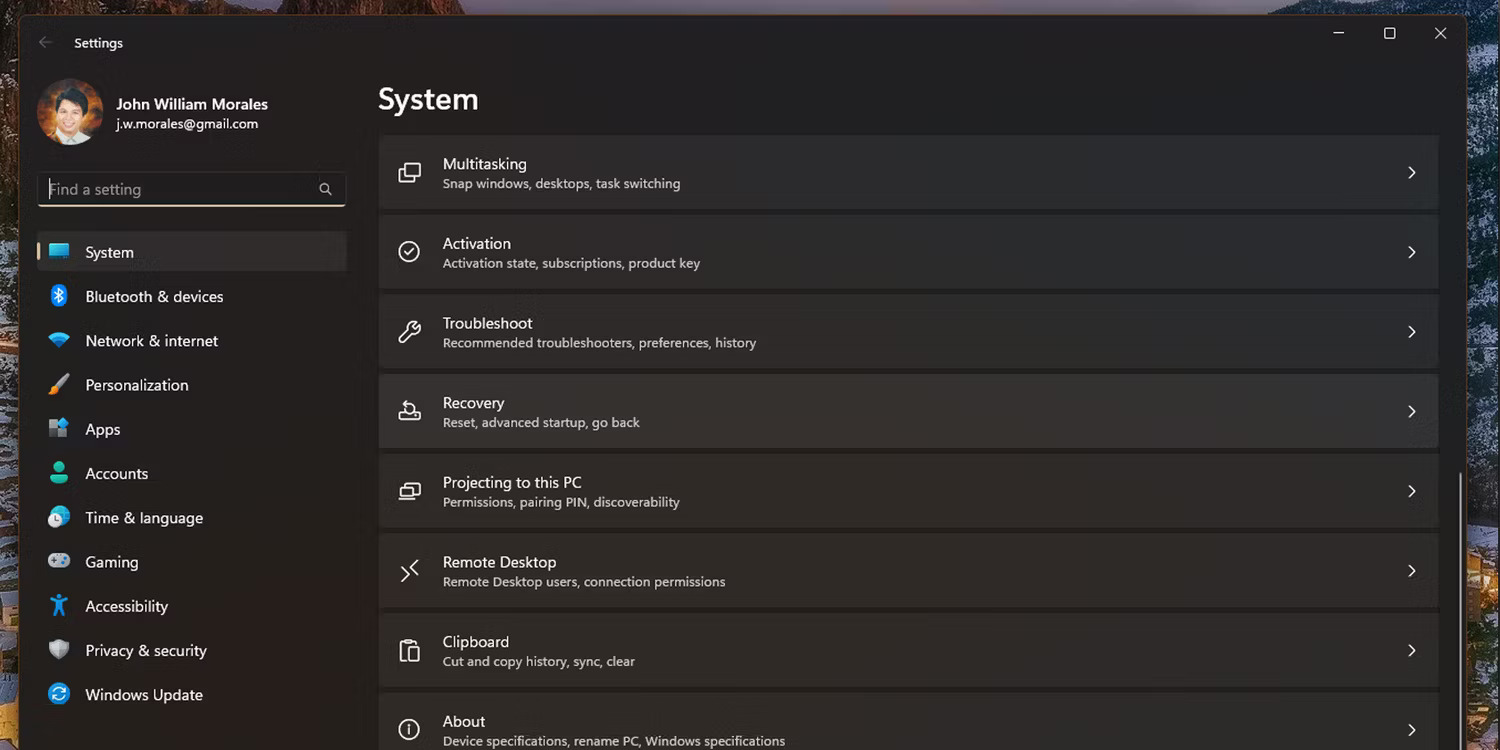
2. In the sidebar, click System, then select Recovery.
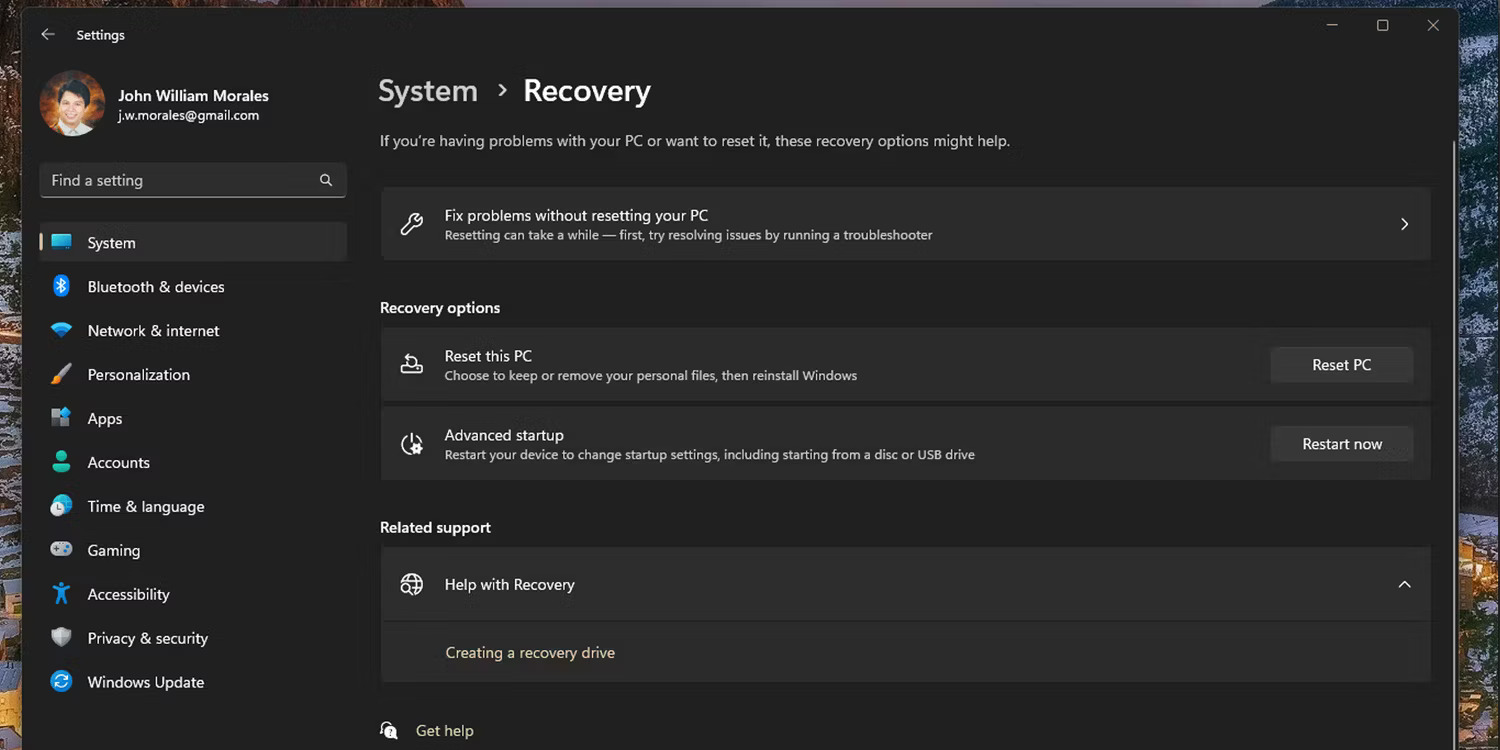
3. Click Reset PC.
4. In the Reset this PC window, select Remove everything.
5. To ensure you get the latest version of Windows, select Cloud download in the next window. If you do not have a reliable internet connection, select Local reinstall instead.
6. In the Additional settings window, click Change settings to customize your setup.
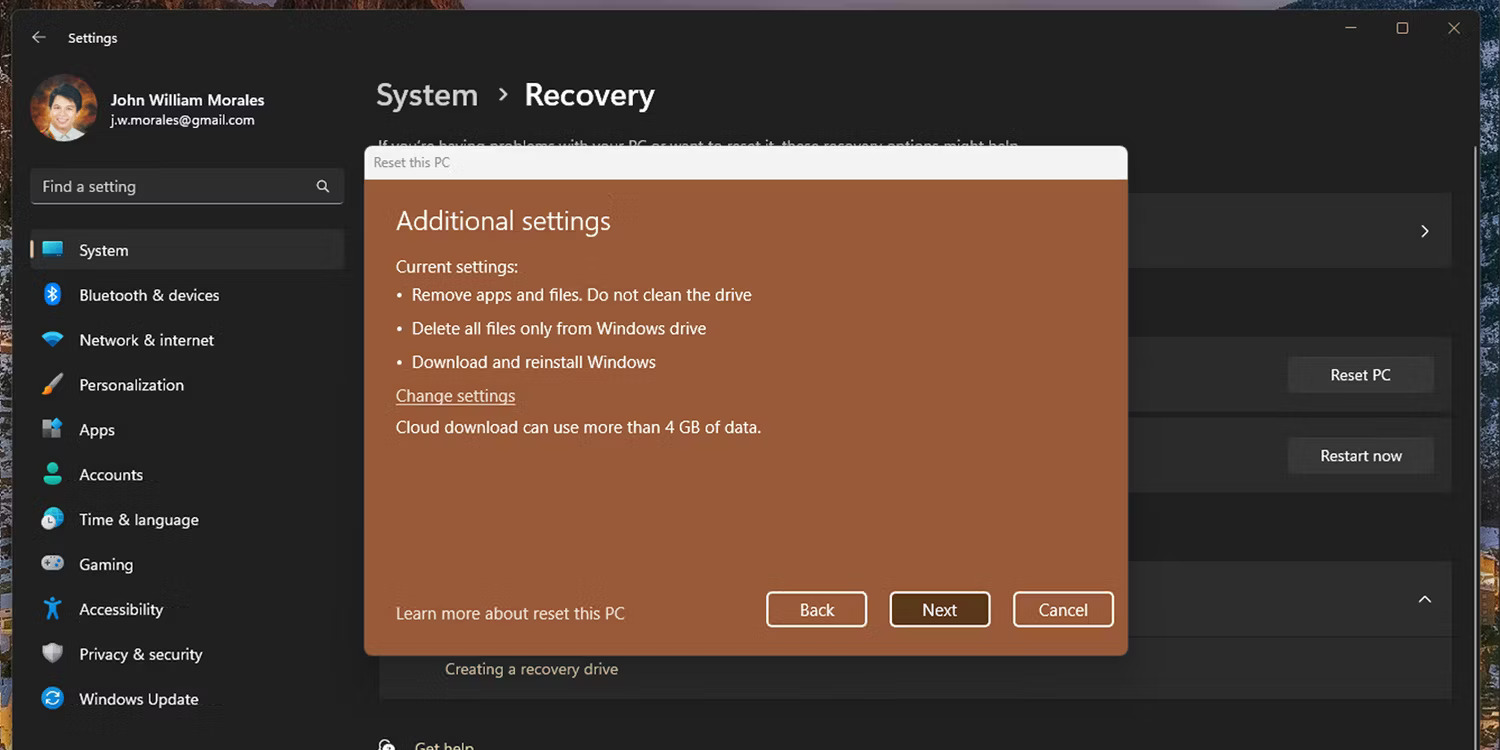
7. If you have installed any unwanted apps on other drives, ensure that the slider under Delete files from all drives? is set to Yes, all drives. However, be careful, as this will erase all drives connected to your PC. Do not accidentally erase external hard drives where you store photos and similar items!'
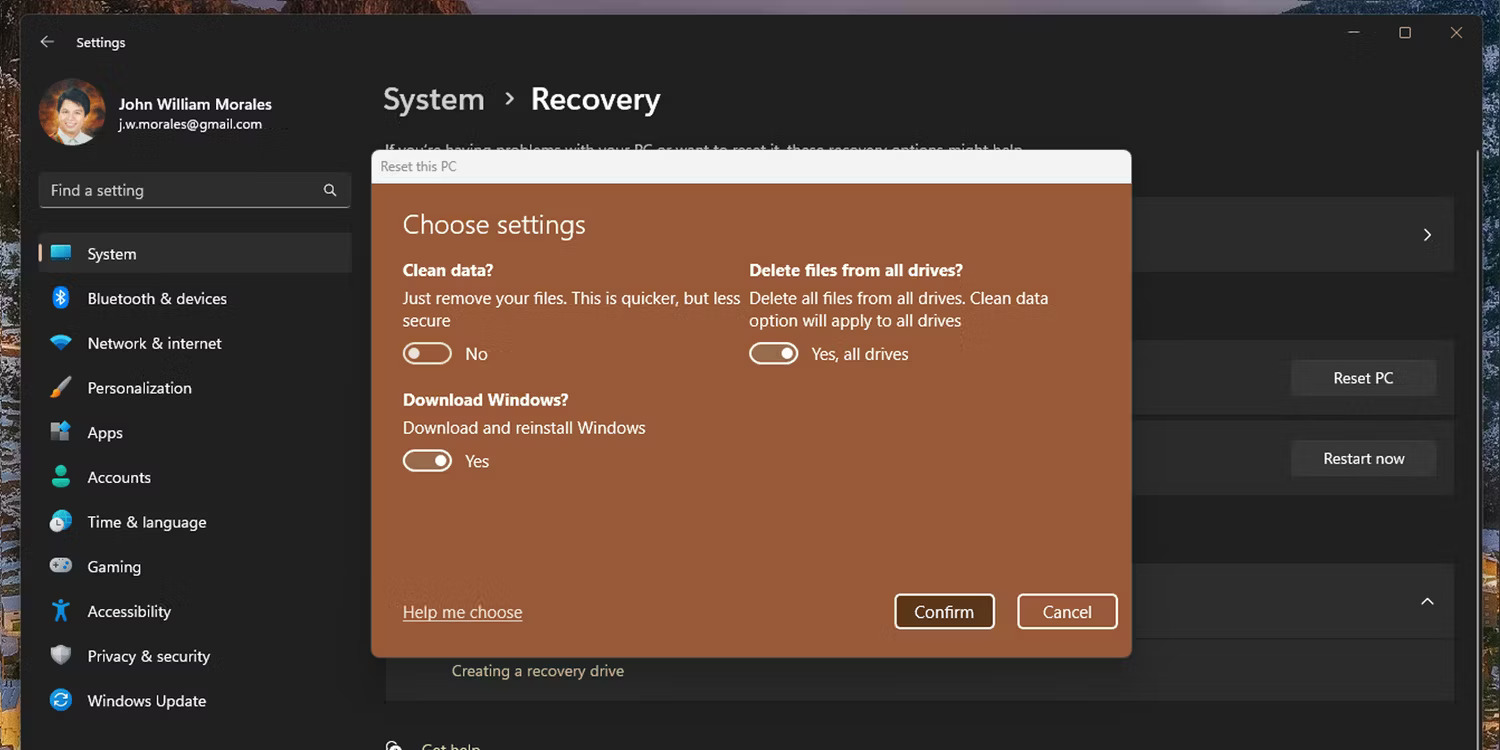
8. Once you have confirmed these settings, click Next.
9. When your computer is ready to reset, click Reset.
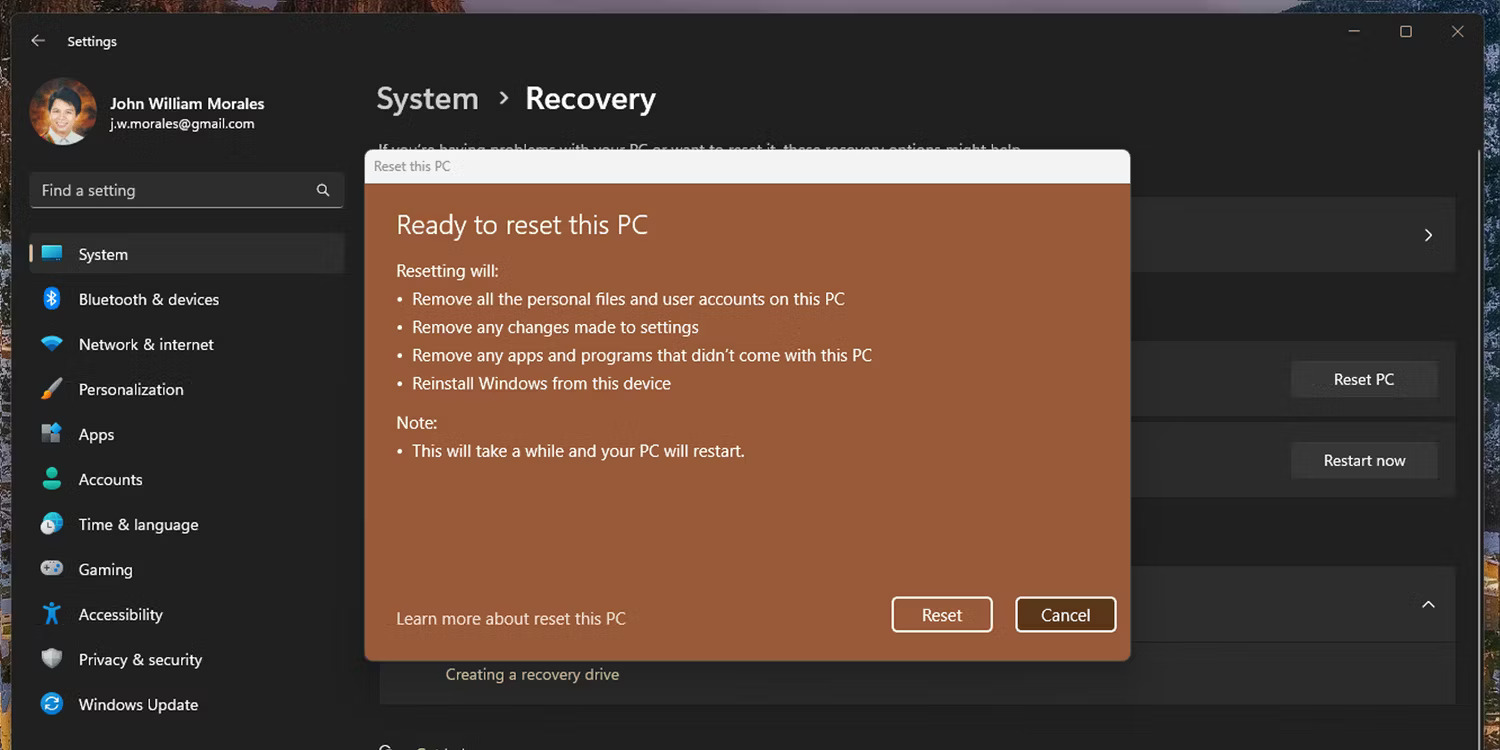
When you click the reset button, your computer will perform a clean installation of Windows 11. This process will remove most third-party bloatware, although you may still need to manually remove unwanted Windows applications. Additionally, you can perform a clean install of Windows 11 from an ISO file to ensure a truly fresh installation.
While bloatware is usually not dangerous, these applications are annoying because they can slow down your PC, especially if they all launch when you turn on your computer. Therefore, by removing these applications, you will reduce the PC's workload, allowing it to run better.











