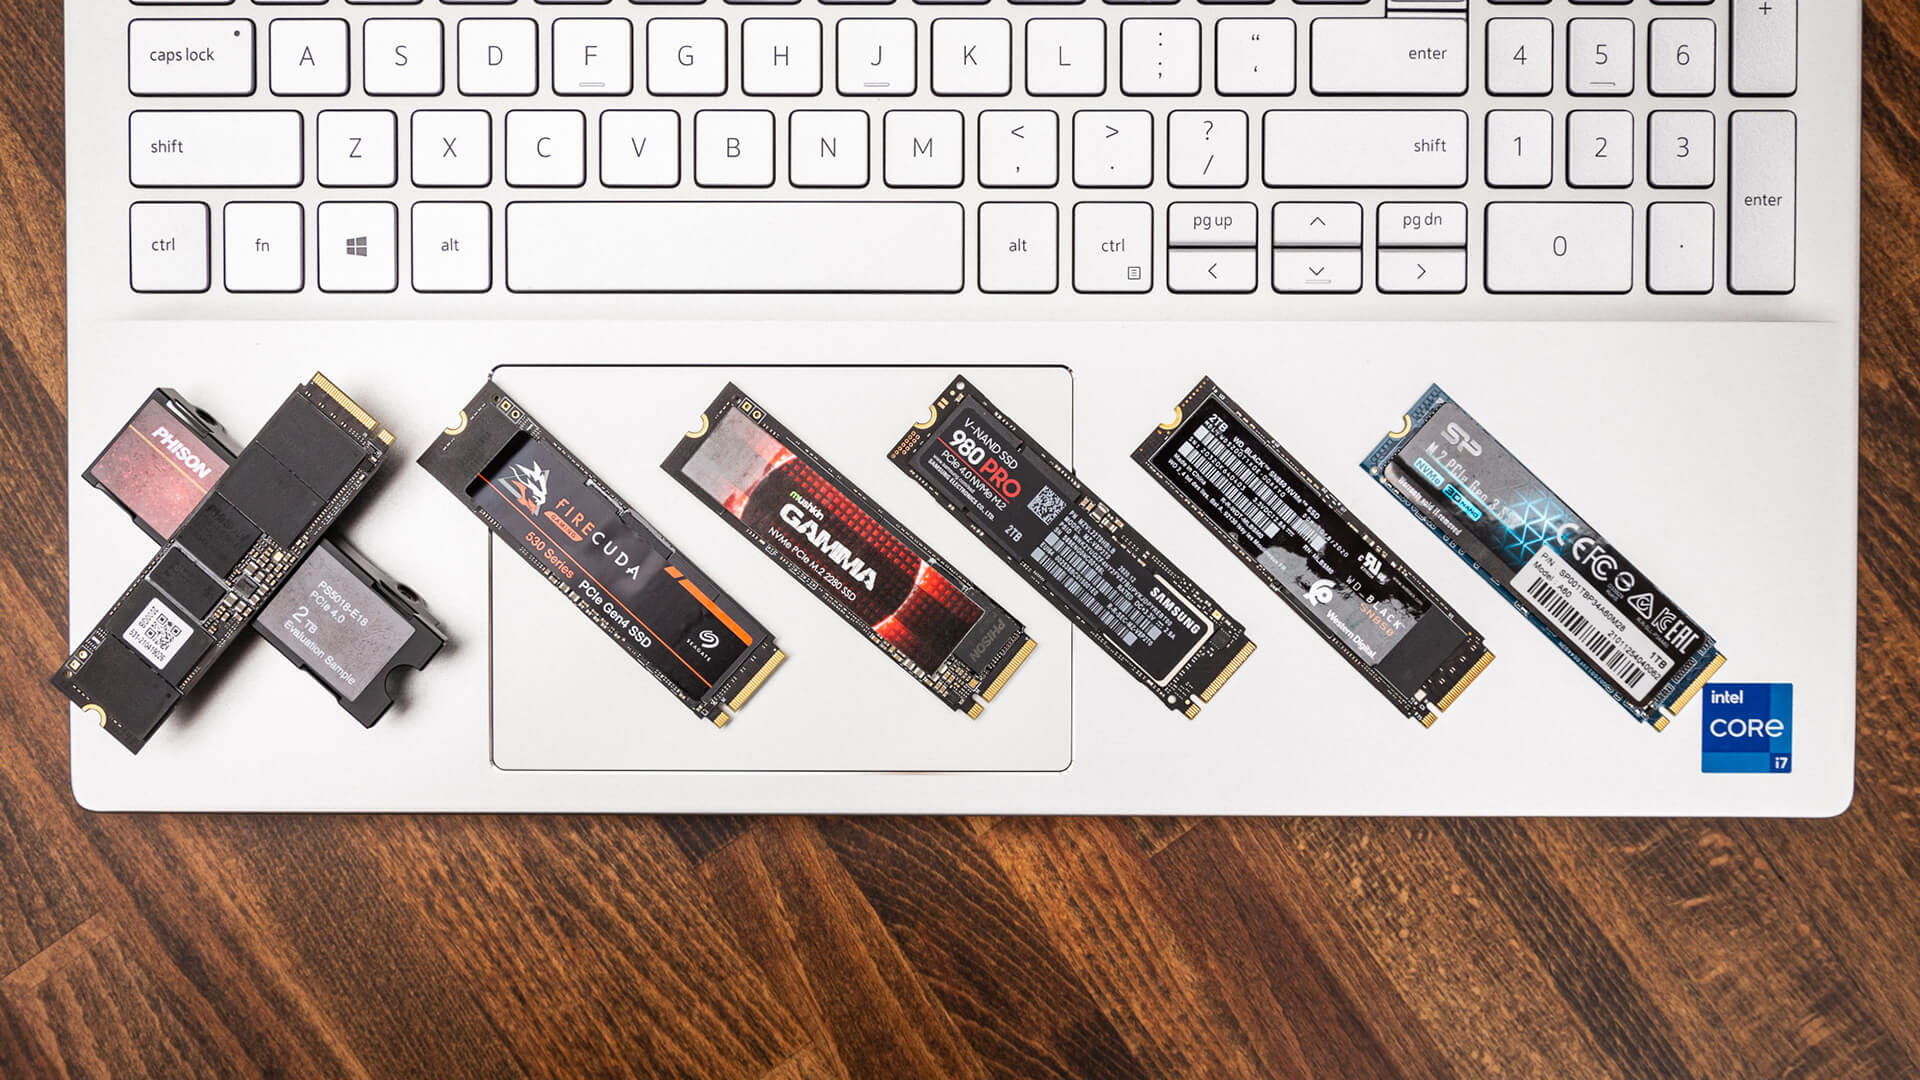
SSD drives significantly boost PC performance and are often used in conjunction with traditional hard drives. Before you start using an SSD as secondary storage, you need to initialize it correctly. Failing to do so may result in the operating system not detecting the SSD.
While this may seem technical and complex, initializing an SSD is actually easier than you think.
Do you need to initialize an SSD before use?
Initializing an SSD is a crucial step in preparing the drive for Windows use. When you initialize an SSD, you are essentially formatting the drive with a specific file system. This file system determines how your data is organized on the SSD or hard drive.
For a brand-new SSD, initializing it and assigning a drive letter is typically the first step in configuring the drive with your PC. This allows Windows to detect the SSD and display it in File Explorer.
How to initialize an SSD in Windows 10/11
Initialization is an irreversible process, so you must ensure you are initializing your SSD correctly. You could permanently lose data if you select the wrong SSD or hard drive. Once you have verified the name of the active storage device (SSD or hard drive), you can begin the initialization process.
Disk Management is a powerful utility that allows you to manage various connected storage devices by allocating drive letters and configuring disk partitions.
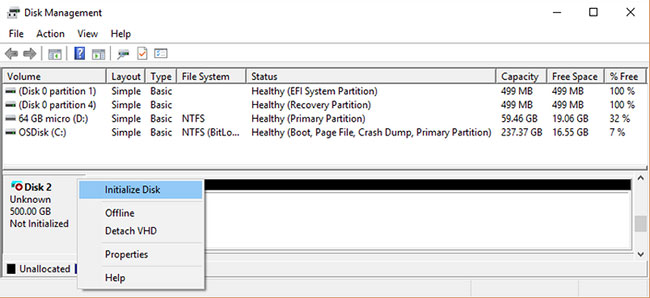
To initialize an SSD on Windows 10/11 via Disk Management:
1. Search for Disk Management in the Start menu search bar, right-click Create and format hard disk partitions, and then select Run as administrator.
2. Ensure that the drive you want to initialize is in an Online state. If it is listed as Offline, right-click the drive and select Online.
3. Right-click the SSD you want to initialize and select Initialize Disk.
4. In the Initialize Disk dialog box, select the SSD you want to initialize and choose a partition style (partition styles are detailed in the next section).
5. Click OK to begin the disk initialization process.
6. Once the disk is initialized, right-click the SSD and select New Simple Volume.
7. Complete the New Simple Volume Wizard to allocate a volume to your SSD.
Now, you have completed the SSD initialization process and can access it through File Explorer.
How to choose a partition style for your SSD
Every storage device connected to a computer has a specific partition style. The partition style determines how Windows accesses data on the drive. There are two main partition styles on Windows: GPT and MBR.
GUID Partition Table (GPT) is the more commonly used partition style for SSDs and hard drives. By default, Windows 10 partitions drives using the GPT format. GPT is the preferred format because it supports volumes larger than 2TB and is compatible with the latest UEFI-based systems. Master Boot Record (MBR) is the traditional partition style used by older computers and portable storage devices like memory cards.
This article recommends using the GPT partition style for SSDs because it offers better support, enhanced security, and allows for larger volumes.
You can also choose to convert an MBR drive to a GPT drive or vice versa. However, you will first need to format the drive and erase all data.
What to do if you cannot initialize an SSD on Windows?
Although the Disk Management app makes initializing an SSD easy, you may encounter situations where the "Initialize Disk" option is missing or does not function as expected. Fortunately, fixing this is quite simple and only requires running a few commands in Command Prompt. Here is how to do it.
- Press Win + S to open the search menu.
- Type command prompt into the box and select Run as administrator.
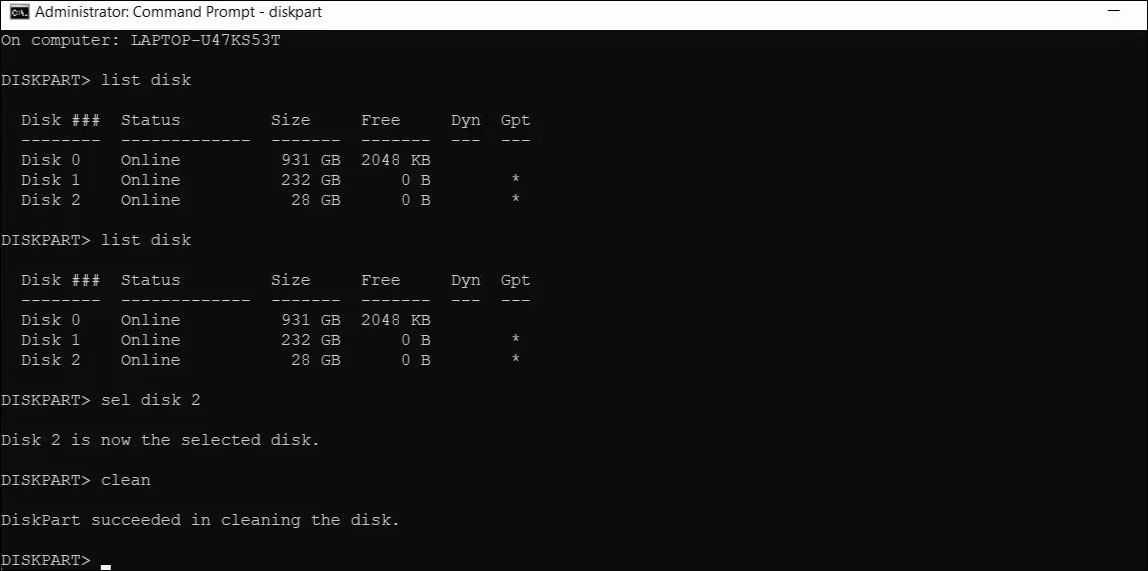
- In the console, type diskpart and press Enter.
- Type list disk and press Enter to see all disks on your system.
- Note the number associated with the SSD you want to initialize from the first column.
- Type sel disk N, replacing N with the disk number noted in the previous step, and press Enter.
- After selecting the disk, type clean into the console and press Enter.
Open the Disk Management app and try restarting the disk.
Good luck with your setup!