

Whether you are working with international clients or simply want to make a good impression on friends, you may encounter situations where you need to input data in a different language. But don't worry, on Windows 11, adjusting between keyboard layouts and typing in the language you want is very easy and convenient.
How to change your language keyboard
During the Windows 11 installation process, you will be asked to select your preferred keyboard language. This will be the primary language for your system. However, you can easily add other keyboard languages and switch between them through the Windows Settings app.
To add a new keyboard language, first press the Windows+i key combination to open the Settings app.
Select "Time & Language" from the left sidebar, then click "Language & Region" in the right pane.
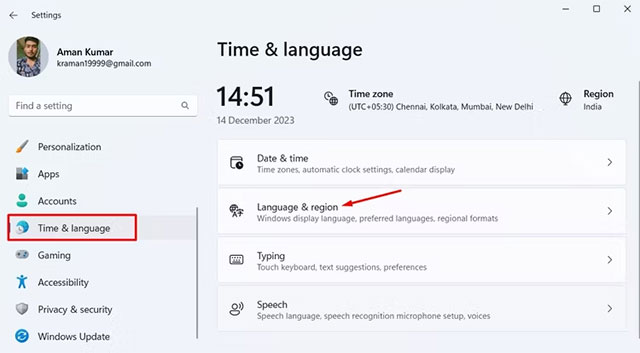
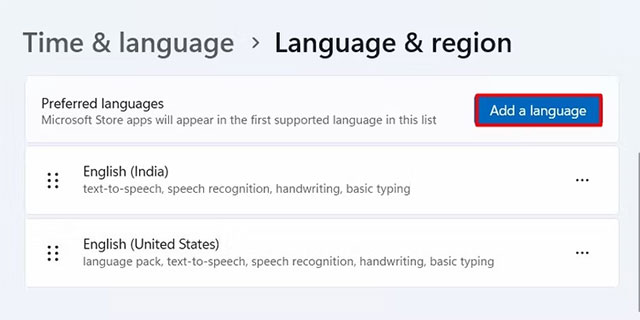
Click the "Add a Language" button.
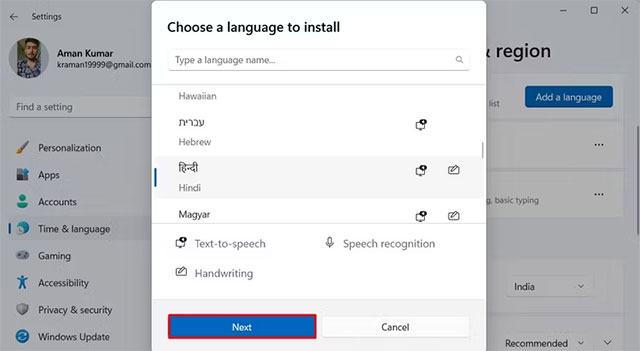
Select the language you want to install and then click the "Next" button.
Click "Install" to start the installation process.
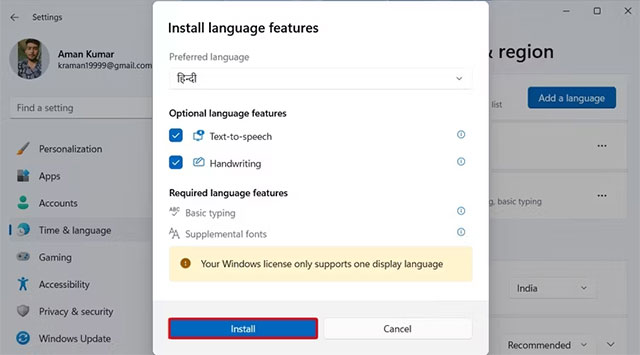
Once the new language has been installed, you will see it listed in the Languages section. Then, you can click the language icon on the taskbar and select the language you want to use.
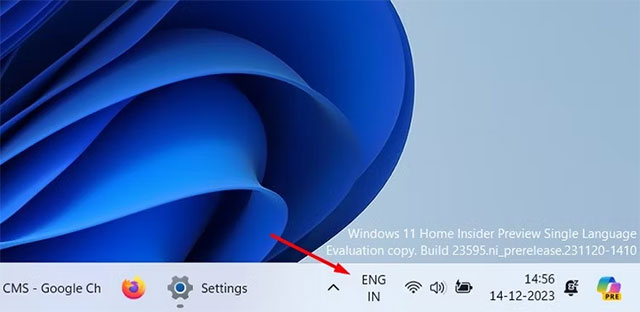
Additionally, you can press the Windows+ Spacebar or Alt+Shift key combinations to quickly switch languages on your Windows computer.
How to change keyboard layout
When you install a language, the keyboard layout will automatically change to match that language. However, the default layout might not be the best choice for you, as each language has different layouts.
In this case, you can choose from the various layouts available for the language and install the one that best suits your typing habits. To install a different layout for your language, open the "Settings" app and navigate to Time & Language > Language & Region.
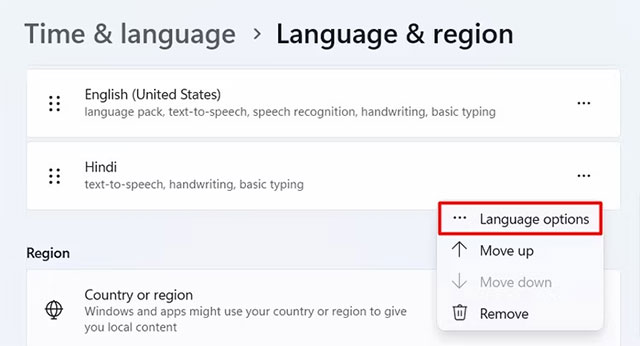
Click the three dots next to your language and select "Language Options" from the menu that appears.
Click the "Add a Keyboard" button next to Installed keyboards.
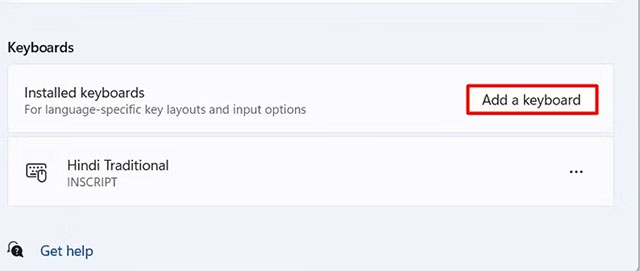
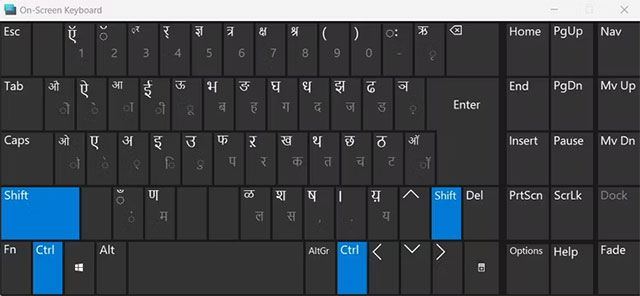
Select the layout to install. You can use the on-screen keyboard to see how the selected layout works in practice.
How to remove a language or keyboard layout
If you no longer need an added keyboard language, you can remove it to avoid accidentally switching to that language. To remove a keyboard language, launch the Settings app and navigate to Time & Language > Language & Region.
Click the three dots next to the language you want to remove and select "Remove" from the menu.
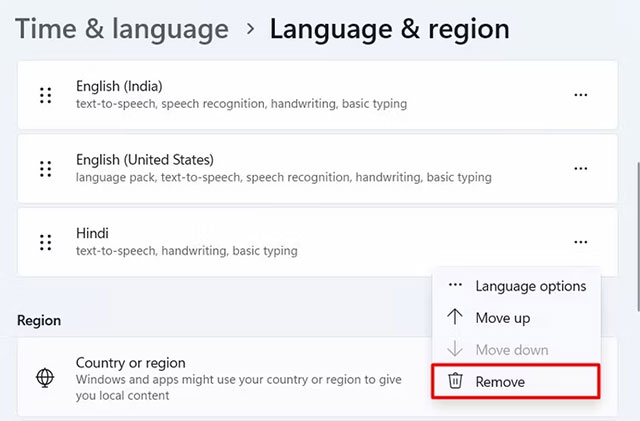
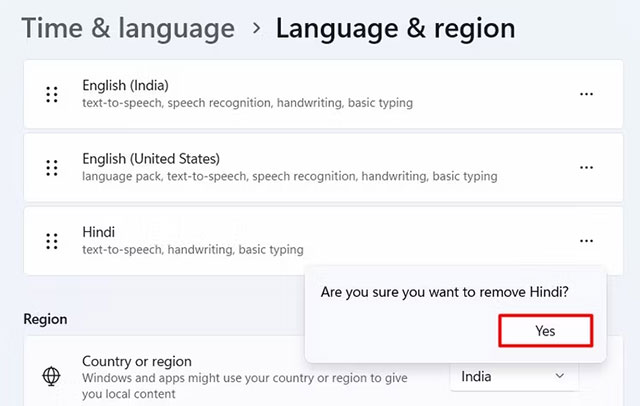
A prompt will appear asking you to confirm whether you want to remove the selected language. Click "Yes" to confirm.
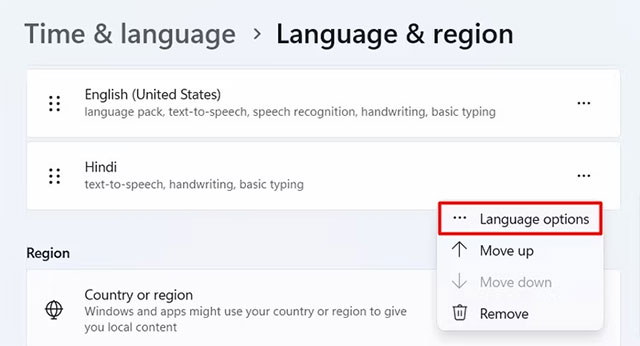
To remove a language layout, click the three dots next to the language containing the layout you want to remove and select "Language Options" from the menu.
In the Keyboards section, click the three dots next to the layout you want to remove and select "Remove" from the pop-up menu.
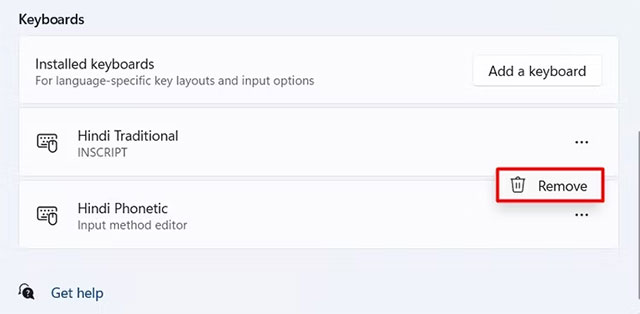
Simply repeat the process for each keyboard layout you wish to remove.
Good luck!











