

If you find it annoying to enter a password every time you turn on your computer, Windows 11 and 10 offer integrated utility features that allow you to skip the login step and go directly to your desktop. Below is how to set up automatic login on Windows 11 and 10 to make your usage even easier.
Use Netplwiz to automatically log into a user account
The easiest way to automatically log into a user account on Windows 11 or 10 is by using the Netplwiz tool. Although the interface of this tool looks outdated and is not a place you visit frequently, simply adjusting one option here will allow you to enable the automatic login feature.
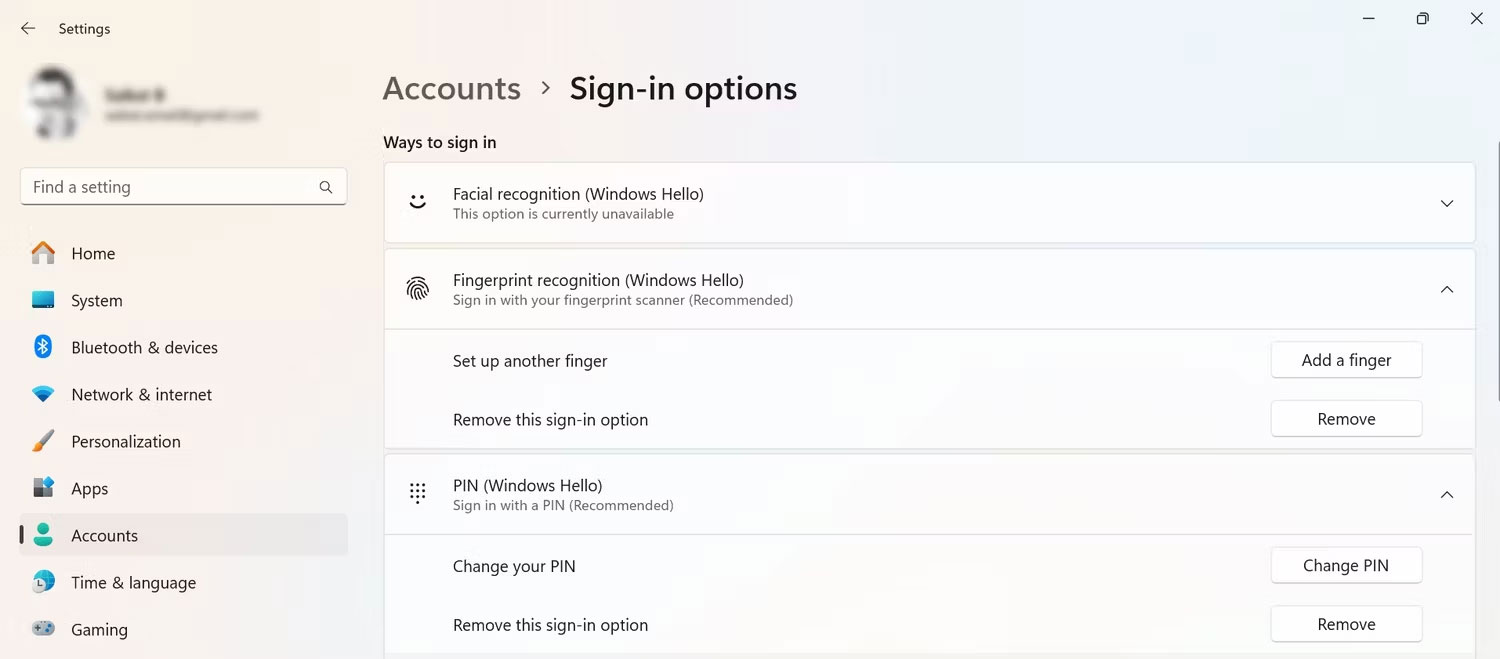
Before you begin, remember that Windows Hello with security options like PIN, facial recognition, and fingerprints does not work with the automatic login feature. If you are using Windows Hello, please disable this feature in Settings > Accounts > Sign-in options.
The Sign-in options page includes all the Windows Hello methods you have set up. Select the one you want to remove and click Remove - for example, to remove a PIN in Windows 11.
To continue using your computer, you need to remember your Windows username and password. If you log in with a Microsoft account, use your Microsoft account password. To automatically log into your PC, follow the steps below.
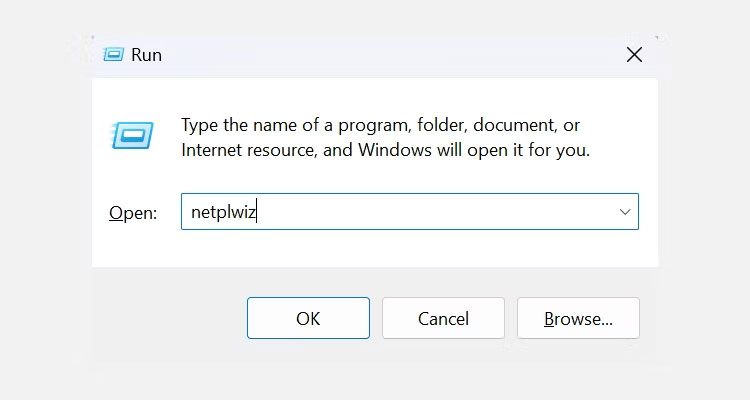
1. Press Windows + R, type netplwiz into the box, and press Enter.
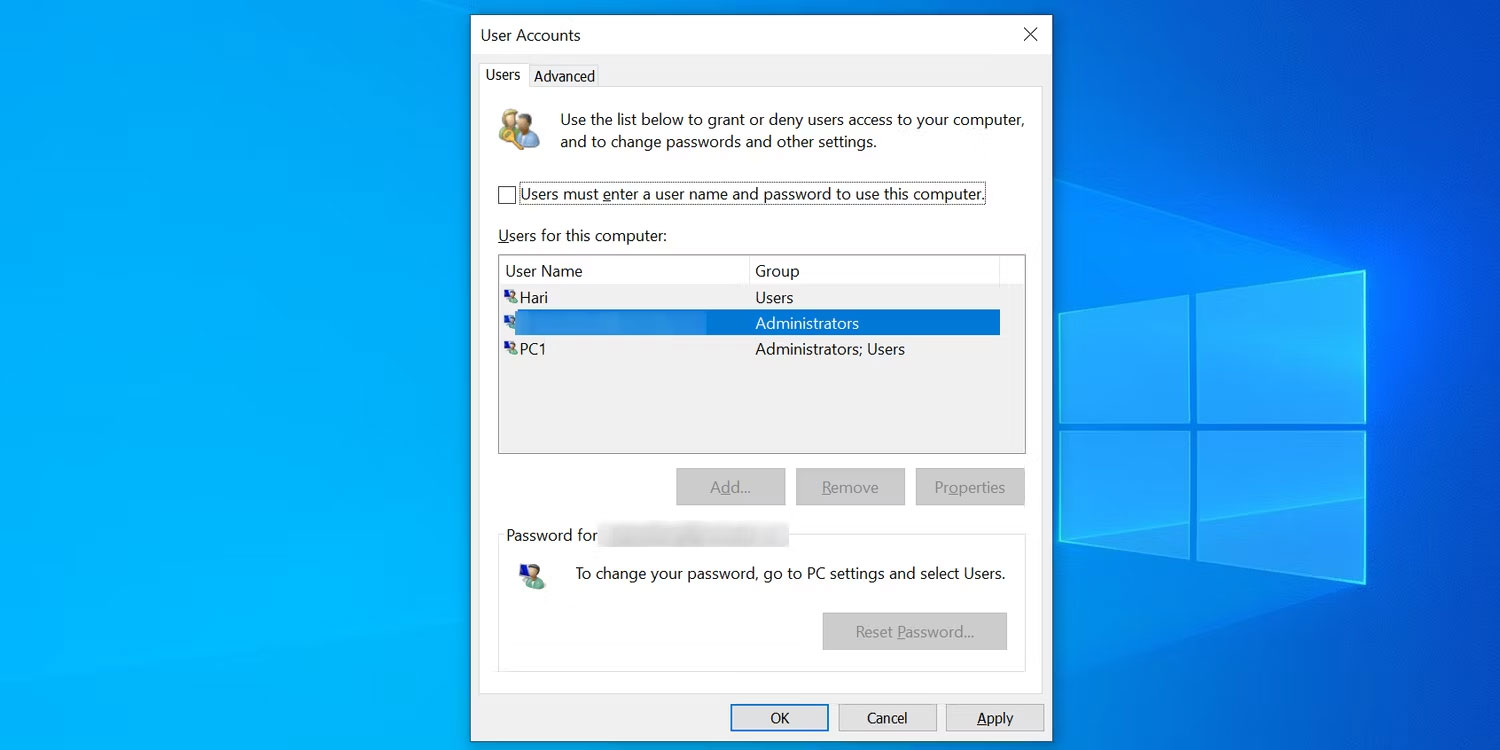
2. On the Users tab in the dialog box that appears, select your user account from the list.
3. Uncheck Users must enter a user name and password to use this computer. You will find this option at the top. After unchecking the box, click Apply.
4. A prompt will appear asking for your login information. Enter your username in the corresponding field (if it is not already filled), enter your password in both the Password and Confirm Password fields, and then click OK.
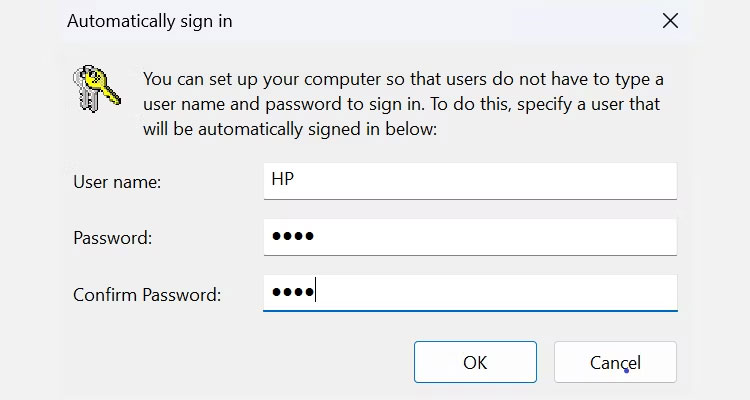
5. Click OK on each open window.
Restart your computer and it will no longer require a password. To disable the automatic login feature, simply check the Users must enter a user name and password to use this Computer box in the netplwiz utility again.
How to skip Windows login after waking from Sleep mode
Using Netplwiz only disables automatic login upon startup. You will need to adjust some additional settings to disable automatic login after waking from Sleep or Hibernation:
- On Windows 10, navigate to Settings > Accounts > Sign-in options > Require sign-in and select Never under If you’ve been away, when should Windows require you to sign in again?
- On Windows 11, this feature is located in Settings > Accounts > Sign-in options > Additional settings > If you’ve been away, when should Windows require you to sign in again? > Never.
Using Windows Registry to automatically log into a user account
If you do not want to use the method above, you can edit some registry keys to automatically log into your account every time you start your computer. Remember that when working with the Registry, make sure you only edit keys you understand well. Don't forget to back up the registry before making any changes!
When Windows Hello is not working and your login information has been previously saved, you can follow these steps to enable the automatic login feature for your account.
1. Press Windows + R, type regedit, and press Enter.
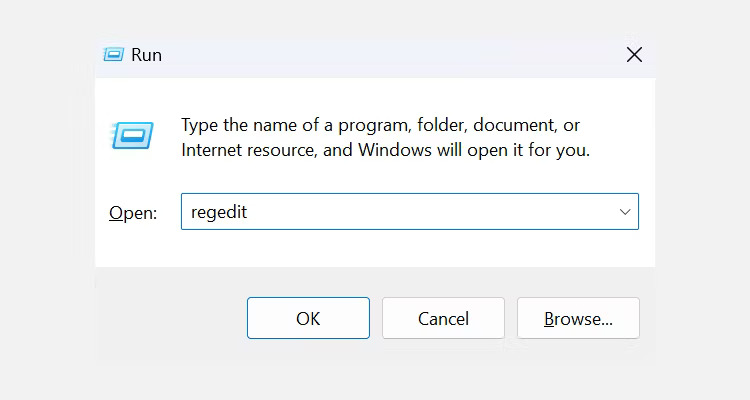
2. Click Yes in the pop-up prompt asking to allow Registry Editor to make changes to your device.
3. When Registry Editor opens, navigate to the following path:
HKEY_LOCAL_MACHINE\SOFTWARE\Microsoft\Windows NT\CurrentVersion\Winlogon4. Find the DefaultUserName entry on the right and double-click it.
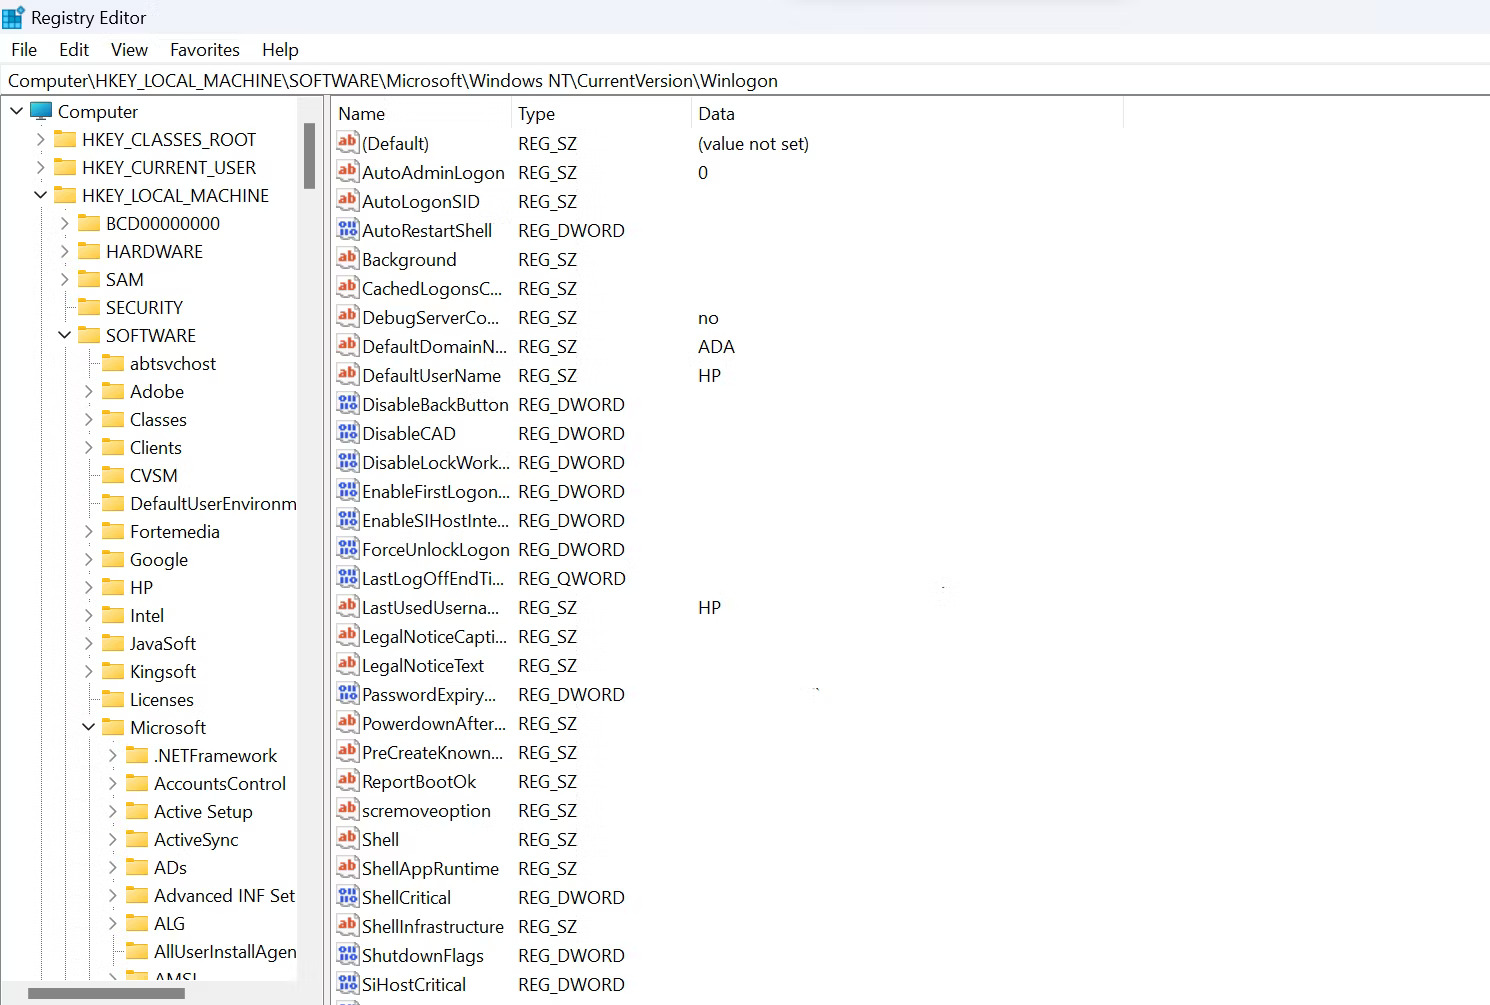
5. Enter your username in the Value data field and click OK. If you only have one user account on your device, this option will be pre-filled.
6. Double-click DefaultPassword on the right. If you do not see this entry, right-click on any empty space on the right, click New , and select String Value. Use DefaultPassword as its name.
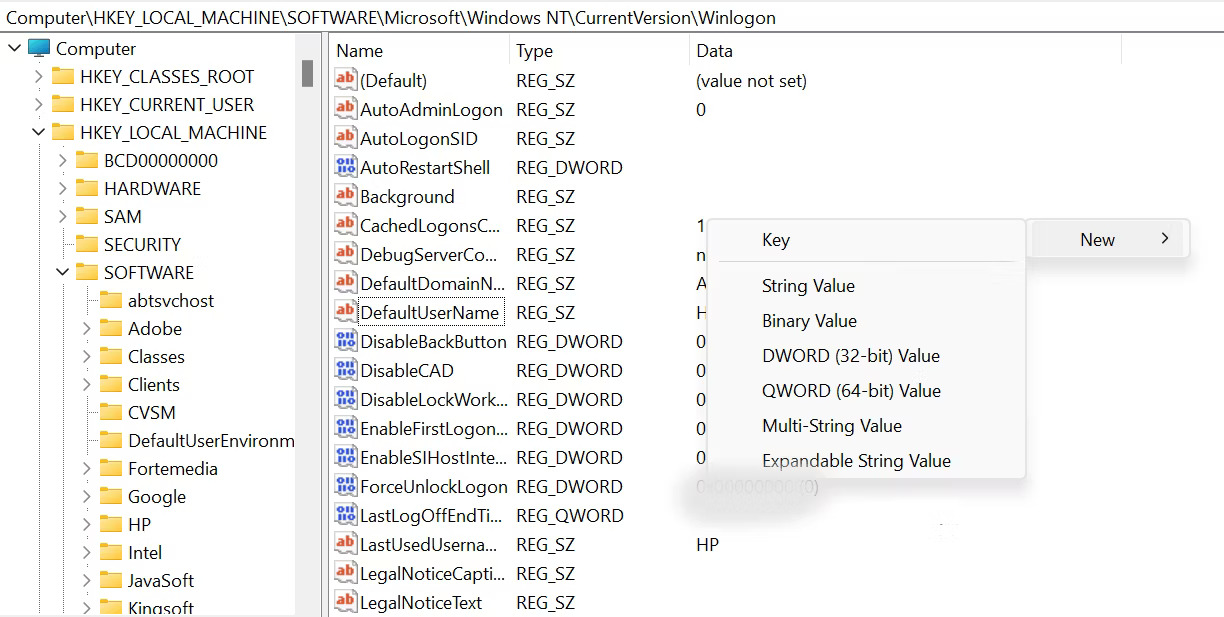
7. Double-click the entry and enter your password in the Value data field. Remember to use your Microsoft account password if you are not using a local account. After adding your password, click OK.
8. Find AutoAdminLogon on the right and double-click it.
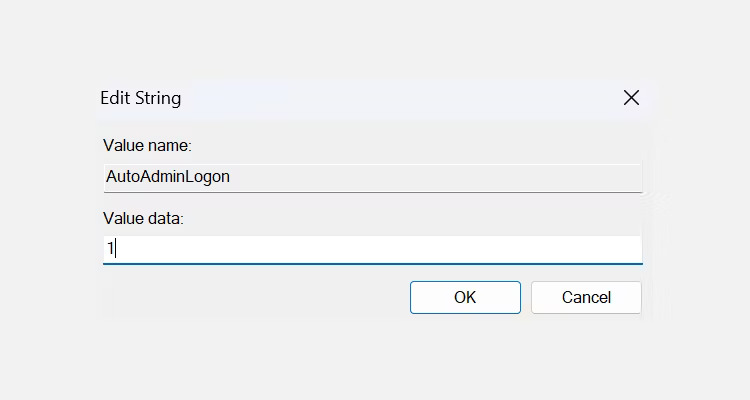
9. Enter 1 in the Value data field and click OK.
10. Close Registry Editor and restart your computer.
The next time you turn on your computer, it will take you straight to the desktop. To stop the automatic login function, simply change AutoAdminLogon to 0.
Does your user account become less secure when using automatic login?
This depends on the situation.
Since anyone can access your account, your data may not be secure if you allow others to use your computer. A piece of advice is that you should set a password or use Windows Hello login options, especially if your computer contains sensitive data.
However, if you are the only person with physical access to your computer, using the automatic login feature is perfectly fine. This helps you save time and reduces the hassle of entering a password every time you log in.











