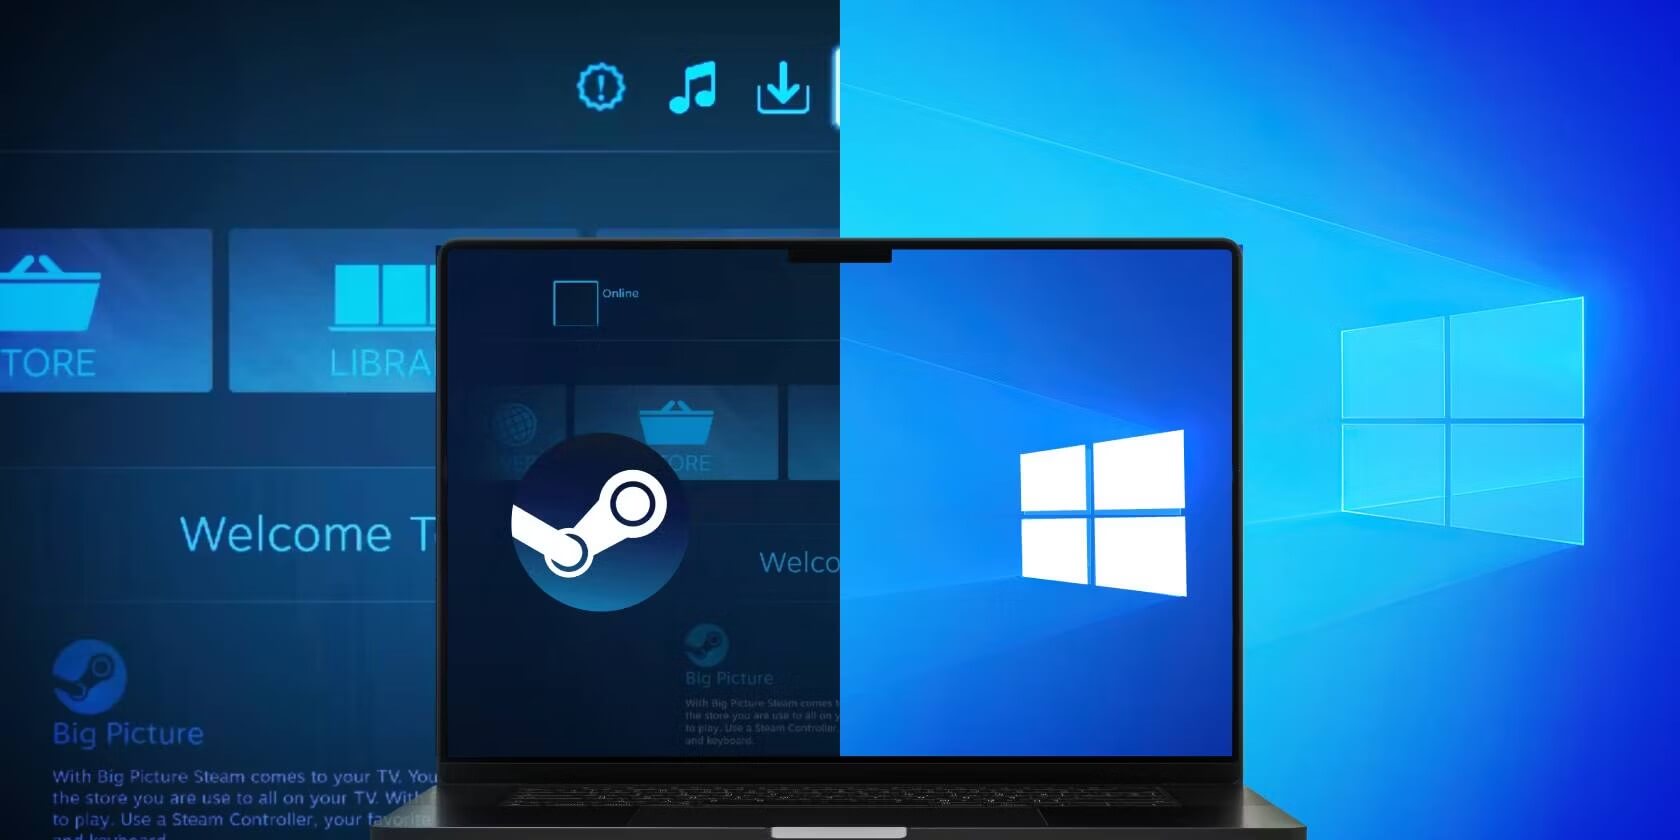
Can you dual-boot Windows 10 and SteamOS? The answer is Yes.
To dual-boot both Windows 10 and SteamOS on the same computer, you need to download SteamOS, create a bootable drive, and run the SteamOS installer. That is the basic process you need to follow.
1. Verify that your device meets SteamOS hardware requirements
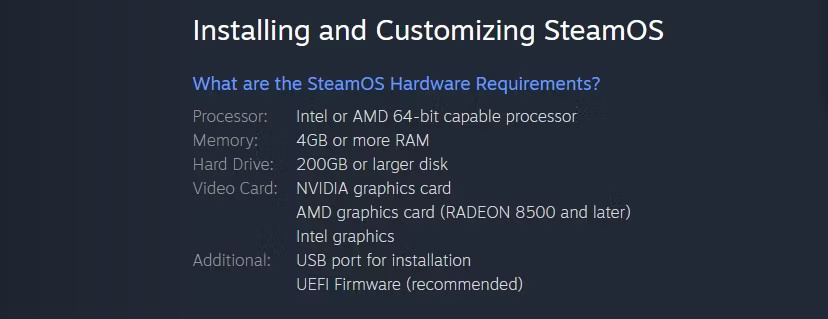
Before downloading anything, make sure your computer meets the Steam OS hardware requirements. SteamOS 2.0 is an ideal choice for installation on a PC.
If you want to run an unmodified version of SteamOS, Alchemist (SteamOS 1.0) and Brewmaster (SteamOS 3.x) might be suitable options. You can download the ISO or ZIP file for the SteamOS version you want. However, SteamOS may not be compatible with all computers-in this case, you can use alternatives like ChimeraOS.
2. Use an installer to create a bootable USB
Creating a bootable USB from an ISO file is quite simple. Ensure that your USB has at least 4GB of capacity and that you have backed up important data. Next, use bootable USB creation software like Rufus.
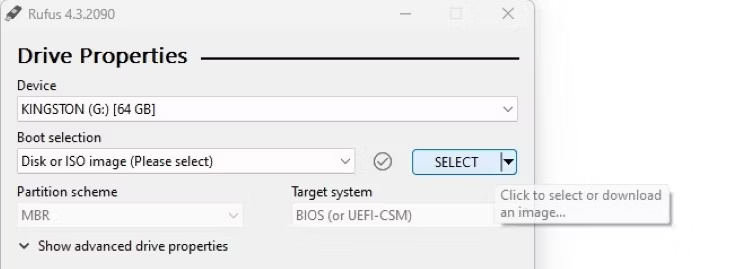
Open Rufus and select your USB from the device list. Then, click the SELECT button to choose the SteamOS ISO file from your computer. Finally, press Start and wait for Rufus to complete the process of writing the ISO file to the bootable USB.
3. Restart your computer and run the SteamOS installer
Once the bootable USB is created, you are ready to install SteamOS. To start the installation process, ensure that your USB is connected.
Next, you need to restart your computer and repeatedly press the BIOS key until the BIOS loads. The BIOS key may be F2 or F12, depending on your computer model.
Once in the BIOS, navigate to the Boot Order menu. The location and name of this menu will depend on your computer's BIOS. Adjust the boot order so that the USB is prioritized to boot before the operating system.
Finally, save the changes and exit the BIOS. Your computer will automatically restart and begin the SteamOS installation process.
4. Select Expert Install and configure partitions
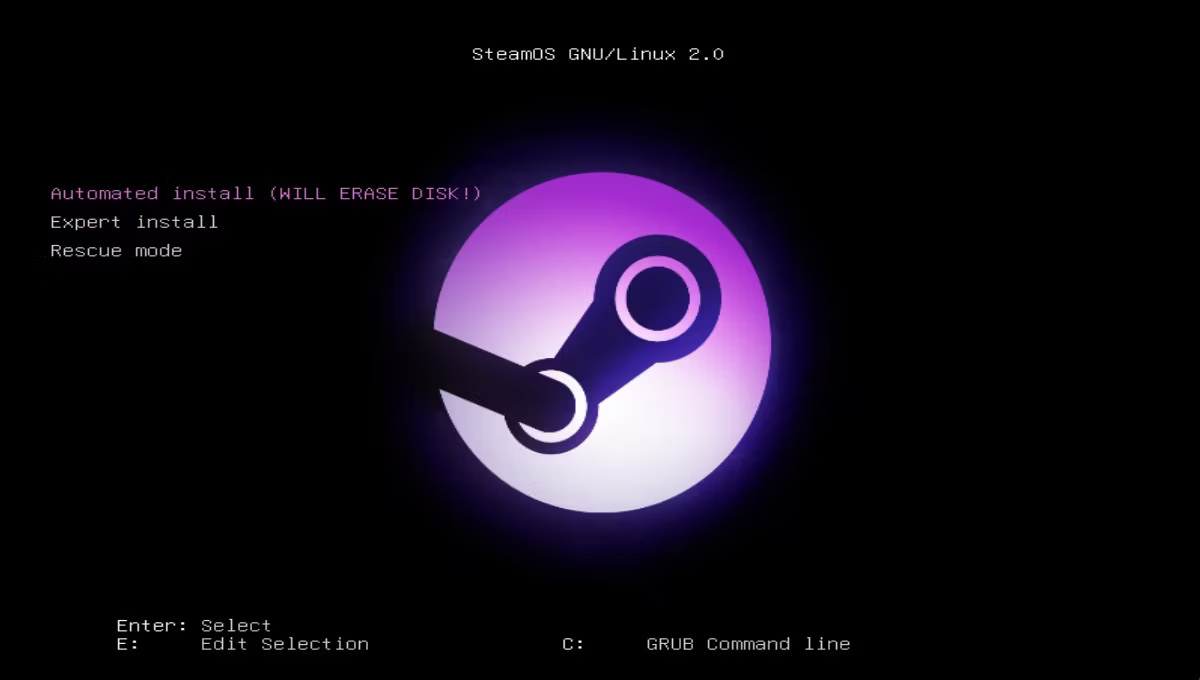
After the computer boots, the SteamOS installation interface will appear. Select Expert Install from the list of options.
Attention: Never select Automated install! This action will erase the entire operating system and all data on your hard drive to install SteamOS.
Select your language, country, and keyboard before continuing the installation. Then, the installer will load and display the menu of available partitions on your machine.
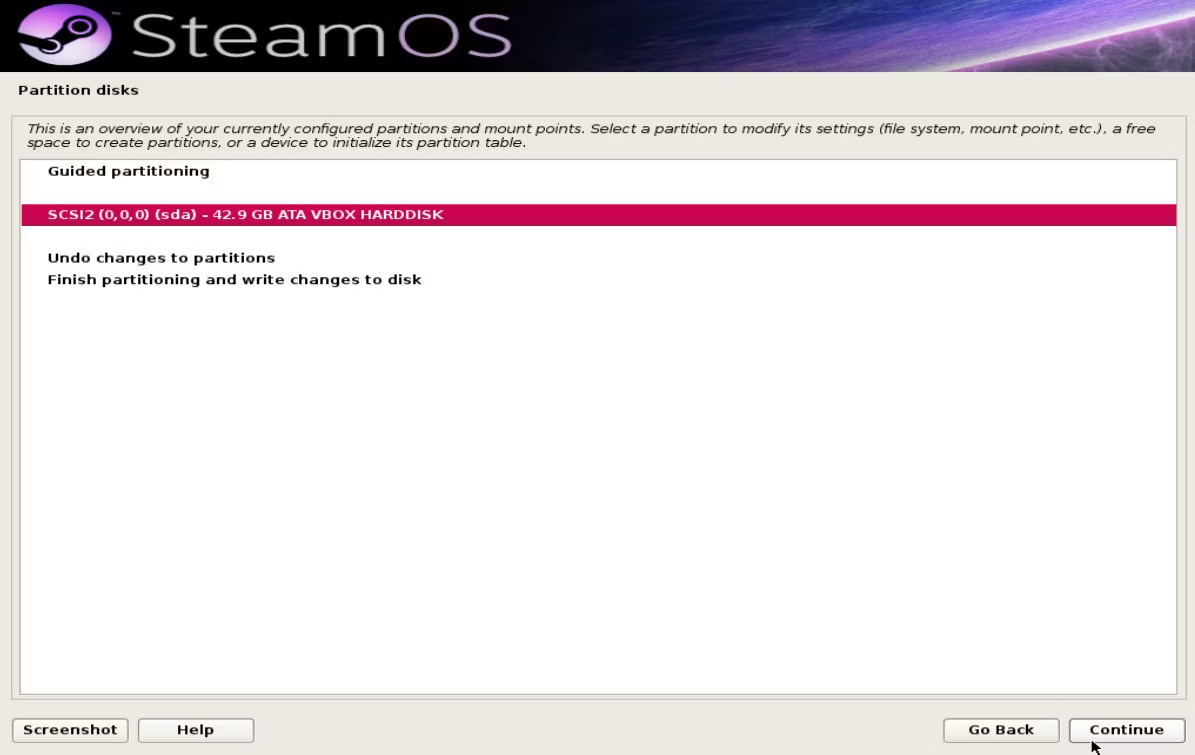
Double-click Undo changes to partitions to revert the partition changes previously set by SteamOS. Select the partition you want to use and click Continue.
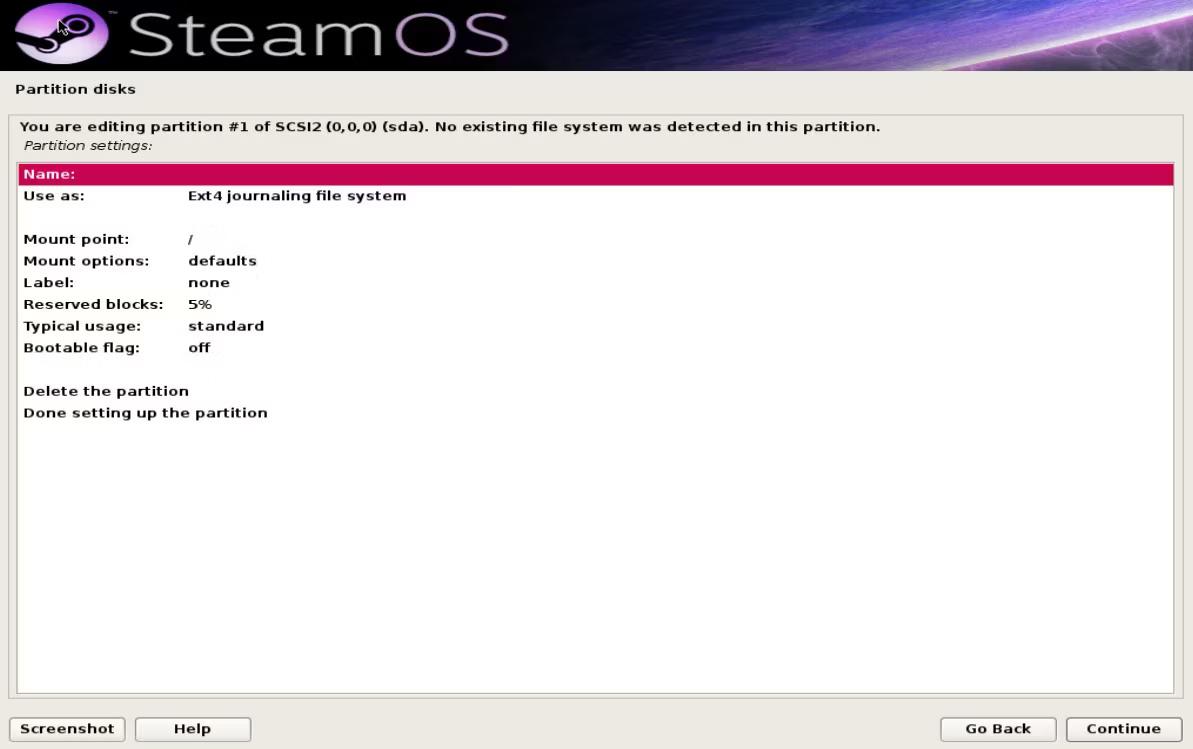
To create a new partition for SteamOS, select Yes (to create a new partition table), then select FREE SPACE and click Continue. Create a new partition with a minimum capacity of 10GB, set Mount point: / and Use as: Ext4 journaling file system.
Next, create a new swap file partition from the FREE SPACE partition with a capacity of about 10GB and set Use as: swap area.
Create a recovery partition from the FREE SPACE partition with a capacity of 3GB to 10GB, set Use as: Ext4 and Mount point: /boot/recovery. Finally, create a game partition from the remaining FREE SPACE with Use as: Ext4 and Mount point: /home.
Note: You can also create all 4 SteamOS partitions by creating at least 40GB of FREE SPACE and selecting Partition disks > Guided partitioning > Guided - use the largest continuous free space. If any unwanted changes occur, you can double-click Undo changes to partitions to revert them.
5. Complete the SteamOS installation
Select additional collections to install with Steam OS. After creating the necessary partitions and nearly completing the Steam OS installation, confirm the changes by selecting Finish partitioning and write changes to disk. When prompted by the installer, confirm that you want to install the GRUB bootloader. This bootloader will allow you to choose between Windows and Steam OS when booting the computer.
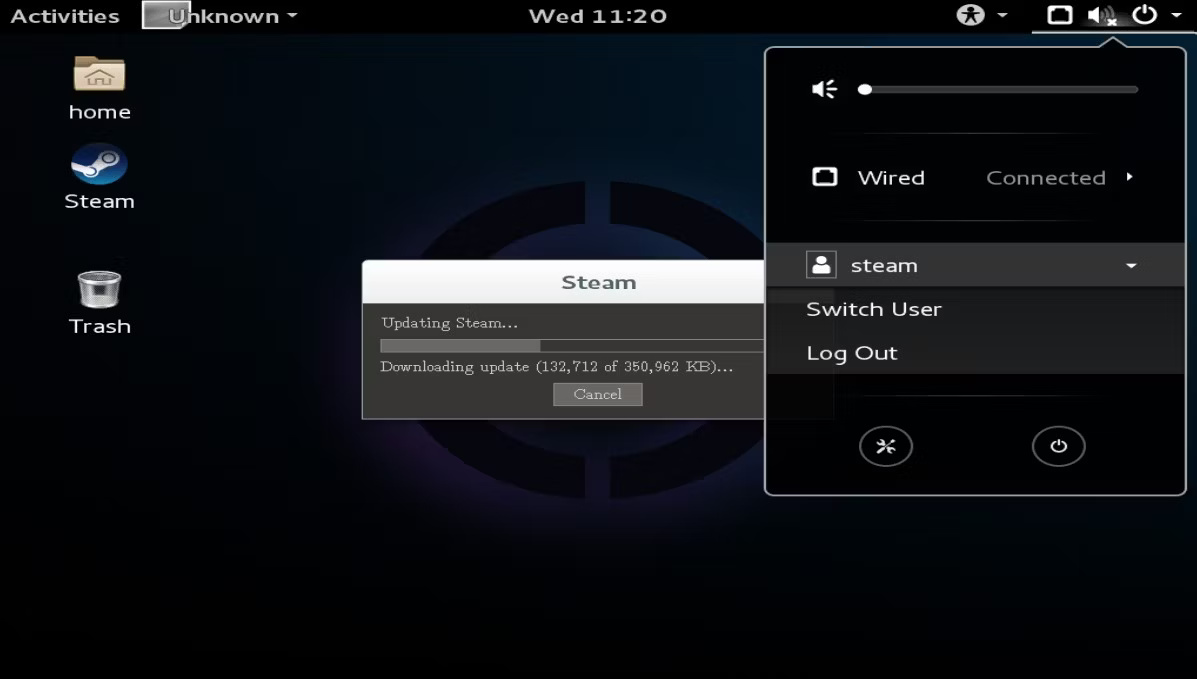
Allow Steam to update upon login in SteamOS. When you first boot into SteamOS, you will need to log in with the default account. Use the password steam for the steamos user account. Open the Terminal by pressing Ctrl + T, type steam, and allow Steam to set up the system. Then, log out of steamos and log into the desktop with the password desktop. This will be your account, which you can configure as you wish.
Reopen the Terminal and type ~/post_logon.sh to run the Steam OS setup script. During this process, the computer will restart, but there is no need to worry. Allow SteamOS to create the recovery partition, restart into Steam OS, and enjoy playing your favorite games on this spectacular operating system.