

BitLocker is a hard drive encryption tool that protects data from remote intrusion or physical theft. Below are 4 simple ways to check the BitLocker status on a computer running Windows 10.
1. Check BitLocker status using File Explorer
To check if a file is encrypted with BitLocker, you can use File Explorer as follows:
- Press Win + E to open File Explorer.
- Select This PC from the left menu, then select the drive you want to check. For example, if you want to check the Local Disk (C:) drive.
- Click the View tab in the upper-left corner of the window, then select Details pane.
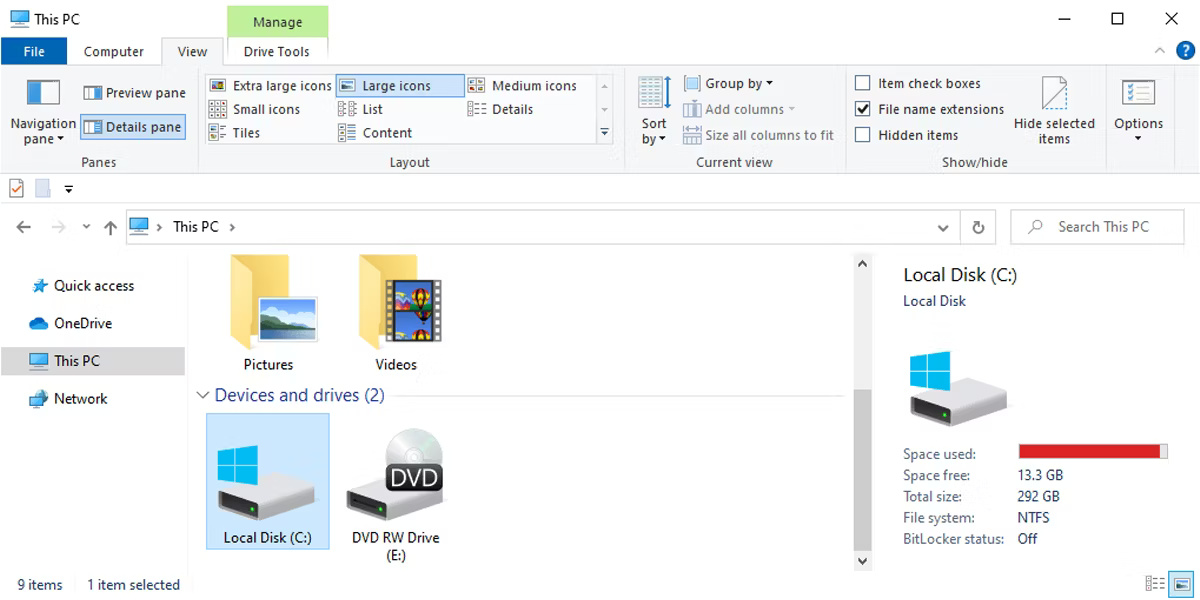
From there, you will see the BitLocker status in the bottom-right corner of the screen.
2. Check BitLocker status using Control Panel
Control Panel is another tool that helps you check the BitLocker status quickly and easily.
- You can find Control Panel by clicking the search bar in the Start menu, typing Control Panel, and selecting Control Panel when it appears.
- Next, click the View By drop-down menu in the upper-right corner and select Large Icons or Small Icons.
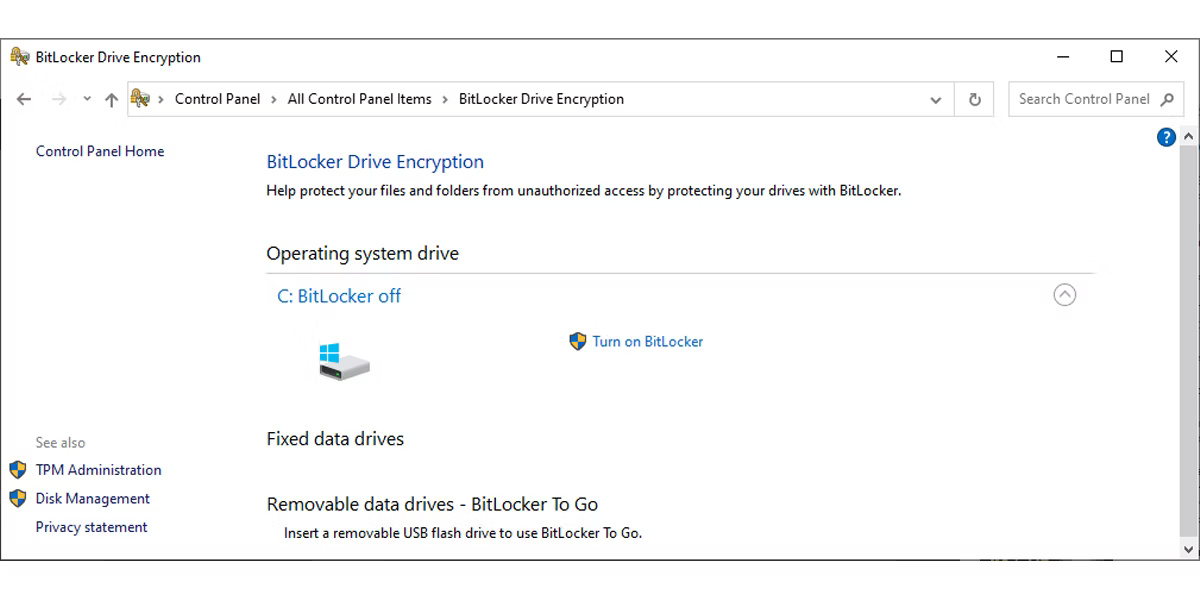
- Select BitLocker Drive Encryption from the menu. In the next window, the BitLocker status will be displayed above the hard drive icons.
3. Check BitLocker status using Command Prompt
If you want to check the BitLocker status using Command Prompt, follow these steps:
- Find and run Command Prompt as an administrator by typing Command Prompt in the Start menu search bar and selecting Run as administrator.
- Type the command manage-bde -status and press Enter to check the BitLocker status of all drives on the device.
Please note that using Command Prompt requires caution, especially when running with admin privileges, to avoid causing unintended issues to your system.
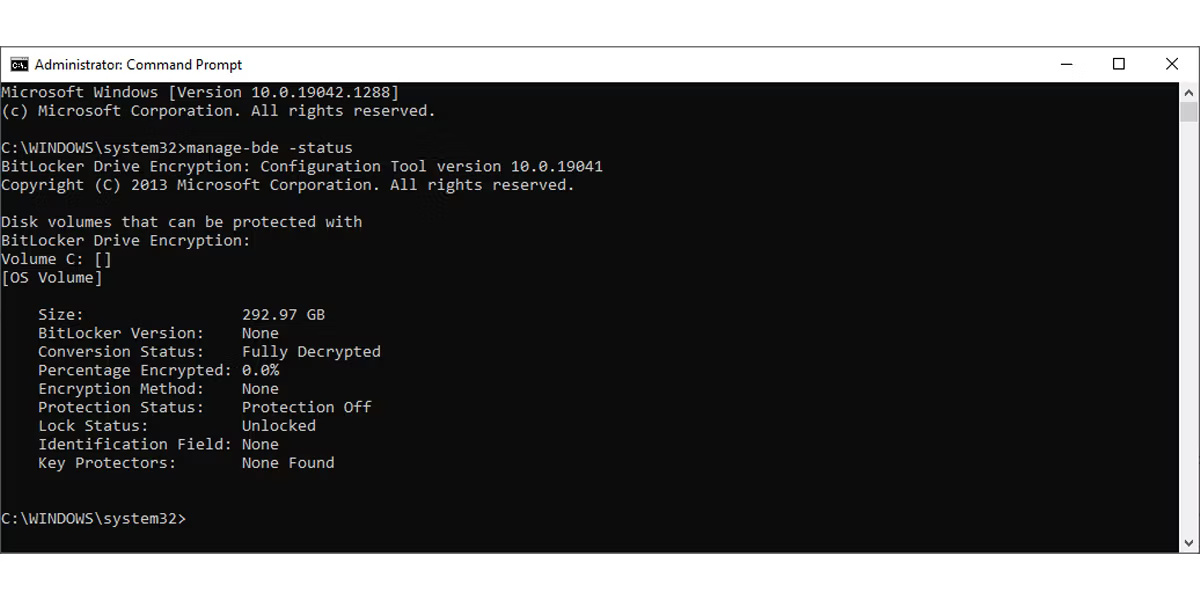
In the results, you will see whether BitLocker is turned on in "Protection Status".
If you want to check the BitLocker status of a specific drive, type manage-bde -status <Drive Letter>: in Command Prompt. Therefore, to check the status of the (C:) drive, type manage-bde -status C: in Command Prompt and press Enter.
4. Check BitLocker status using PowerShell
You can also use Windows PowerShell to check the BitLocker status:
- Start by clicking the search bar in the Start menu, then type PowerShell and select Run as administrator.
- Then, type the command Get-BitLockerVolume and press Enter to check the BitLocker status of all drives on the computer.
Check the results in "Protection Status" to see if BitLocker is turned on.
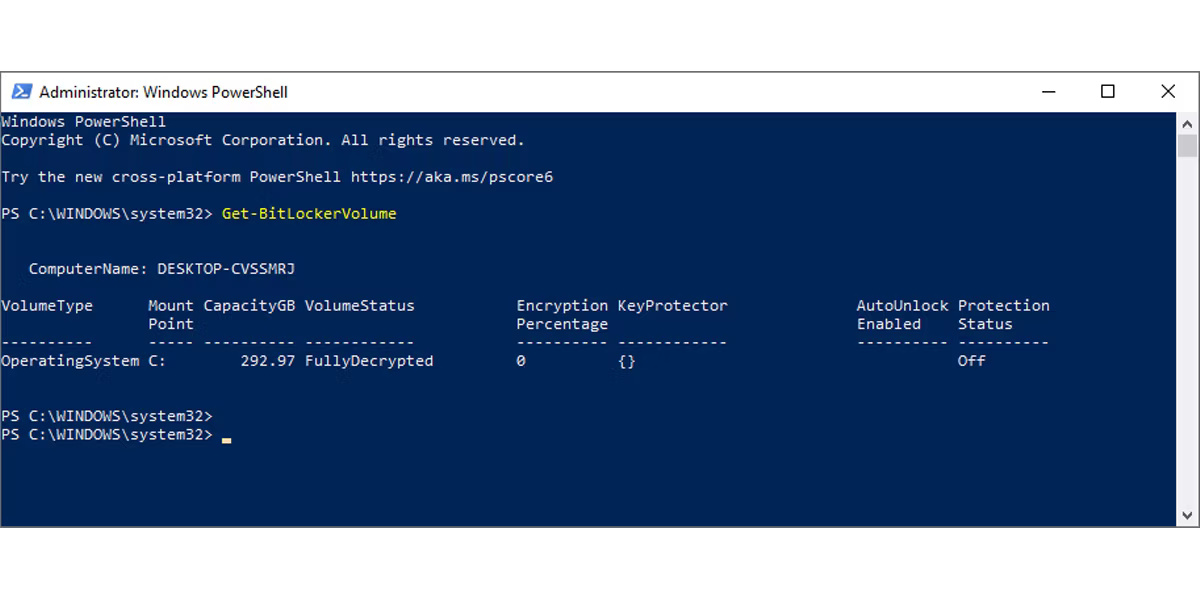
To check the BitLocker status of a specific drive, type Get-BitLockerVolume -MountPoint <Drive Name>:. For example, to view the status of the (C:) drive, type Get-BitLockerVolume -MountPoint C: and then press Enter.
Summary
Periodically checking the BitLocker status is an important part of maintaining information security on your computer. By performing these checks, users can ensure that their data is protected in the best possible way.
We hope the information in this article helps you better understand BitLocker and how to check its status on Windows 10. Apply these methods to protect your important data on your computer. Good luck!











