If you encounter an Internet connection icon on Windows 10 or Windows 11 displaying a message that there is no Internet access, even though you are connected to WiFi, here is a guide to help you fix this situation.
Connected to WiFi but no Internet access?
Before proceeding, it is important to understand the network status when connected to WiFi but without Internet. This relates to your home network setup.
When a wireless device like a laptop connects to a router, the router acts as the device that manages the home network connection. The router is connected to a modem, which is the device that provides Internet access to the home network.
When your computer displays messages like Connected, no Internet access, or Connected but no Internet, it means you are connected to the router but cannot access the Internet. Conversely, if the message is Not connected, no Internet, or No Internet connection, the computer is not connected to the router.
Based on these signs, you can apply the following troubleshooting methods.
Fixing "Connected to WiFi but no Internet access"
1. Confirm if other devices are also unable to connect
Before solving the problem, it is important to determine whether the issue is specific to your personal computer. You can check this by using a phone or another device already connected to the WiFi network to see if they can access the Internet (for example, by playing a YouTube video).
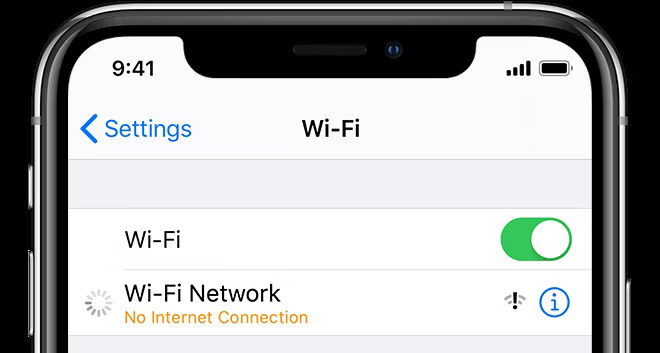
On some Android versions, this issue is often indicated by an "X" icon on the WiFi symbol in the status bar. iPhone and iPad users can go to Settings, select WiFi, and check if a "No Internet Connection" message appears under the network name.
If a computer running Windows cannot connect to the network while other devices can, it may be due to incorrect configuration settings on the computer. However, if there is no Internet connection on any device, the problem may originate from the network equipment, and you can skip the computer-specific steps below.
Before continuing, if the issue affects all devices, you should perform a quick test. Disconnect the Ethernet cable from the modem to the router and instead, connect your computer directly to the modem using that cable.
If you can access the Internet through this direct connection, the problem may lie with the router. Therefore, if you follow the troubleshooting steps below without success, the router might be malfunctioning and may need to be inspected or replaced.
2. Restart your PC
If the connection issue affects multiple devices, there is no need to perform this step.
To fix network connection issues on your computer, you can try restarting the computer. This can help temporarily resolve connection errors and network glitches.
If you are using a WiFi connection and experiencing issues, try restarting your computer to see if the problem is resolved. However, if you are connecting your computer to the router via an Ethernet cable, try using a different cable to ensure the problem is not caused by the network cable.
3. Restart your modem and router
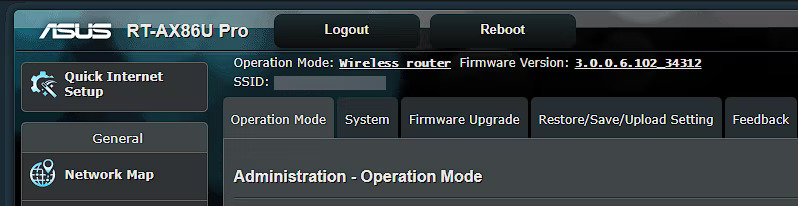
To troubleshoot network issues, you should start by restarting your modem and router. This is a crucial step because most network problems involve these two devices. You can unplug the power from both the modem and the router for a few minutes or use the power button on the devices.
First, plug the power back into the modem and wait for it to fully boot up before reconnecting the router. Wait a few minutes to ensure both devices are operating normally. During this process, check if the lights on the modem and router are on to ensure they are functioning correctly. If any lights are off or blinking irregularly, there may be an issue with the network hardware.
If the computer still cannot connect to the Internet after that, you can proceed with the following troubleshooting measures.
Please note that the process you are performing is a device restart, not a device reset. A reset means restoring the device to its original factory settings, which is not necessary in your case.
4. Disable all VPN connections
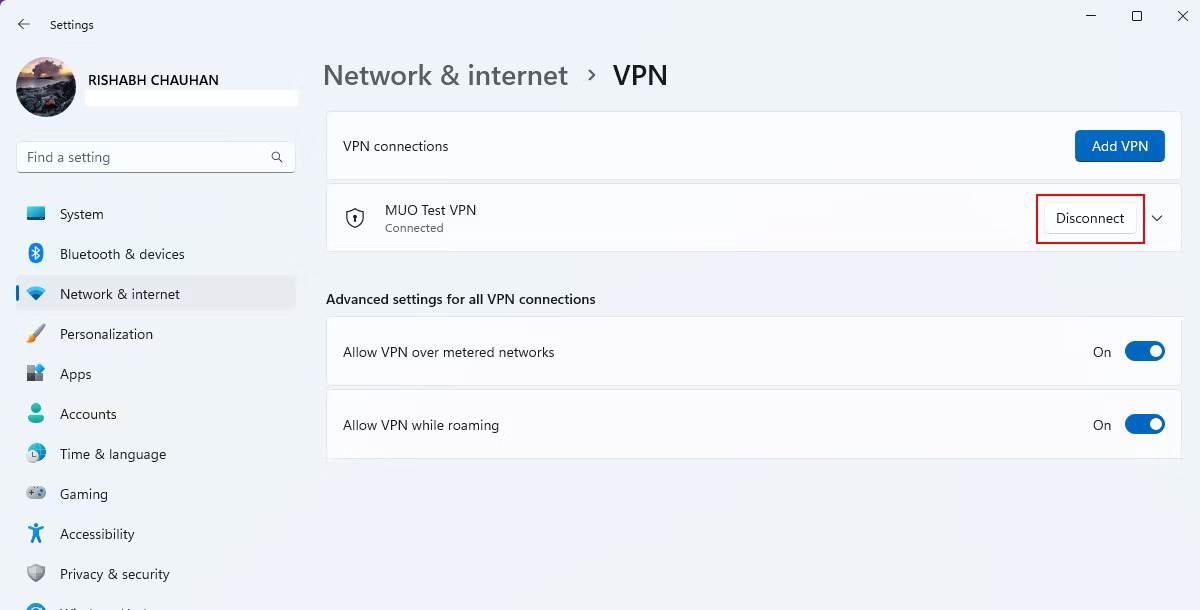
Using a VPN offers many benefits, but it can also cause issues during the Internet connection process. This can happen when the VPN encounters an error or the server is overloaded and cannot process the connection.
If you experience home network connection issues while using a VPN, try turning off the VPN and attempting to reconnect. If the problem persists, temporarily disable the VPN to reduce the number of variables during troubleshooting.
5. Run Windows Network Troubleshooter
If the connection issue affects multiple devices, there is no need to perform this step.
If you are having issues with a computer running Windows, there may be a problem related to the computer's network settings. Although the built-in Windows troubleshooting tool cannot solve all problems, you should try using it before performing more complex troubleshooting steps.
To access the network troubleshooter on Windows 10, go to Settings > Network & Internet > Status. Select Network troubleshooter and follow the steps to see if Windows can resolve the issue.
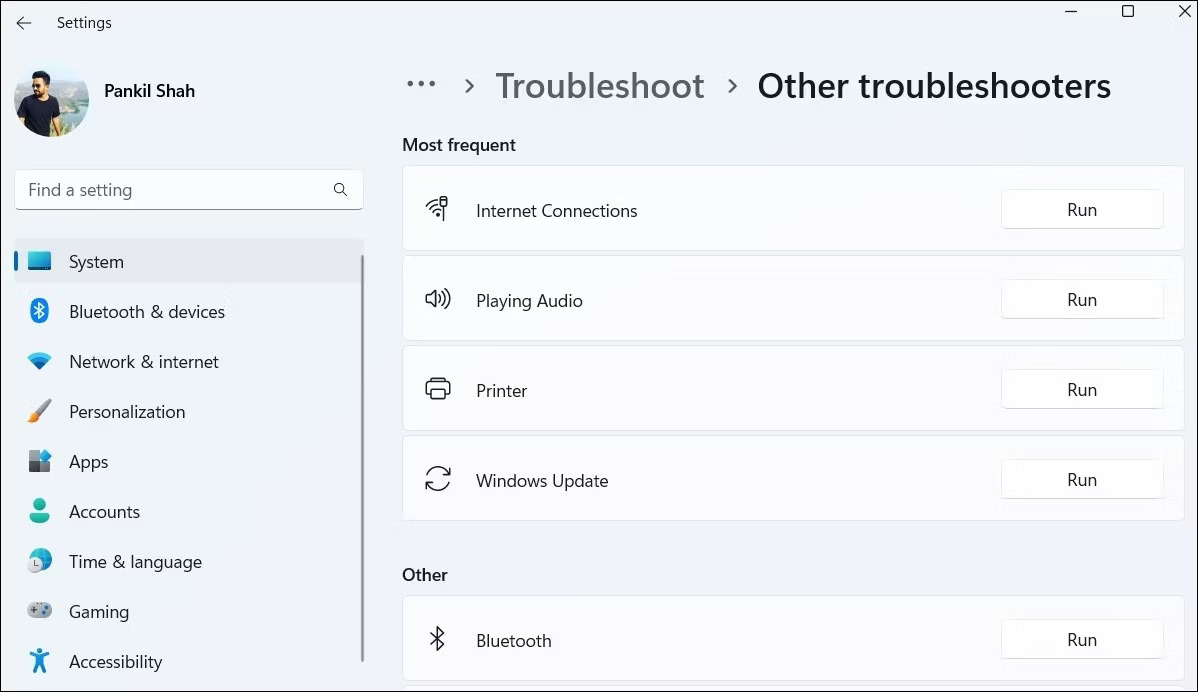
On Windows 11, you will find this tool at Settings > System > Troubleshoot > Other troubleshooters > Network and Internet.
6. Check IP address settings
If the connection issue affects multiple devices, there is no need to perform this step.
To diagnose network issues, you should verify that the computer has a valid IP address. In a typical home network environment, the router automatically assigns IP addresses to devices when they connect. If the IP address settings on the computer are incorrect, this can cause issues with Internet access or IP address conflicts.
Check IP settings on Windows 10
When using Windows 10, go back to Settings > Network & Internet > Status. Click on Change adapter options and then double-click the connection you are using.
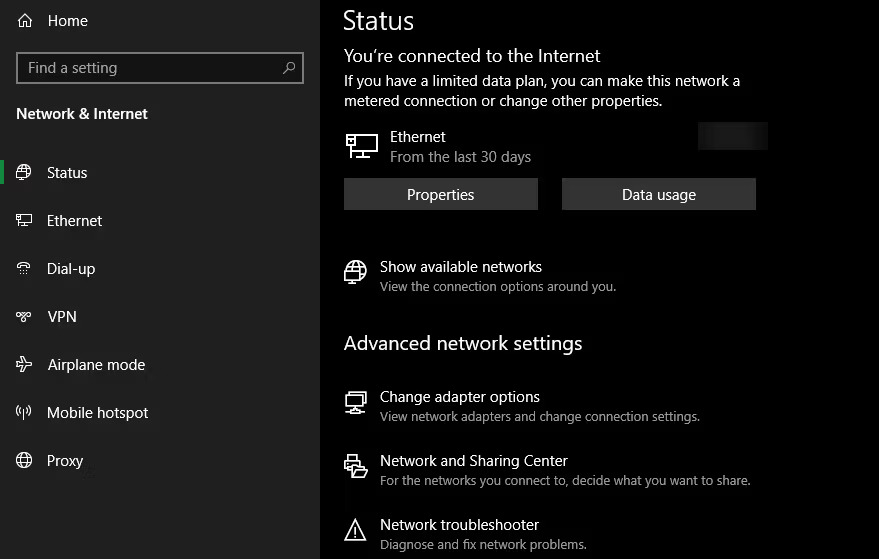
When the window with your connection information opens, click the Properties button. Find Internet Protocol Version 4 in the list and double-click it.
There, ensure that Obtain an IP address automatically and Obtain DNS server address automatically are selected. Setting an IP address manually is intended for advanced use; it is very likely that if you enter something here, it will be invalid.
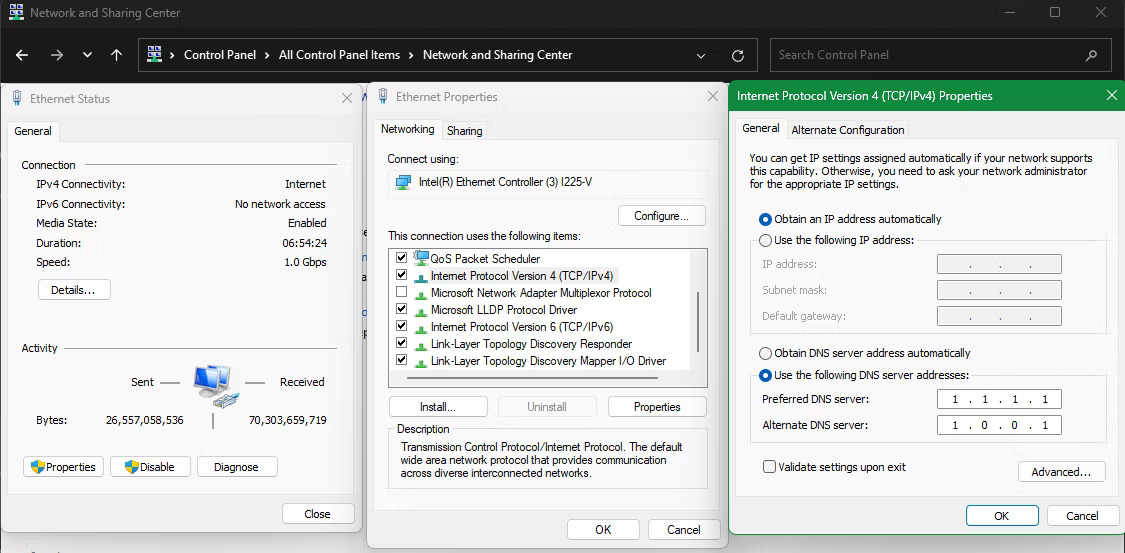
Click OK after setting both to use automatic values, then try going online again.
Check IP options on Windows 11
If you are using Windows 11, reopen Settings and go to Network & internet. Click on Advanced network settings at the bottom of the list, then select the network connection you are using. In the expanded list, select View additional properties at the bottom.
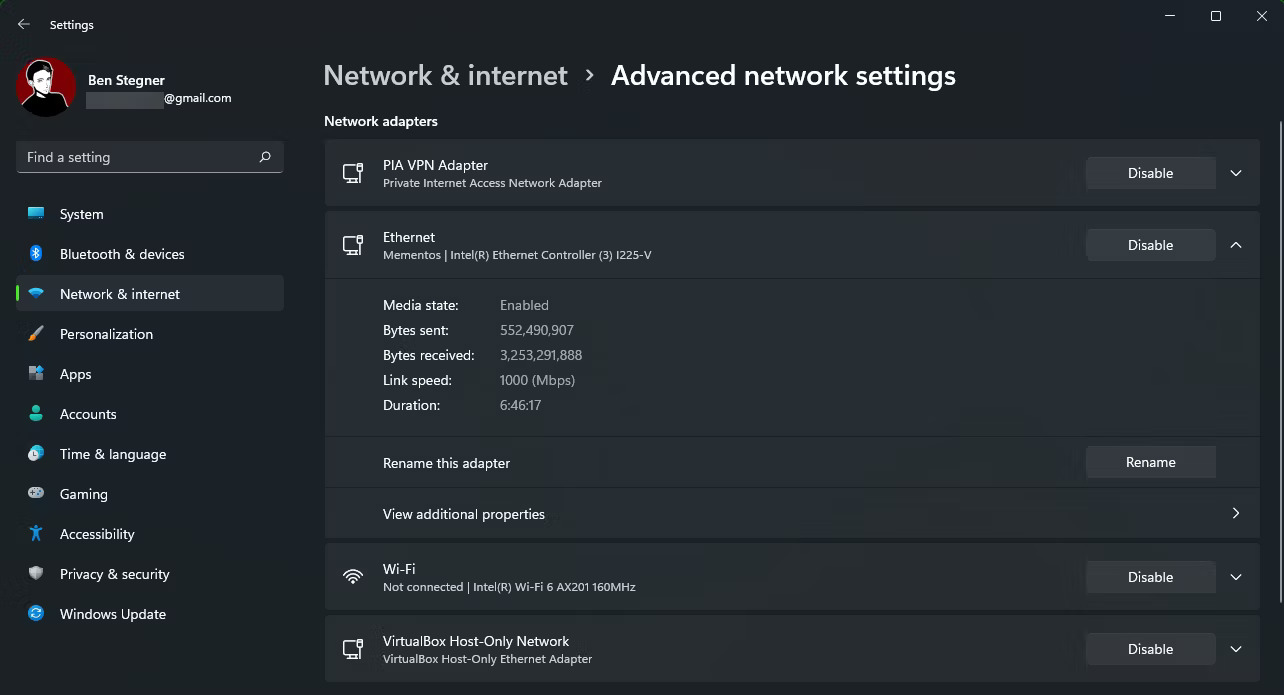
On the resulting menu, ensure that IP assignment and DNS server assignment are both set to Automatic (DHCP). If not, click the Edit button next to these options and change both to Automatic. After confirming this, try reconnecting.
7. Check ISP status
If you are having difficulty connecting your device to the Internet, you should first check if your Internet Service Provider (ISP) is experiencing issues. Although rare, this could be the reason why you cannot access the Internet on multiple devices.
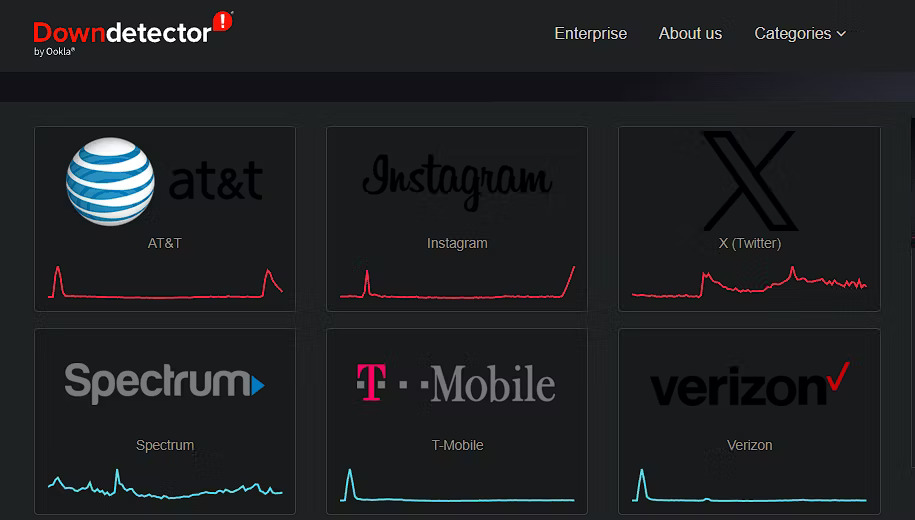
To check the status of your ISP, you can use your mobile data connection to visit the DownDetector website. This website provides information about network outages and includes an outage map so you can see the locations of ongoing reported issues. You can also search on Google or forums to see if others are experiencing similar problems.
8. Try using network tools in Command Prompt
If the connection issue affects multiple devices, there is no need to perform this step.
To resolve Internet access issues in Windows, you can use several network connection commands in Command Prompt. First, type "cmd" into the Start menu, then right-click it and select "Run as administrator" to open the Command Prompt window with admin privileges. Next, you can try running a few of these commands to troubleshoot your network connection.
To reset some Windows files that manage Internet access, use the following two commands:
netsh winsock resetnetsh int ip reset
If that doesn't work, try releasing your computer's IP address and obtaining a new IP address from the router using these two commands, one at a time:
ipconfig /releaseipconfig /renew
Finally, refresh your computer's DNS settings with this command:
ipconfig /flushdnsIt wouldn't hurt to restart your PC at this point. If you remain offline, you may need to try a few more steps.
9. Disable security software
If the connection issue affects multiple devices, there is no need to perform this step.
A rare but possible situation is when security software on your computer blocks Internet access; for example, Avast or other antivirus software may encounter an error, leading to a malfunction in updates and blocking access to certain websites or the entire Internet without a clear reason.
To resolve this, you can temporarily disable any installed third-party antivirus applications to see if the Internet connection is restored. If the problem is resolved after disabling these applications, you should consider adjusting the settings within the antivirus software or consider using an alternative solution.
To ensure your computer's safety, you should also run a malware scan using an application like Malwarebytes. Although rare, a malicious program could be the cause of your Internet connection loss.
10. Update wireless drivers
If the connection issue affects multiple devices, there is no need to perform this step.
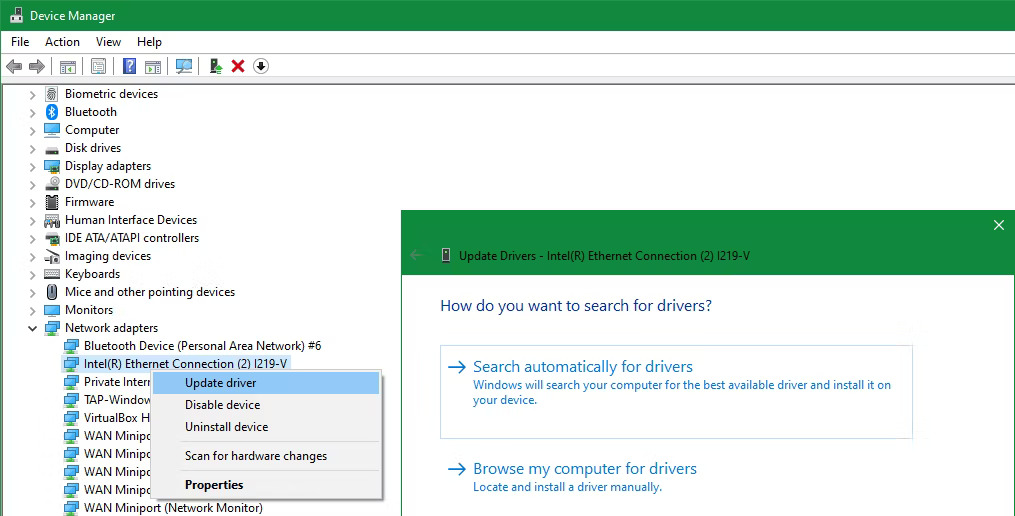
Normally, there is no need to update most computer drivers because doing so can cause more problems. However, if the network connection issue persists, you should check for driver updates for your computer's wireless chip.
If you have a manufacturer's update application installed on your PC (such as HP Support Assistant or Lenovo System Update), open that application and check for wireless driver updates. If not, follow the instructions from Quantrimang.com to update Windows drivers manually.
11. Network Reset
If you still encounter issues accessing the Internet despite being connected to WiFi after following the steps above, your only option is to perform a network settings reset.
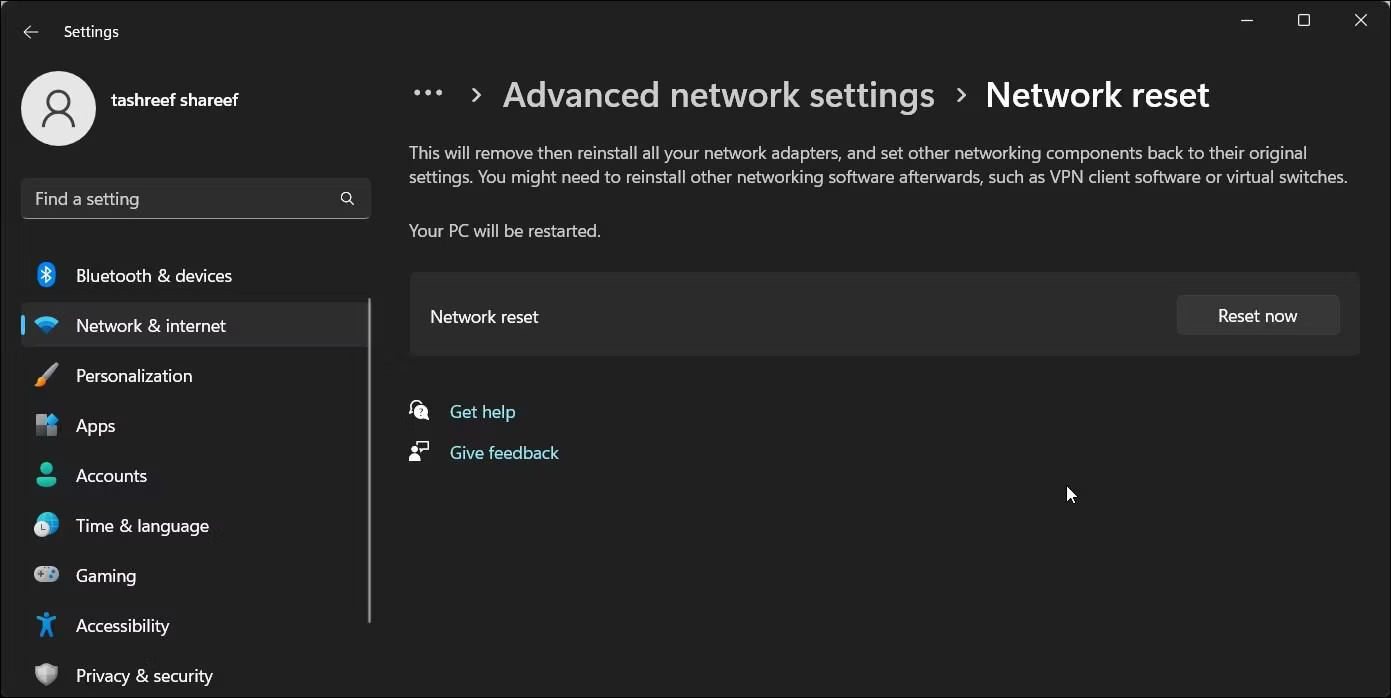
If the Windows computer is the only device experiencing connection issues, you can reset your network configuration on Windows 10 by going to Settings > Network & Internet > Status, then selecting Network reset at the bottom of the screen and clicking Reset now. On Windows 11, you can go to Settings > Network & internet, then select Advanced network settings and choose Network reset.
Following the instructions in these menus will completely remove all network adapters and return network settings to their defaults. You will need to set everything up again, including VPN software, but this may be the necessary fix.
When you cannot connect online from any device in the house, you can try resetting the router and modem. To do this, find a small hole on the back or bottom of the router and press it with a paperclip or similar object for a few seconds to reset it to its original factory settings. If there is no physical reset button, you will need to log into the router and restore factory settings from there.
After resetting, you can set up the router again and use the manufacturer's default settings to test the Internet connection. If there is still no connection, the device may be faulty and need replacement. If the device is still under warranty, contact the manufacturer.
We hope that resetting will help resolve your connection issue without needing to perform a full factory reset. If the problem persists, you may need assistance from a networking professional or may need to move on to more comprehensive troubleshooting methods. Follow all steps to ensure the device is set up correctly and no issues are obstructing the connection.