

The TPM 2.0 requirement when installing Windows 11 has caused difficulties for many users wanting to upgrade their operating system. However, you can create a Windows 11 installation USB that does not need to meet this standard, making the installation process more convenient.
The Trusted Platform Module (TPM) was developed by the Trusted Computing Group (TCG) and has been recognized under the standards of the International Organization for Standardization (ISO).

This processor is located on the computer's motherboard and operates independently from the CPU, aiming to secure hardware through integrated encryption keys, while simultaneously connecting to other computer components via hardware.
TPM is an integrated part of laptops and desktops, used for device identification, information authentication, and password protection through hash functions. Instead of storing passwords on the hard drive as before, with this processor, passwords will be stored directly on it, including fingerprint and facial recognition keys.
TPM 2.0 is actually an evolution from the previous TPM version. Version 1.2 was released in 2011, and the latest 2.0 version has upgraded encryption technology, providing faster and more efficient responses.
Security is always a priority for users, so Microsoft wants to ensure that their systems have high security to prevent attacks from cybercriminals, which is very important for the birth of TPM 2.0. This is the minimum requirement that users need when they want to install Windows 11.
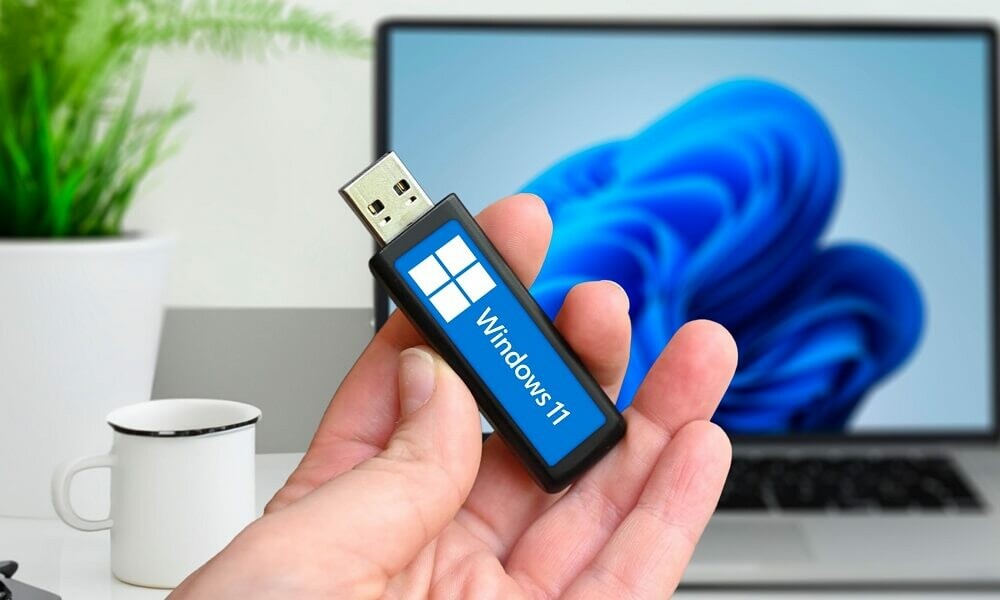
However, not all computer systems meet the full standards to install Windows 11. The article below will guide you on how to install Windows 11 on machines that are not equipped with TPM 2.0. This process will involve two steps to be performed.
Step 1: Download the Windows 11 ISO image file:
- Access the link below to download Windows 11
https://www.microsoft.com/software-download/windows11
- In the Microsoft Download Windows 11 interface, find the Download Windows 11 Disk Image (ISO) for x64 devices section, select the Windows 11 version > Download now, then the language selection part > Confirm.
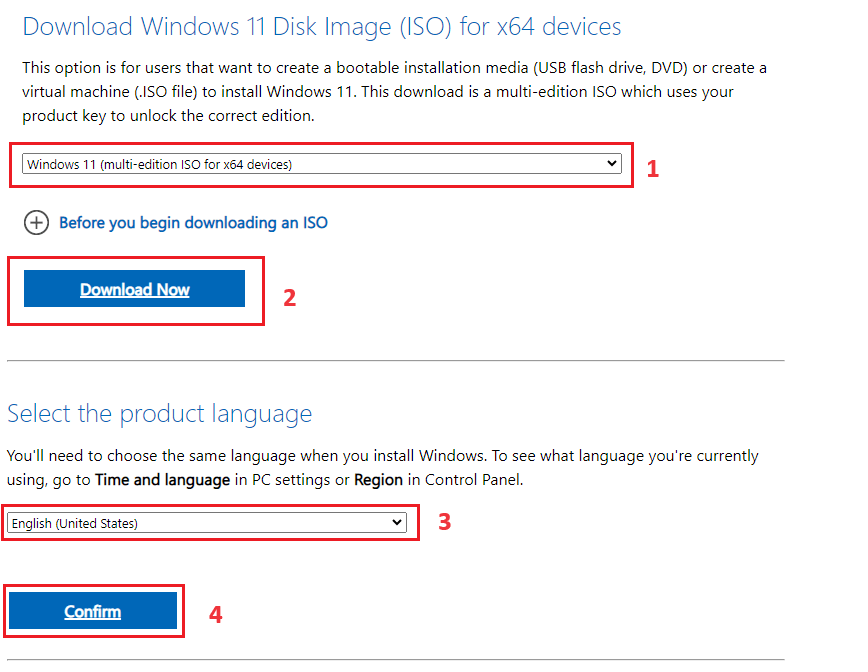
- Select 64-bit Download to proceed with downloading the ISO file.
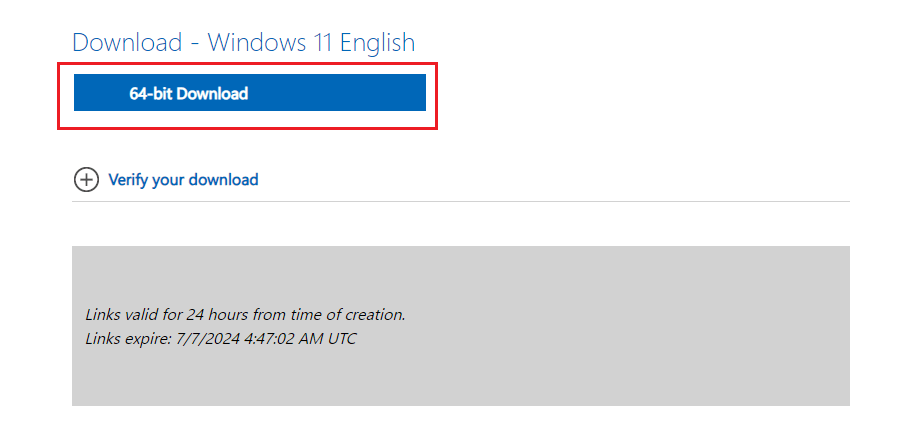
- Once finished, you will have the file Win11_xxxx_English_x64v2.iso, then proceed to step 2.

* Step 2: Create a bootable USB containing the Windows 11 installation media:
- First, you need a USB with a minimum capacity of 8GB and download the latest version of Rufus. You can access the link below to download.
- The article recommends that you download the portable version of Rufus to completely avoid the installation process.

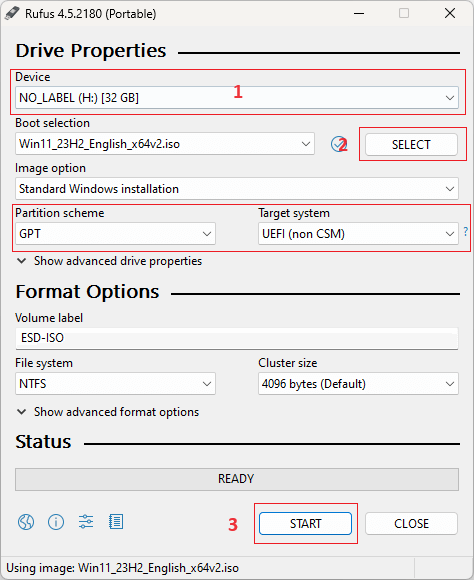
- Plug the USB into your computer, wait for the Rufus file to finish downloading, and open the file to see the default interface as shown below:
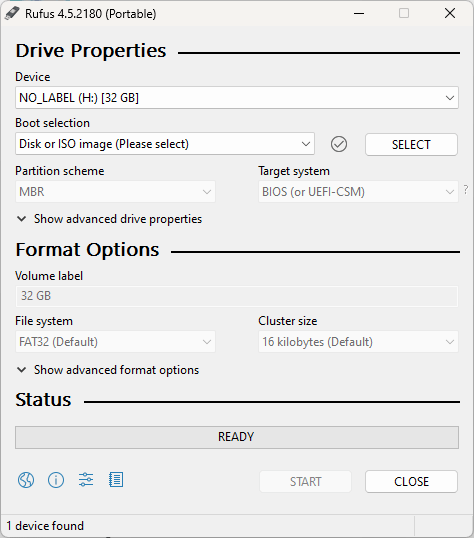
- In the device(1) section, select your USB; here I am using a 32GB USB. Click the Select(2) button in the Boot selection section, browse your computer to find the ISO file you just downloaded and select it. Next, click the Partition scheme option. Choose MBR if you want to use this USB on a system with BIOS or UEFI. Leave Target system and Partition scheme as they are if you intend to use this bootable USB on a UEFI system. Press the Start(3) button to begin.
- A Windows User Experience box will open. Here, you can apply all the customizations you want for the Windows 11 installation USB. I will select Remove requirement for 4GB+ RAM, Secure Boot, and TPM 2.0, Remove requirement for an online Microsoft account, and Disable data collection (Skip privacy questions). Click OK.

- Rufus will show a warning about deleting all data on the USB. Select OK to start.
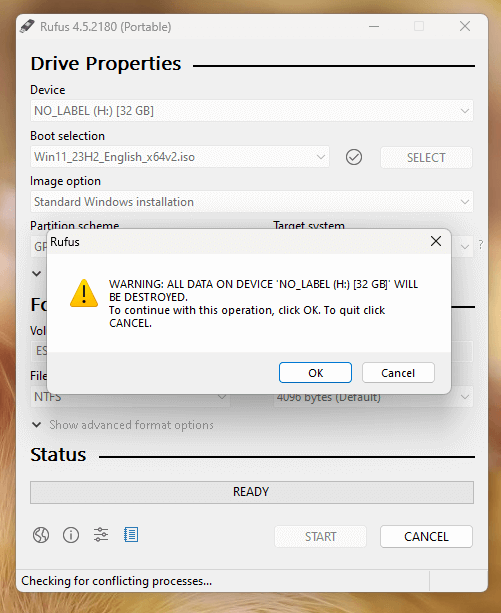
- We can monitor the USB creation progress in the Status.

- When the READY notification appears, it means you have completed creating the Windows 11Windows 11 installation USB; select CLOSE to close the program and unplug the USB to use it for the machine that needs installation.
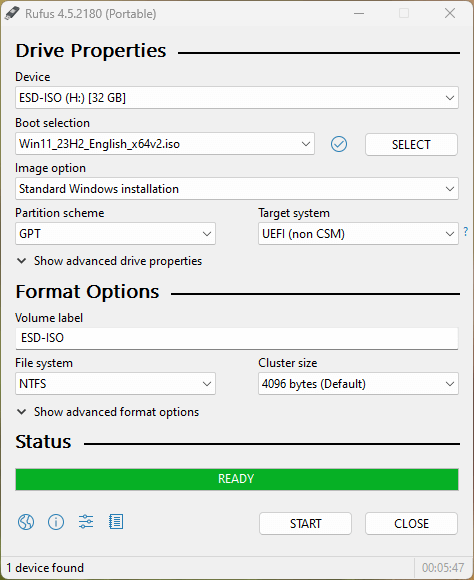
Above are all the steps to create a Windows 11 installation USB that bypasses the TPM 2.0 and online Microsoft account requirements. Good luck to you all.











