

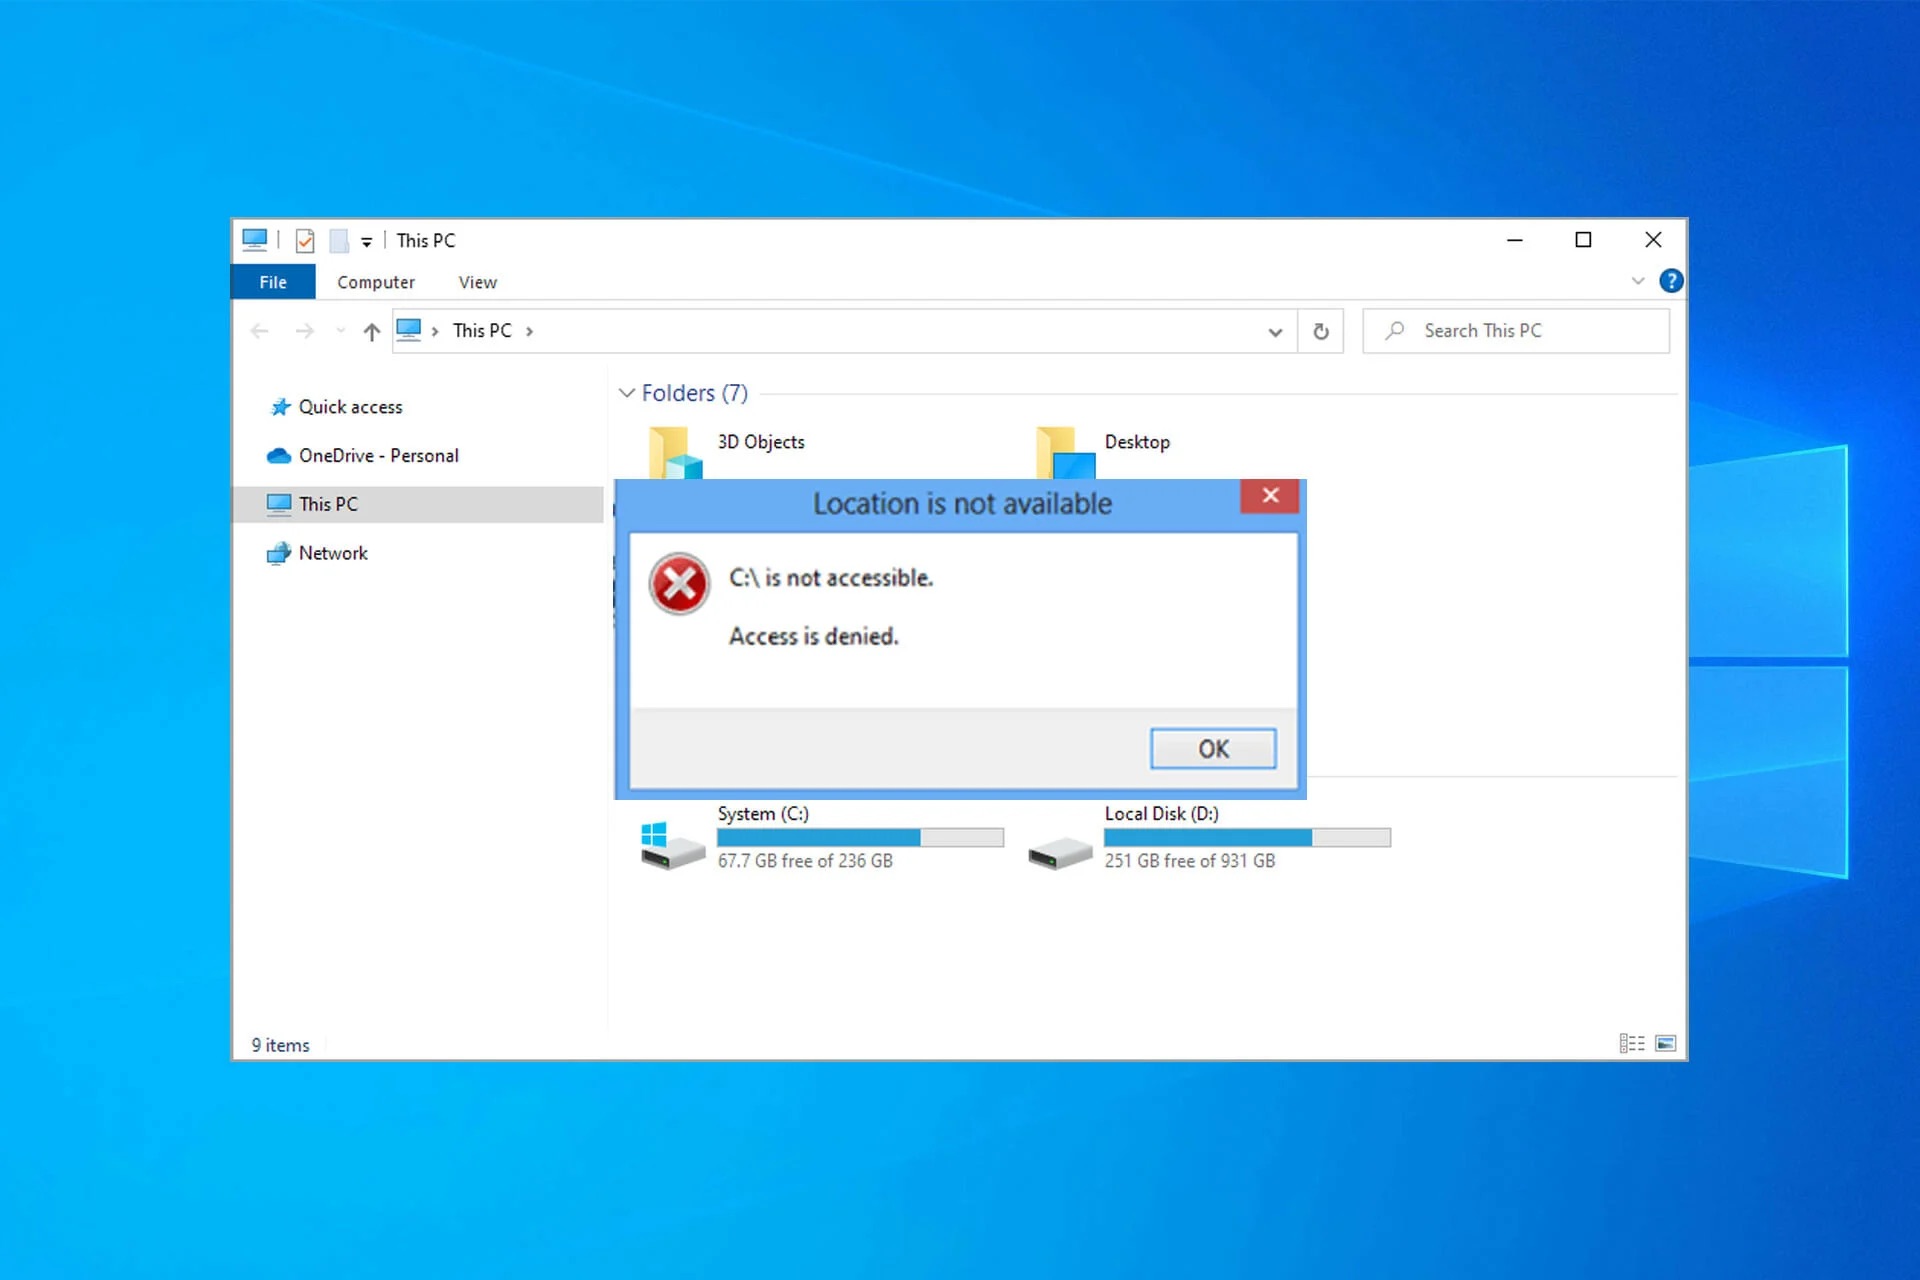
When you encounter the "Access Denied" error message on Windows 11, you might feel locked out of your own computer. Although being unable to access files and folders can be frustrating, don't worry-with a few simple adjustments, you can restore access to your system.
Reasons why you encounter the "Access Denied" error
The "Access Denied" issue is a common problem on the Windows operating system, indicating that you do not have permission to access a file or folder. The main cause is that the system has not granted access permissions for that folder to the user account you are currently using. Simply put, you are using an unauthorized account to access a path, folder, or file on your computer or external hard drive.
In some cases, issues related to file ownership and encryption can also cause this error. It is also possible that third-party antivirus software is blocking access. Some applications may mistakenly identify official setup instruction files as threats and display incorrect warnings.
Below are some common methods to fix the Access Denied error on Windows 11.
5 ways to fix the “Access Denied” error on Windows 11
1. Check file system permissions
Here is a simple solution you can apply to ensure that your account has the appropriate access permissions for the file or folder you are using:
1. Locate the file, folder, or directory you are trying to access. Right-click on it and select Properties from the menu.
2. Go to the Security tab and click the Edit button.
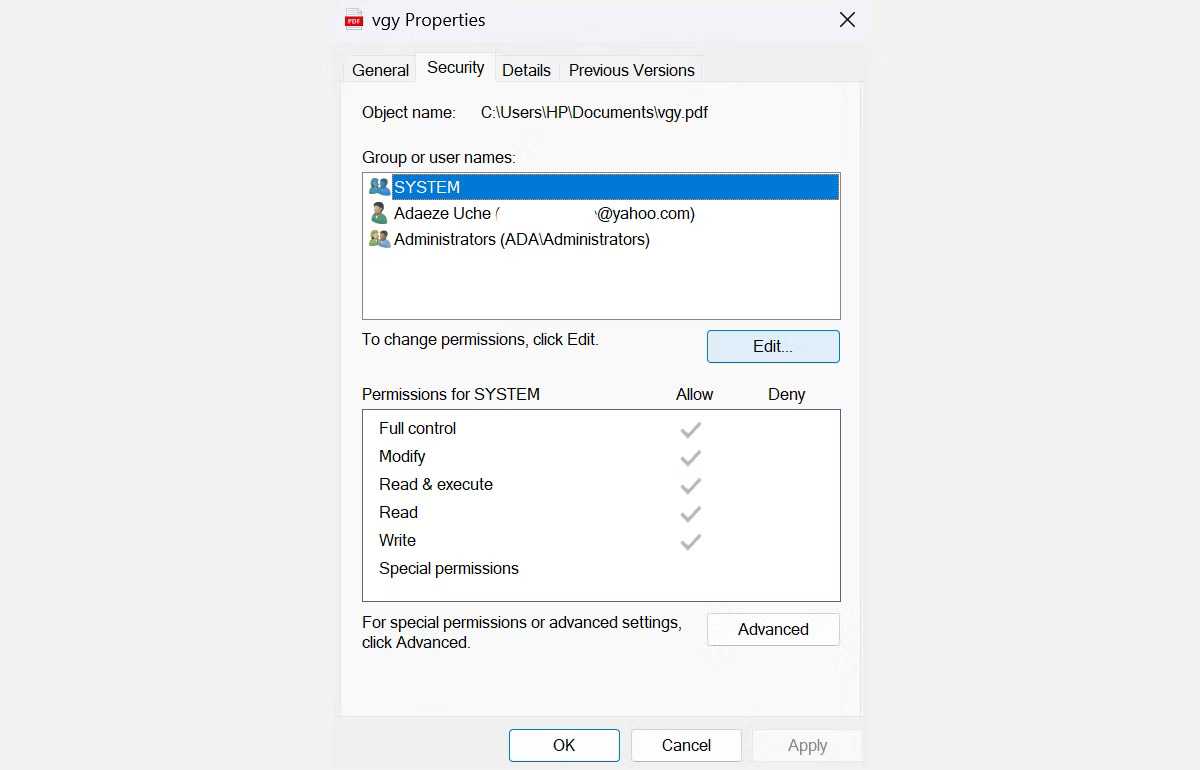
3. Select your username from the list and check the box next to Full control in the Allow column under the Permissions for User section. Then, click OK.
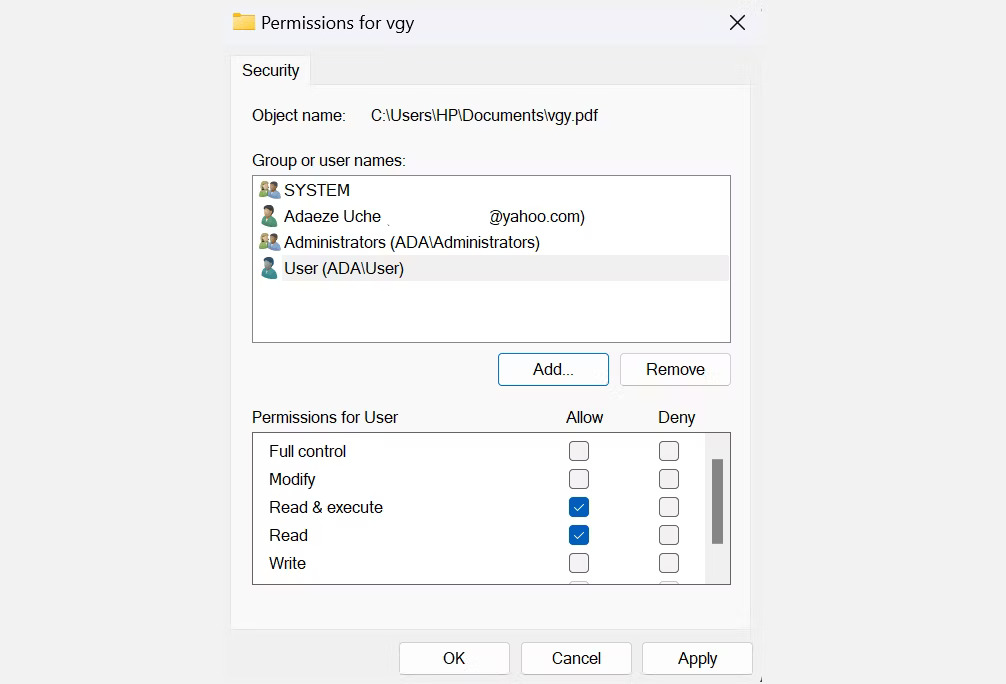
Note: If your username is not in the list, you must add the username manually and then change its permissions.
You can also try restoring default permissions using the icacls command in Command Prompt. Resetting permissions via icacls can help resolve access issues caused by changes in default permissions.
2. Set your account as an admin
In most cases, fixing the Access Denied error can be done by upgrading your user account to admin privileges on the computer. Here is how to do this for your account:
1. Press Win + R to open Run. Type control userpasswords2 and press OK.
2. In the User Accounts window, select the box next to Users must enter a username and password to use this computer. If this option does not appear, skip this step.
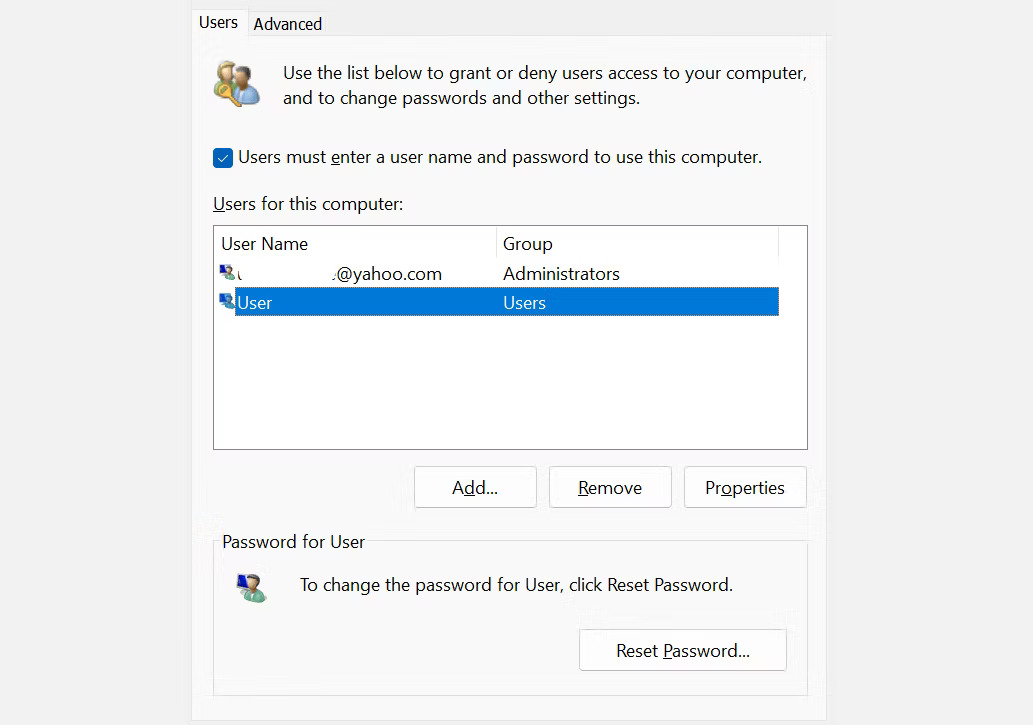
3. Select your account and click the Properties button below that account.
4. Next, go to the Group Membership tab. Select Administrator from the menu, then click Apply > OK.
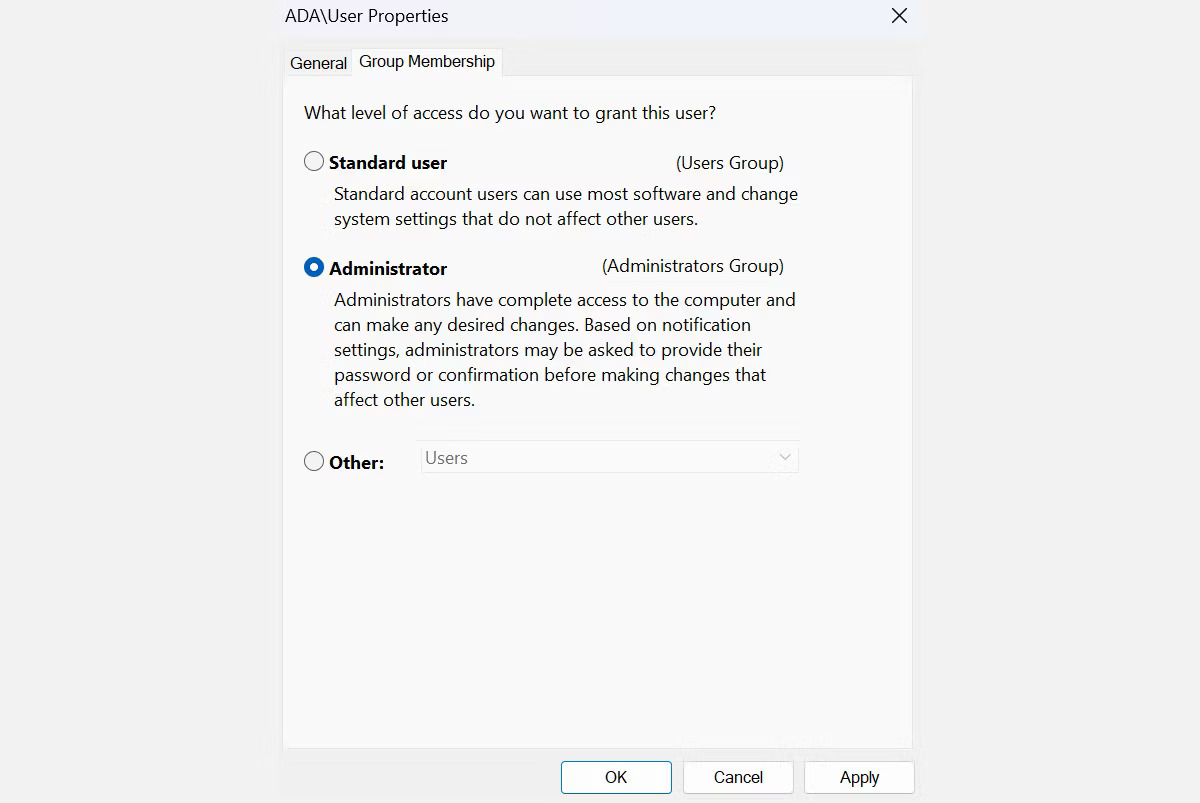
Please restart your device and check if the issue is resolved. If the problem persists, proceed to the next step.
3. Enable the hidden admin account
On your Windows 11 operating system, there is a hidden administrator account with more privileges than a standard account. You can enable this feature to access files, folders, and paths that a regular user cannot access-this is very useful when you cannot switch your user account from a standard account to an administrator account.
1. Open Windows Search by pressing Win + S.
2. Next, type CMD, right-click on Command Prompt, and select Run as administrator.
3. In Command Prompt, run the following command: net user administrator /active: yes. This will unlock the admin account.
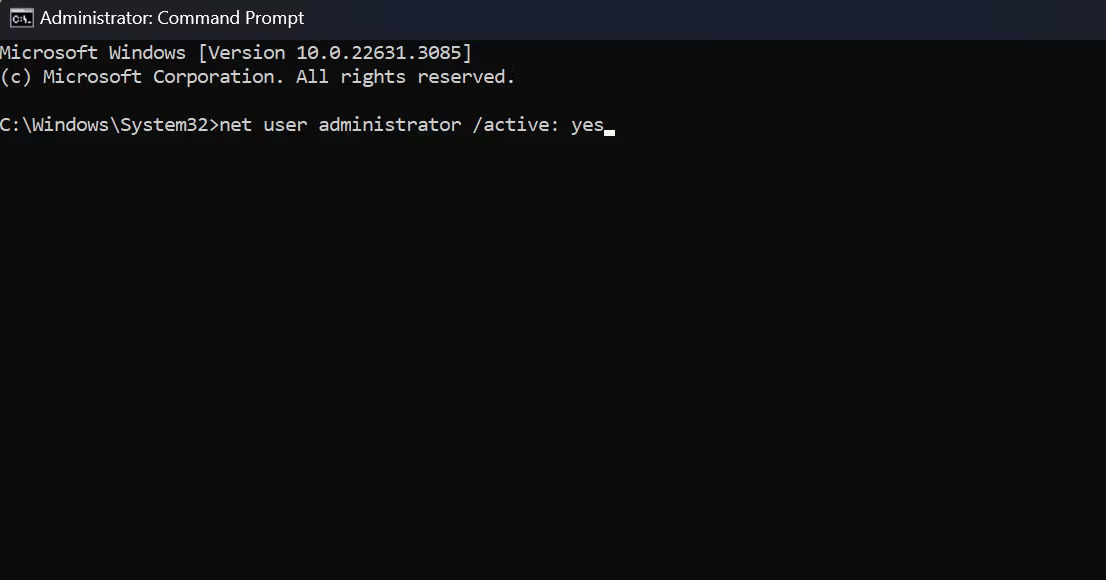
4. Log out of your current account and switch to the newly activated admin account. Using this account, you should not encounter access issues because it has more privileges than a regular admin account.
5. Once you have finished with the admin account, log out and log back into your main account. Repeat steps 1 and 2, then run this command: net user administrator /active: no. This will disable the admin account.
4. Take ownership of the file
As mentioned previously, the "Access Denied" error message can sometimes arise due to ownership issues. If this is the cause, taking ownership of the file can immediately grant you the access you need.
1. Locate the folder or file you want to access and right-click on it. Click Properties from the menu.
2. Go to the Security tab and click the Advanced button.
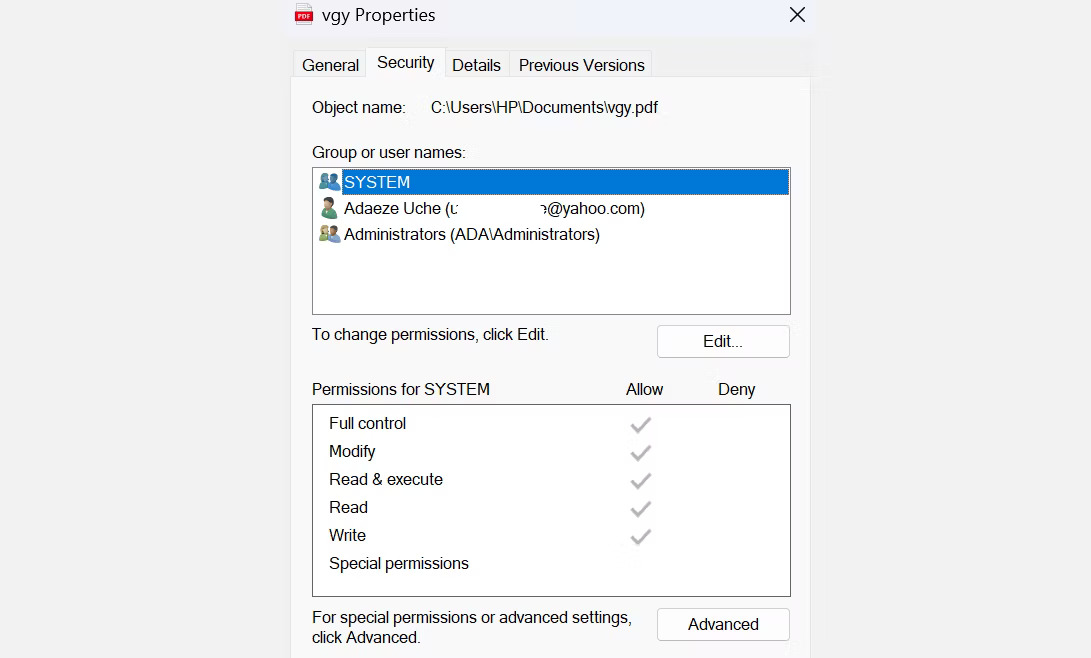
3. Next, find the Owner section at the top of the window and click Change. This will open a new dialog box.
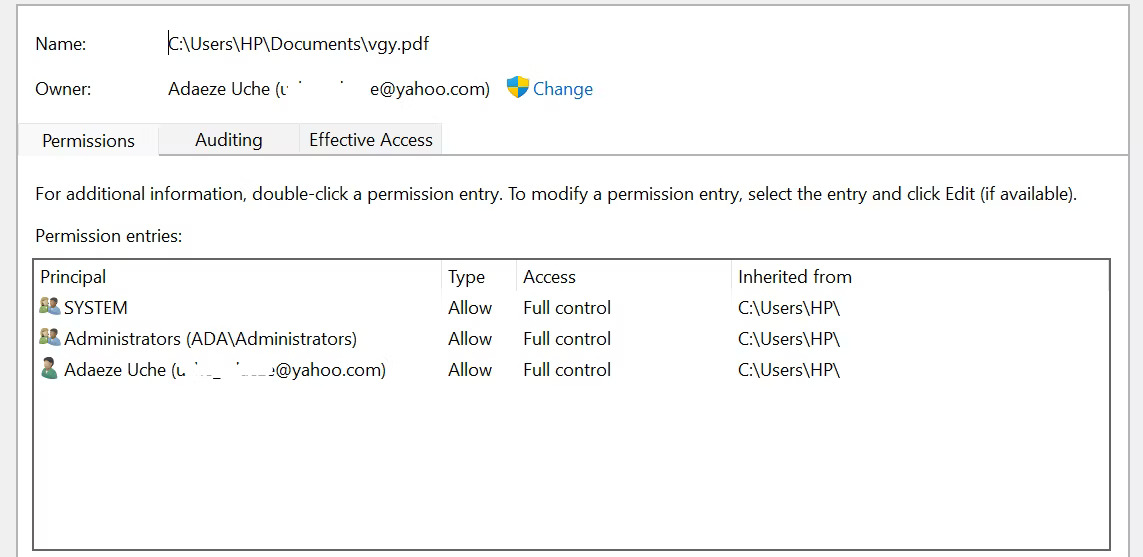
4. In the Select User or Group window, type your username or Administrators into the Enter the object name to check field.
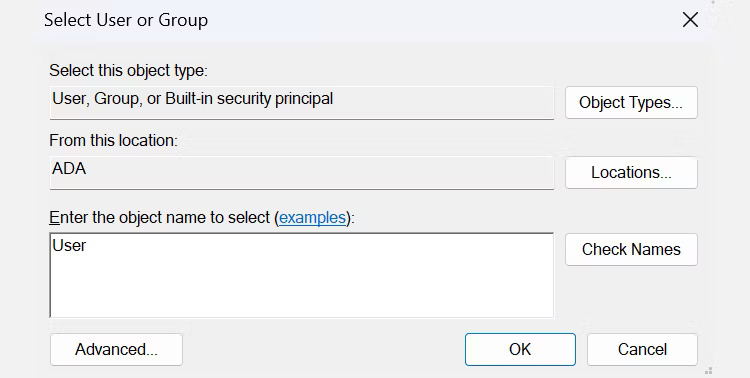
5. Then, click the Check Names button and OK to save your changes.
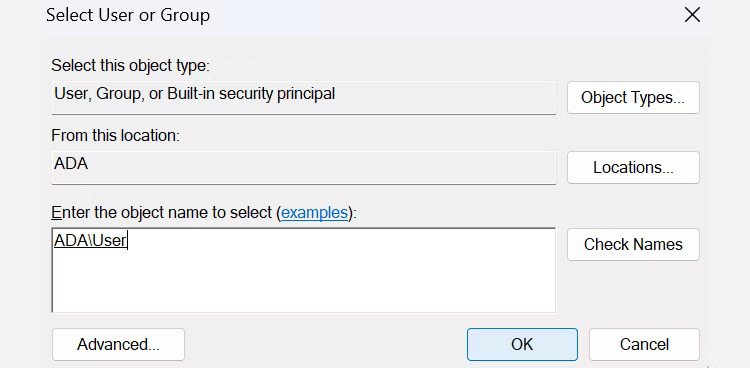
6. Next, click Apply.
7. You will see a Windows Security prompt. Click OK.
8. In the main interface, click OK to save the changes.
In addition to doing it manually, you can also take ownership of a file using Command Prompt. Follow the steps below if you want to use commands:
- Open Command Prompt via Windows Search by pressing Win + S and typing CMD. Click on Run as administrator in the Command Prompt result.
- In Command Prompt, type or paste the following commands and press Enter after each command:
takeown /f "path_to_folder"/r /d yicacls "path_to_folder"/grant administrators:F /tYou need to replace the "path_to_folder" part with the path to the inaccessible file or folder. Here is how you can get the path:
- Navigate to the mentioned file or folder.
- Right-click on it and select Copy as path.
- Replace "path_to_folder" with the copied path. For example: "C:\Users\HP\Downloads\Literature review sources"
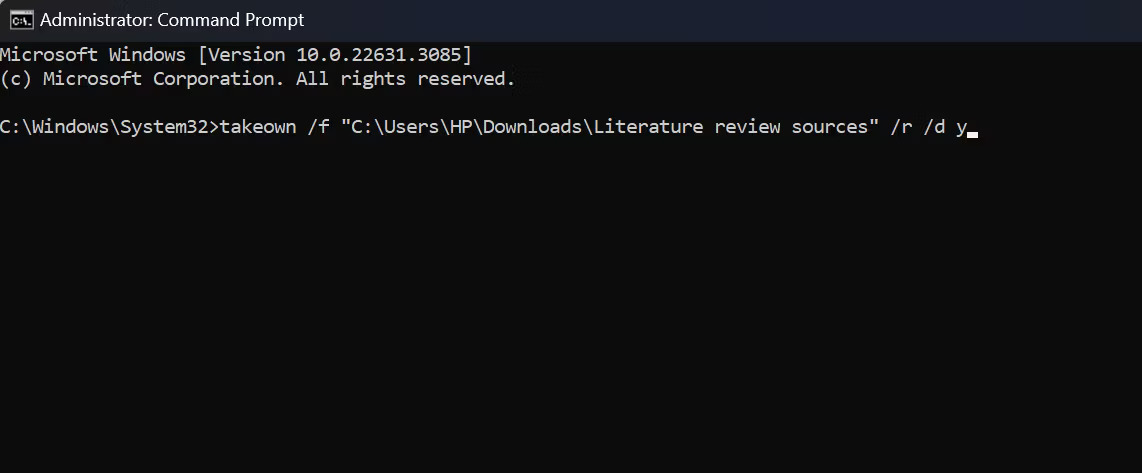
After completing the instructions, please restart your computer to check if the issue has been resolved. Typically, after executing these commands, you will be able to access the files and folders as usual.
5. Disable third-party antivirus software
If the problem is not resolved, consider disabling your third-party antivirus software.
Antivirus software is very important for protecting your system from threats and malware. However, it can cause errors such as access denials and incorrect warnings. For example, many users have reported encountering "Access Denied" errors when installing certain applications, and the main cause was their security software.
To check if your problem is caused by this, temporarily disable your third-party antivirus software and try to access the file or install the program. If the error does not appear, the antivirus software might be the cause, and you should consider using different security software. If not, use Microsoft Defender-the built-in security program in Windows 11.
Fixing the "Access Denied" error is quite simple and does not require many technical steps. You can restore control over files and the system by using several basic strategies. Ensure that your user account has sufficient permissions and, if necessary, upgrade to an admin account.
Good luck!











