

Each official version of Windows typically has many different variants or SKUs with special features. Windows 11 is no different and includes versions such as Home, Pro, etc. One of the important features often only available on Pro versions is Hyper-V; however, with a little experimentation, you can still use it on the Home version. In today's article, I will guide you on how to install Hyper-V on Windows 11 Home.
Instructions to enable hardware virtualization on Windows 11.
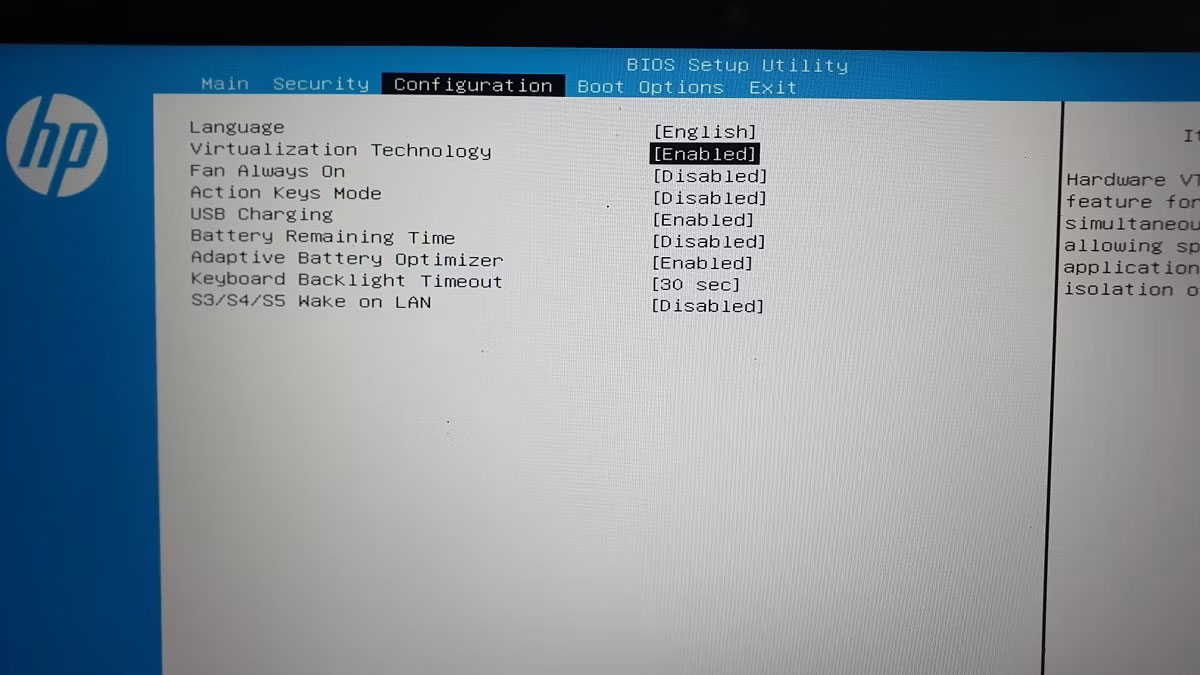
Hyper-V is a bare-metal hypervisor and requires Hardware Virtualization to be enabled in the BIOS to function. Most modern systems support Hardware Virtualization, and you can enable this feature in your device's BIOS.
The steps below apply to HP laptops. For other systems, please refer to the user manual or documentation on the manufacturer's website.
To enable hardware virtualization in BIOS:
- Turn off your computer if it is running.
- Press the power button to restart the machine and immediately press the F10 key to enter BIOS. BIOS access keys may vary depending on the manufacturer; therefore, you can try F10, F2, F12, F1, or DEL to find the correct key.
- In the BIOS Setup interface, navigate to the Configuration tab.
- Use the down arrow key to select Virtualization Technology.
- Press Enter and then select Enabled. Press Enter again to confirm the selection.
- Finally, press F10 to save changes and exit BIOS.
- Your computer will restart to enable Hardware Virtualization. Now, you can proceed to install Hyper-V on your system.
Instructions to set up Hyper-V on Windows 11 Home.
The next step is to set up and execute a batch script to install the necessary files to enable Hyper-V on Windows 11 Home.
Before proceeding with the next steps, please create a restore point. This will help you return your computer to its current state if any issues occur during the process.
To enable Hyper-V on Windows 11 Home:
1. Open a new Notepad file. To do this, press Win + R, type notepad, and click OK.
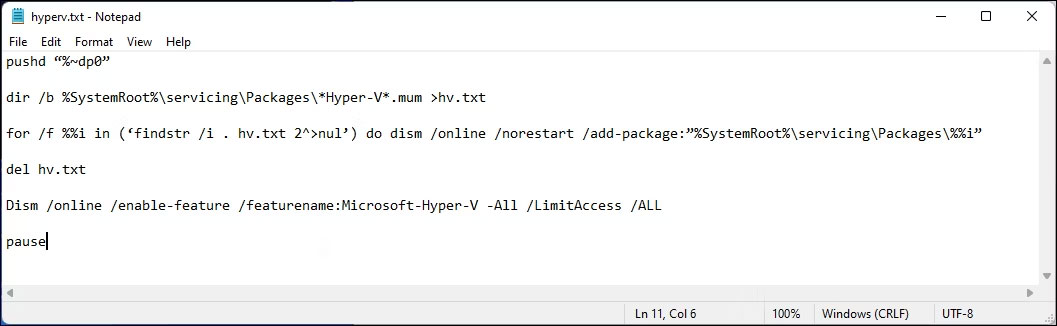
2. In the Notepad file, copy and paste the following script:
pushd "%~dp0"
dir /b %SystemRoot%servicingPackages*Hyper-V*.mum >hyper-v.txt
for /f %%i in ('findstr /i . hyper-v.txt 2^>nul') do dism /online /norestart /add-package:"%SystemRoot%servicingPackages%%i"
del hyper-v.txt
Dism /online /enable-feature /featurename:Microsoft-Hyper-V -All /LimitAccess /ALL
pause
3. Press Ctrl + S to open the Save dialog.
4. In the file name field, type hyperv.bat. The .bat extension at the end of the filename is crucial for the script to run.
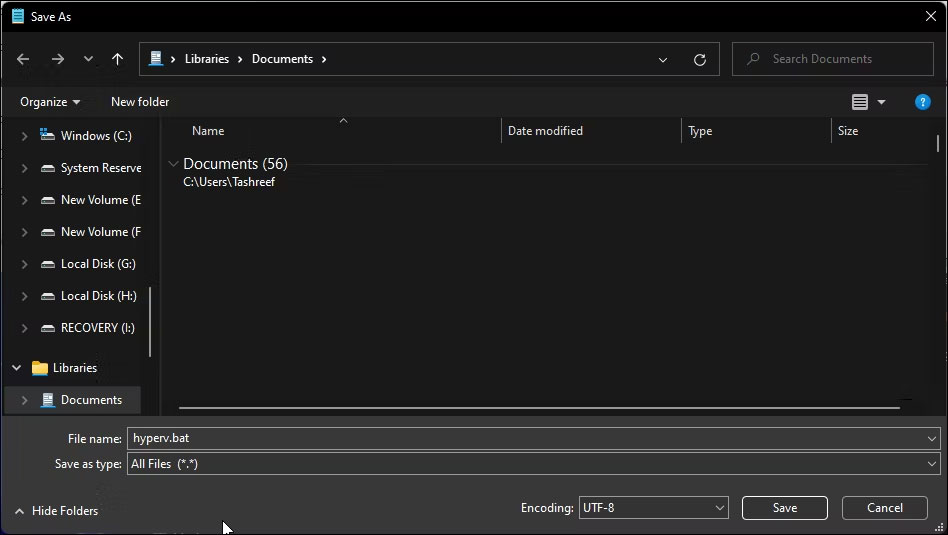
5. Next, click the Save as type drop-down menu and select All Files.
6. Click the Save button to save the file.
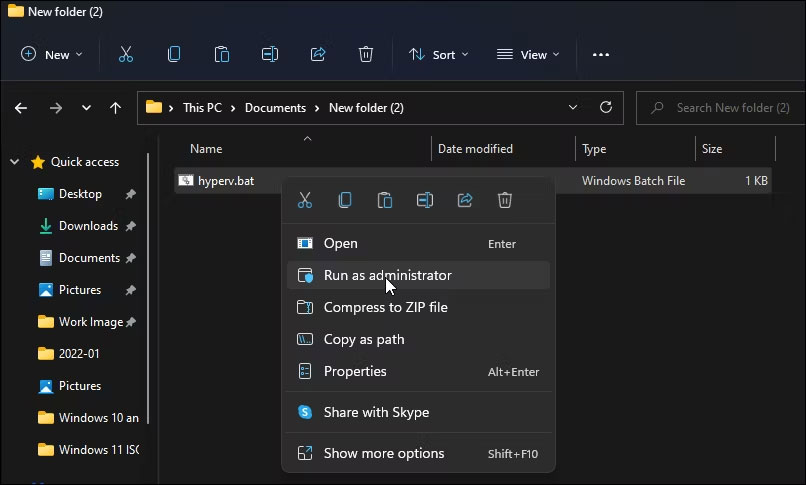
7. Then, right-click the hyperv.bat file and select Run as administrator. Click Yes if prompted by User Account Control.
8. The script will begin executing in CMD to install Hyper-V. This may take a while, so please wait until the process is complete.
9. Once the process is finished, you will receive the message "Operation completed successfully."
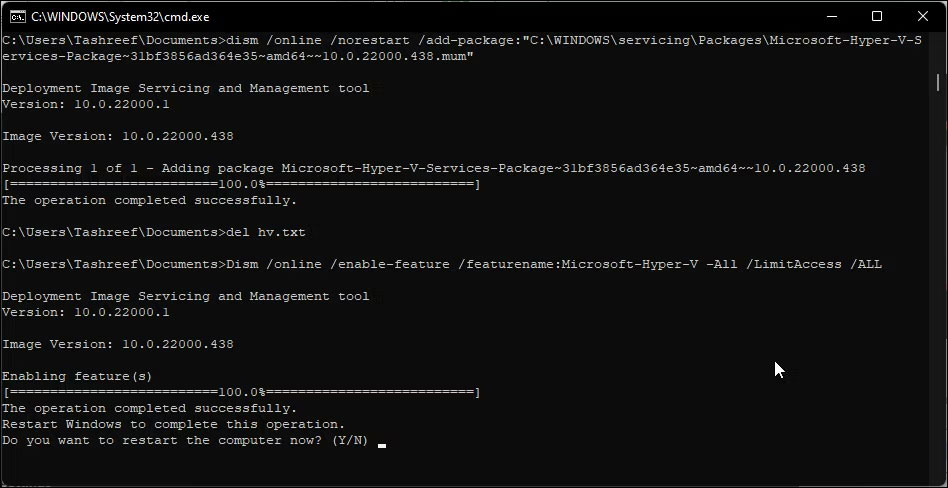
10. Type Y to confirm and restart your computer. Alternatively, type N to exit CMD.
Please note that you must restart your computer for the changes to take effect. After restarting, you should proceed to set up Hyper-V in Windows 11 Home. Type "Hyper-V" into the Windows search box and click on Hyper-V Manager to create a new virtual machine.
If it is still unavailable, you can enable Hyper-V through the Windows Features dialog, Command Prompt, or Windows PowerShell.
Here is how you can quickly add Hyper-V to Windows 11 using Command Prompt:
1. Press the Windows key and type cmd. Next, right-click on Command Prompt and select Run as administrator.
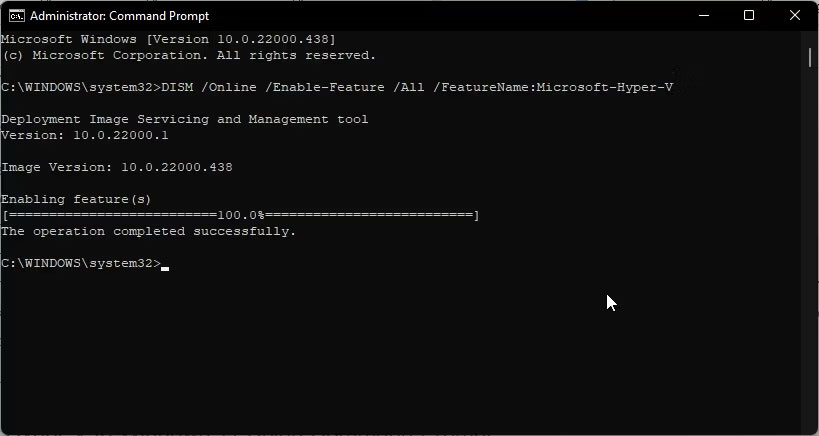
2. In the Command Prompt window, type the following command and press Enter:
DISM /Online /Enable-Feature /All /FeatureName:Microsoft-Hyper-V
3. This command uses the Deployment Imaging Service and Management (DISM) tool to enable Microsoft Hyper-V along with the necessary dependencies on your Windows system. The message "Operation completed successfully" indicates that you have successfully enabled Hyper-V.
By quantrimang











