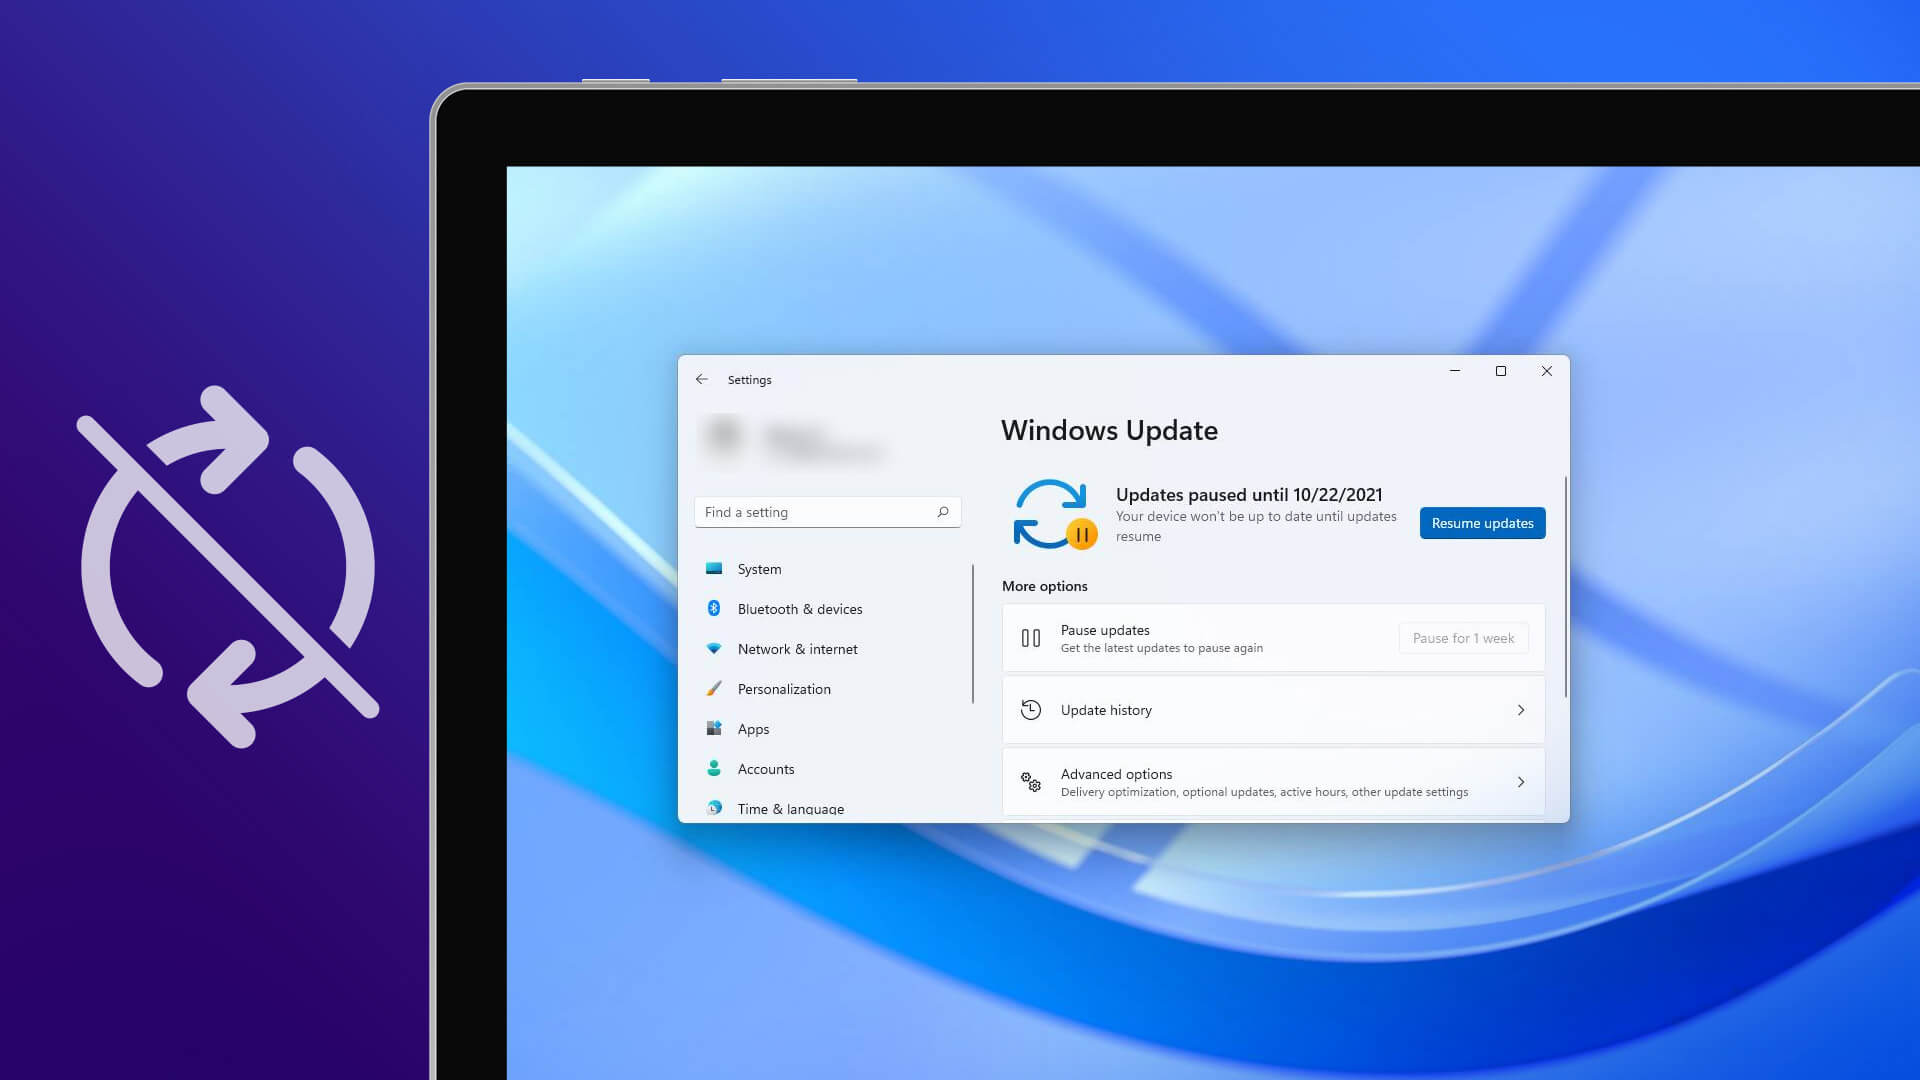
When using the Windows operating system, regular updates are critical for maintaining security and performance. However, not everyone is a fan of the Windows Auto Update feature, particularly new users who may find its sudden changes disruptive. Many users prefer to have more control over when and how updates occur rather than leaving it entirely to the system, creating a need for methods to pause or disable this feature. In this article, we will take a detailed look at how to disable Windows Update, ranging from the most basic steps to useful tips for managing updates on Windows 11.
Disabling Windows Auto Update might sound complicated, but it actually isn't. For many users, constant update notifications can be a nuisance, especially during important work sessions or gaming. Windows provides several options that allow users to choose the approach that best fits their needs.
How to Pause Windows Auto Update on Windows 11
Windows 11 allows users to pause the download of new updates for up to 21 days. To do this, follow these steps:
- Open the Start menu and select Settings.
- Navigate to Windows Update.
- Under the Pause updates section, select Pause for 1 week to delay updates for one week.
- (Optional) Or, click the dropdown arrow to select Extend for 2 weeks or Extend for 3 weeks.
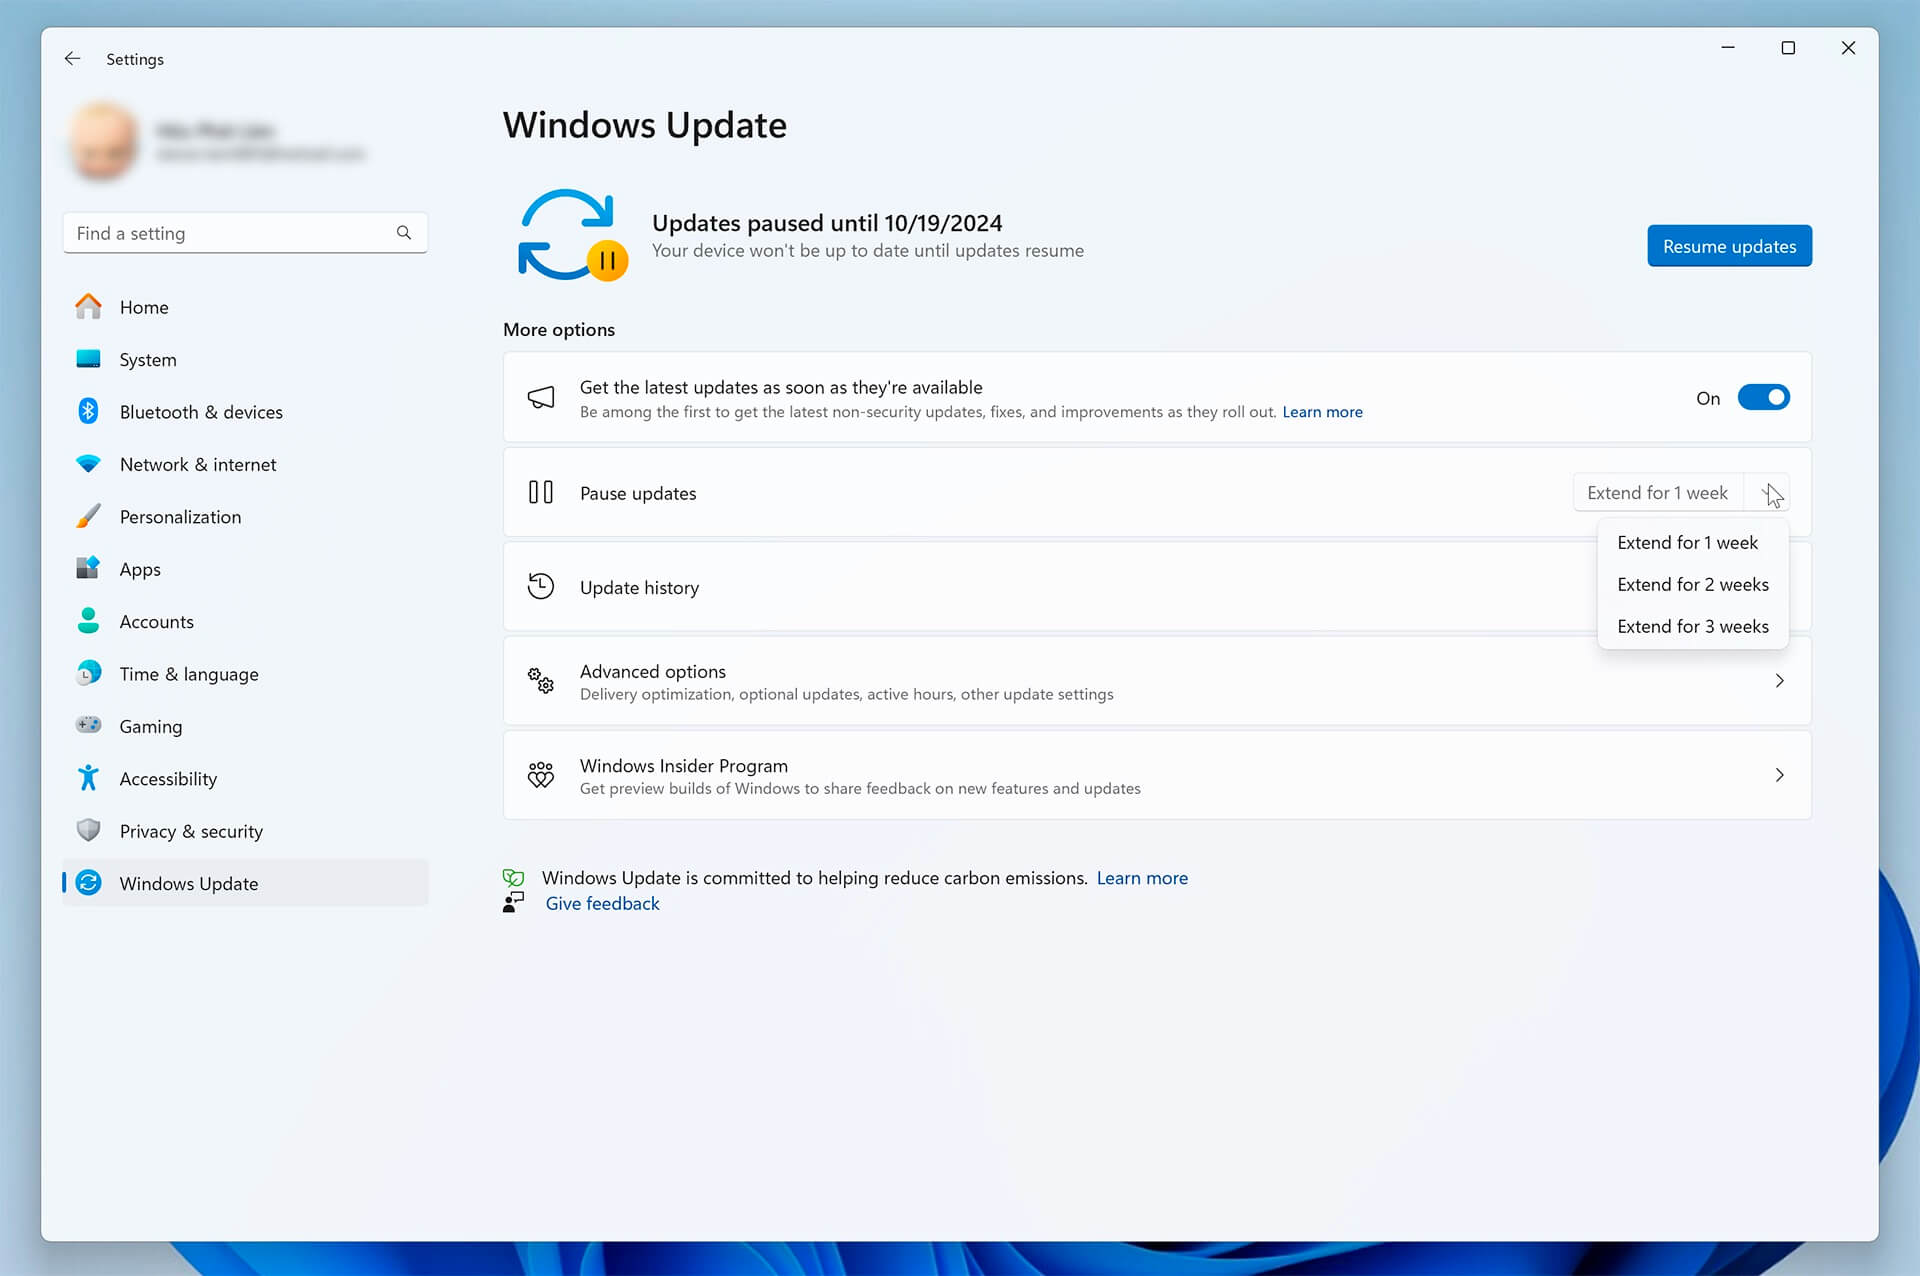
Unlike Windows 10, which offered a 35-day pause, Windows 11 limits the delay to a maximum of three weeks.
Adjusting Restart Times for Windows Auto Update
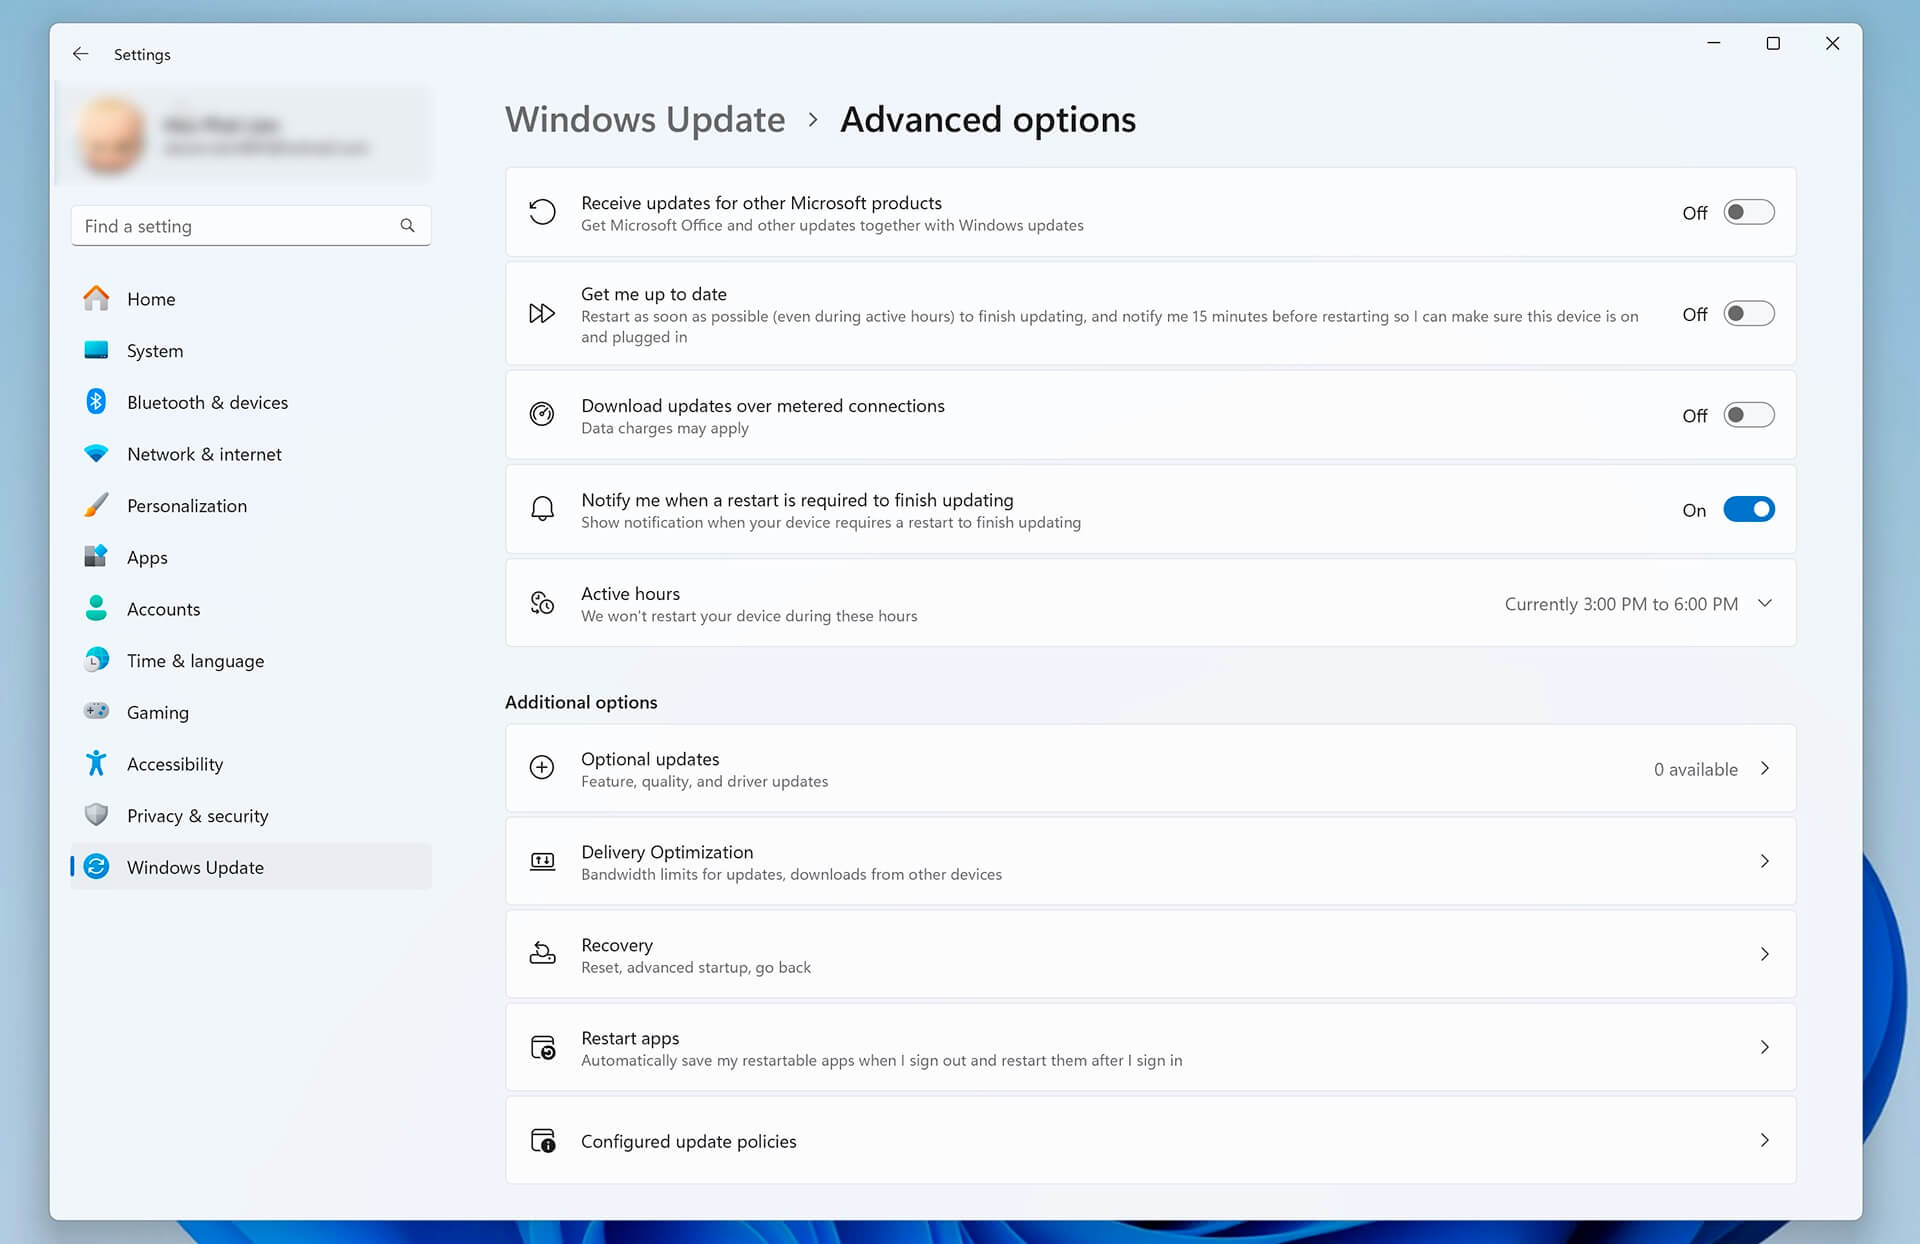
Beyond pausing updates entirely, users can also adjust the device restart schedule to better suit their workflow. Restarting is the final step in completing a Windows 11 update; while this usually takes a few minutes, it can sometimes take several hours. If you want to allow your computer to download updates but need to control when the restart happens, try this:
- In the Windows Update section, select Advanced options.
- Toggle Notify me when a restart is required to finish updating to On.
- In the same window, scroll down to the Adjust active hours option and set your preferred restart window.
How to Completely Disable Windows Auto Update
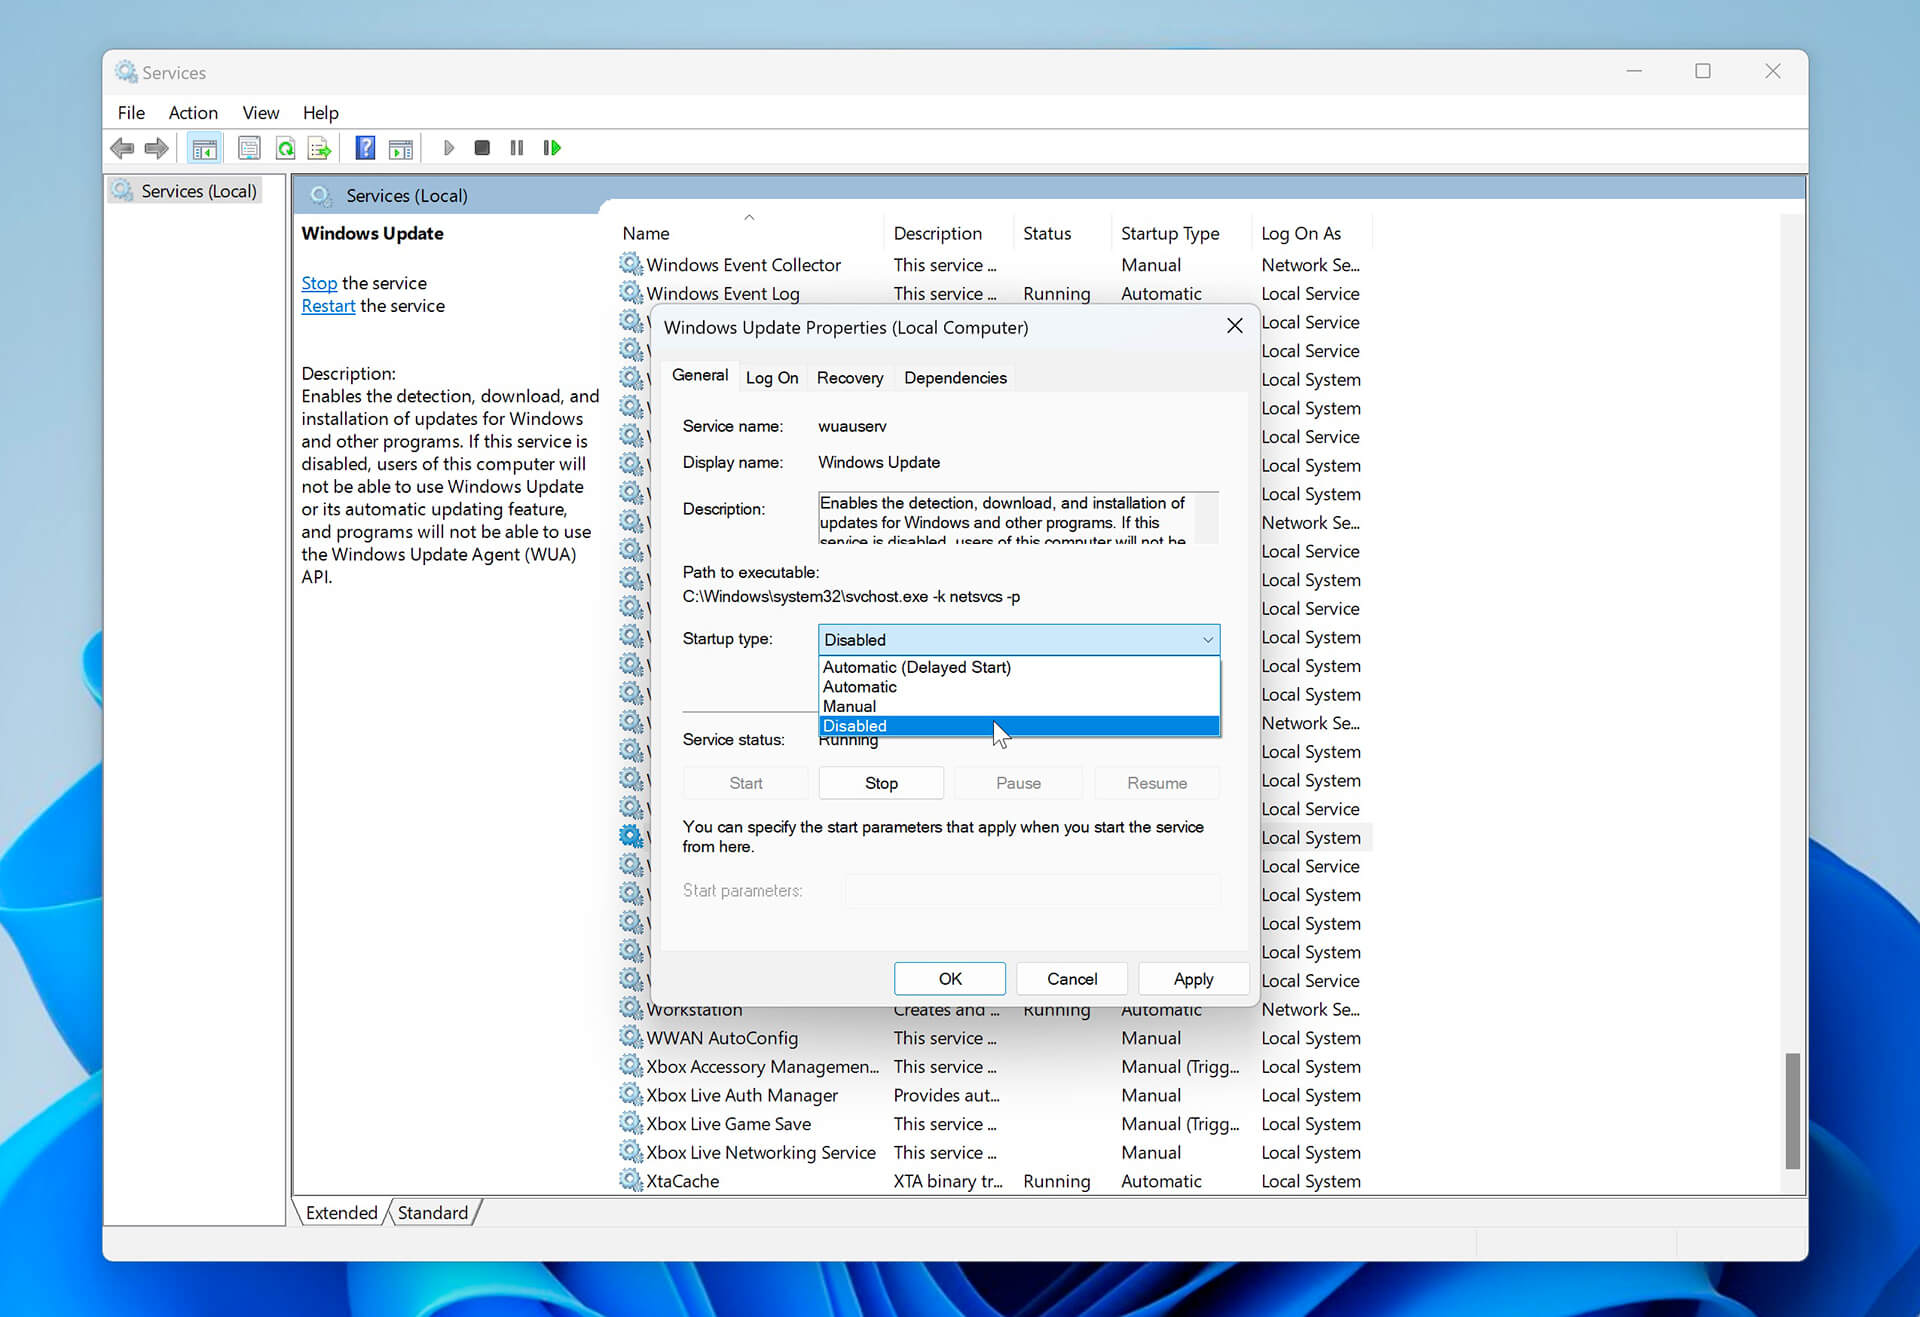
To permanently disable the Windows 11 update feature, follow these steps:
- Use the Windows + R keyboard shortcut to open the Run dialog, type services.msc, and press OK.
- Locate Windows Update in the list and double-click it to open its properties.
- Click the dropdown menu next to Startup type and select Disabled.
- Finally, click OK and restart your computer to complete the process.
Tips for Managing Windows Auto Update Effectively
To get the most out of Windows Auto Update without facing unexpected headaches, consider these tips. First, always keep an eye on available updates and read the release notes before deciding to download and install them.
Additionally, if you learn that a specific update is causing issues for others, pause your updates immediately until you can verify its stability. This proactive approach helps you avoid unnecessary troubleshooting and maintains system stability.
Finally, you might consider joining a Microsoft beta program to test updates before they are released to the general public. This allows you to get a head start on new features and identify potential bugs before they impact your primary system.
Summary: Pausing or Disabling Windows Auto Update
Managing Windows Auto Update and Windows Update is not a simple task, but by using these methods to pause or completely disable the feature, users can gain much better control over their Windows 11 experience. We hope this guide has provided you with the knowledge needed to effectively manage updates on your device. Regardless of which method you choose, ensure you continue to prioritize system security and safety throughout your usage.
By ReviewLaptop