

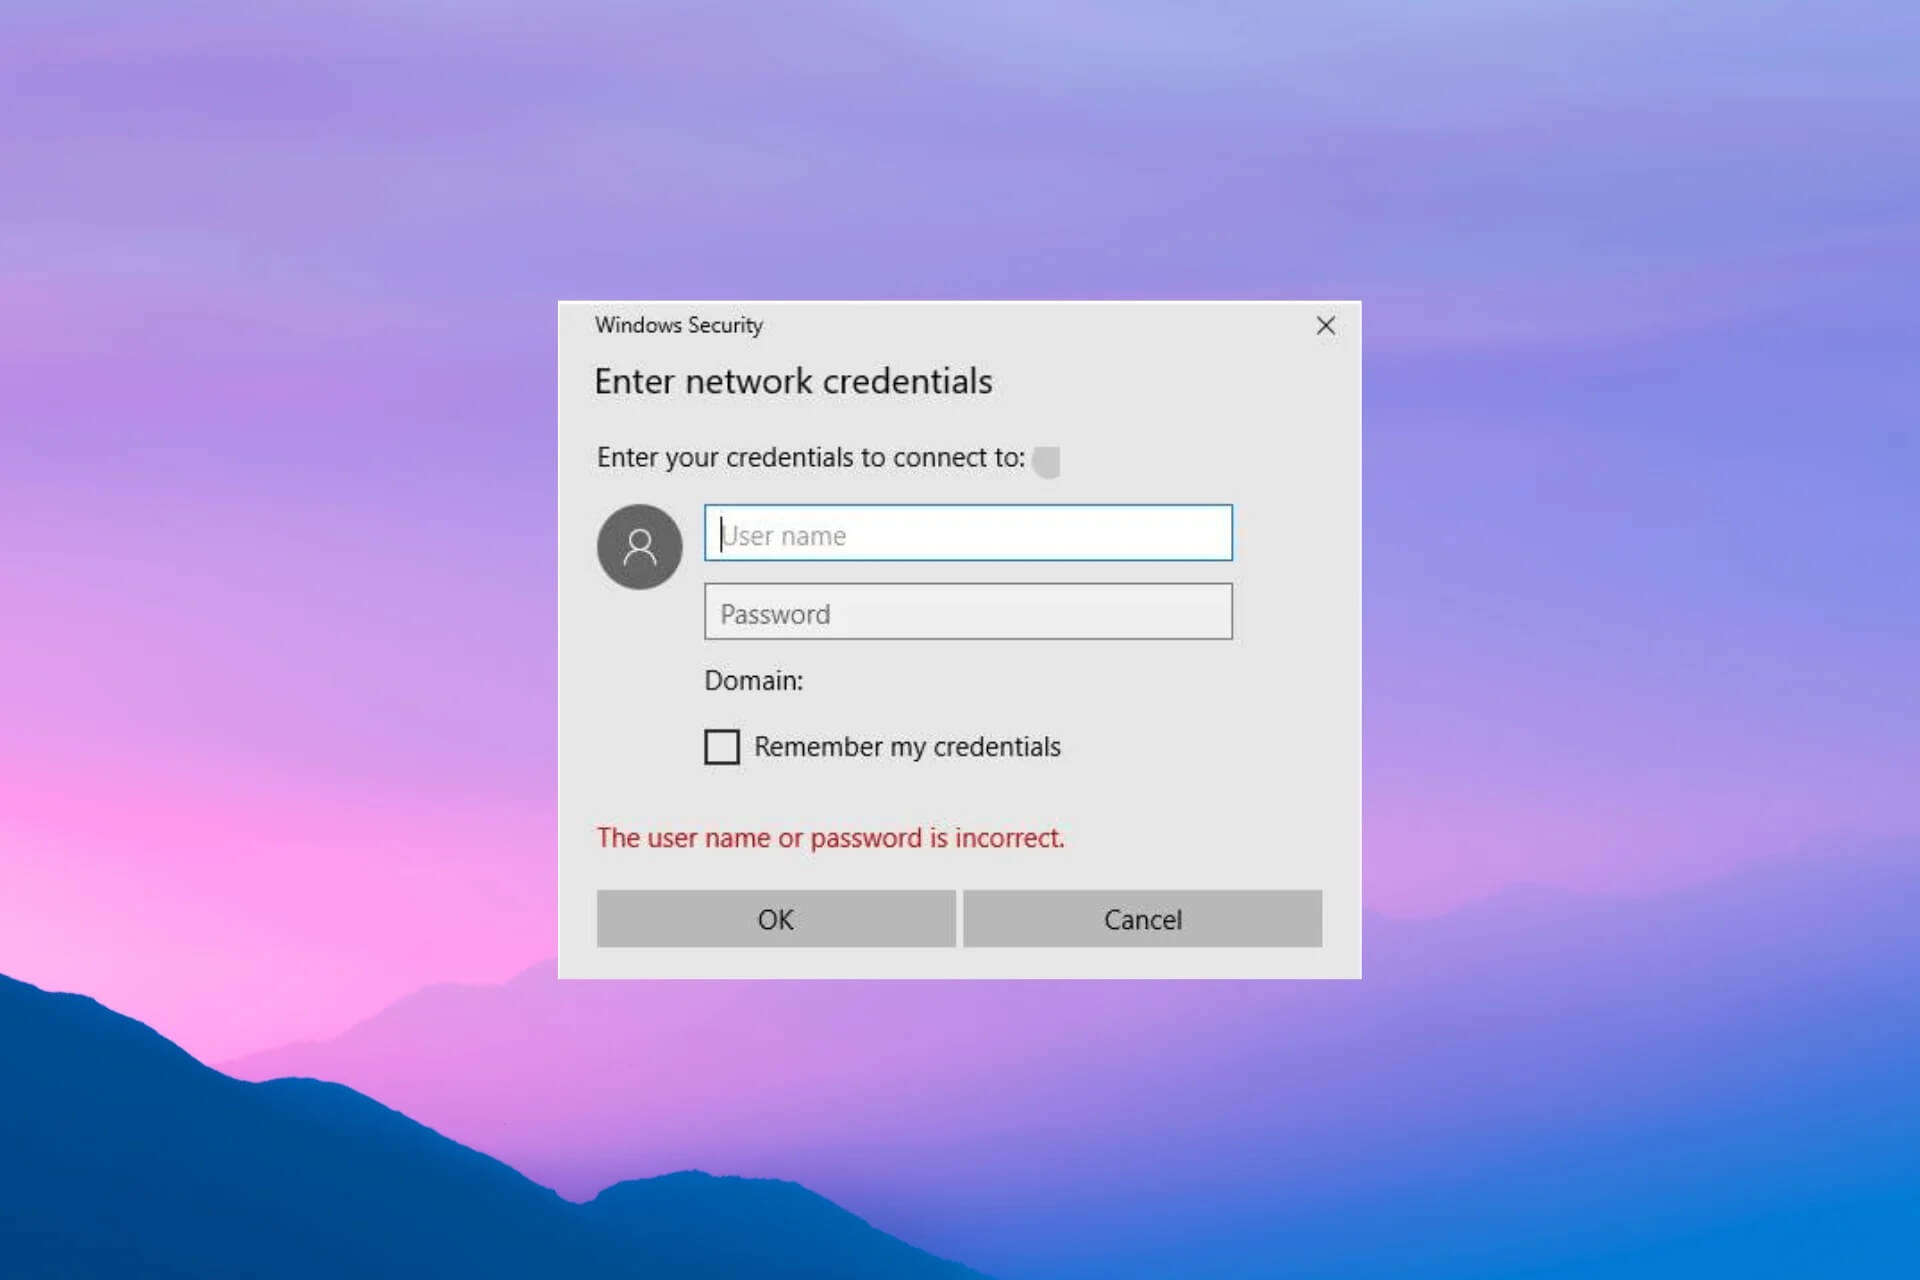
Network authentication information on your PC is very important because it prevents others from using your computer on the network. While this feature is essential for protecting your important files and improving overall system security, it can sometimes cause issues.
A common problem is when the network Credential Manager continuously displays the "Enter Network Credentials" dialog box, even when you enter the correct credentials. In this guide, we will walk you through several troubleshooting methods you can try to resolve this issue completely.
1. Modify Advanced Sharing settings
Incorrectly configured Advanced Sharing settings are one of the most common causes of this error. Ideally, your PC should be allowed to manage homegroup connections. You can also use the Advanced Sharing settings page to turn off password-protected sharing, which will allow you to share files without logging in.
Here is how you can correctly configure the Advanced Sharing settings:
1. Locate the network icon on your taskbar, right-click it.
2. Select Network and Internet settings from the context menu.
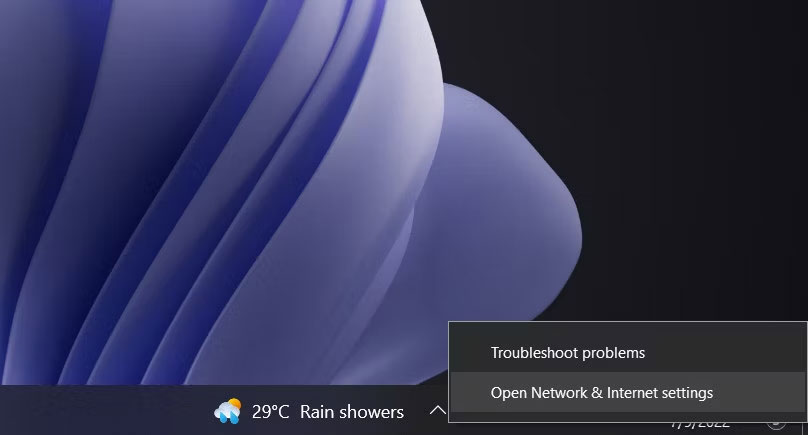
3. In the next window, select Network and Sharing Center.
4. Select the Change advanced sharing settings option on the left.
5. Now, turn on the Allow Windows to manage homegroup connections (recommended) option under Homegroup connections.
6. Click Save changes (you will need admin privileges for this).
7. Now, expand the All Networks section and turn on the Turn off password protected sharing option.
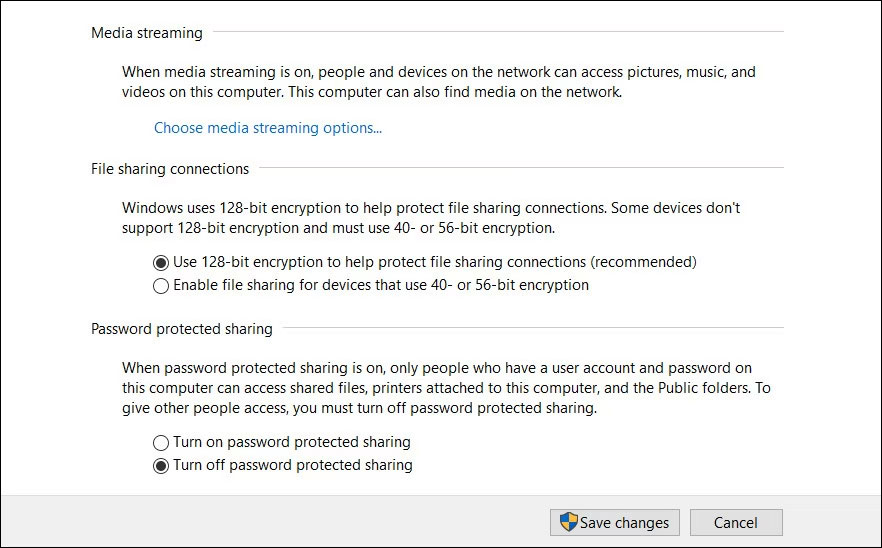
8. Click the Save changes button to complete the process.
After you transfer the files, turn password-protected sharing back on so that others cannot easily access your PC.
2. Use Microsoft account credentials or computer name
You can also try logging into the target PC using your Microsoft account credentials instead of a local username and password.
Additionally, you can try using the name of the computer you are using along with your username in the text field associated with Username. Do not enter spaces, hyphens, or any other symbols between the names.
If the issue is related to login information, one of these two methods may help you eliminate the problem permanently.
3. Manually add target computer credentials to Credential Manager
Another way to fix the issue is to manually add the target computer's credentials to Credential Manager and see if that makes a difference.
Here is how you can do it:
1. Type "Credential Manager" into Windows Search and click Open.
2. Select Windows Credential and click Add a Windows Credential.
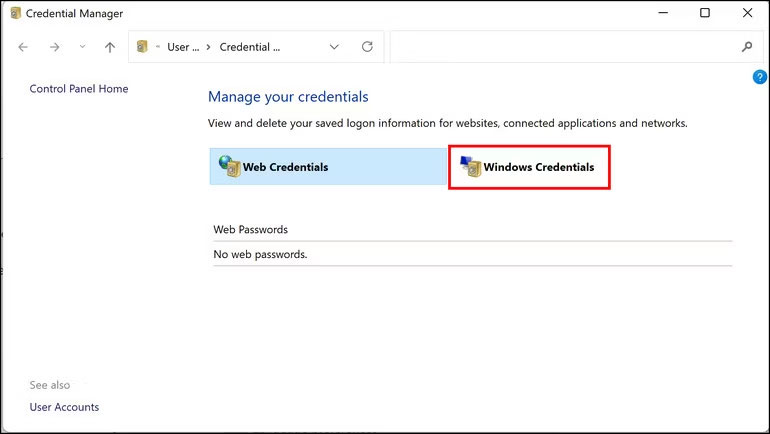
3. Now, add the username, computer name, and password of the computer you are trying to access. Check if you can now successfully share files with the other device.
4. Create a new user account on both devices
Sometimes a user account becomes corrupted, preventing you from performing certain actions. If this happens on your PC or the target computer, it can disrupt the file sharing process.
To fix this issue, first, try switching to a different user account on your computer to see if that works. If this strategy is unsuccessful, you should create a new user account on both devices with the same username and password. Ensure that both accounts have admin privileges. While doing this, you should temporarily disable any third-party antivirus programs you may be using, as they can sometimes block network access.
If the root of the problem is a corrupted user account, this should be enough to fix the issue.
5. Restart the Credential Manager service
The issue may also occur with the Credential Manager service itself rather than the target computer or the network settings on your device. In this method, we will first activate the Credential Manager service if it is disabled.
If it is already running, proceed to restart the service and see if that works. Here is what you need to do:
1. Press Win + R to open Run.
2. Type services.msc into Run and press Enter.
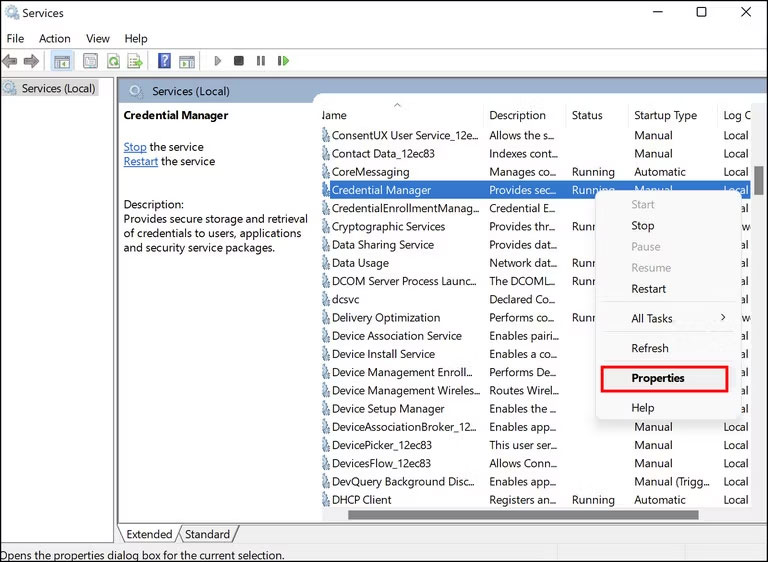
3. In the next window, find the Credential Manager service and right-click on it.
4. Select Properties from the context menu.
5. If the service is disabled, click the Start button to activate it.
6. If the service is already running, click the Stop button, wait a few seconds, and then press the Start button.
7. Ensure that the Startup type is set to Automatic.
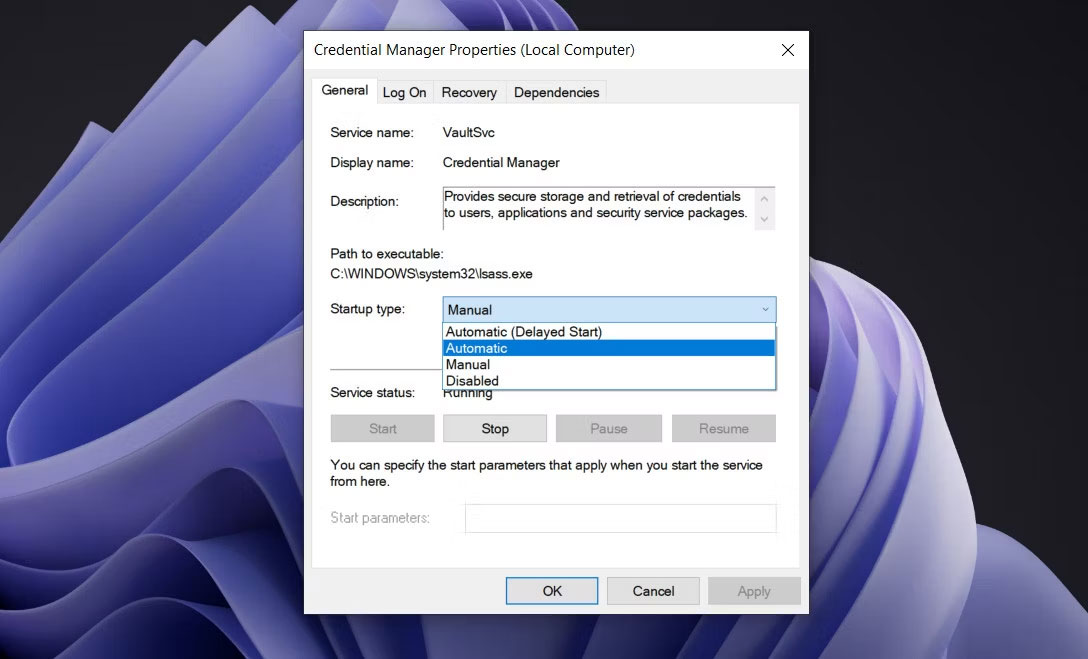
8. Click Apply > OK to save the changes.
Now, try connecting to the target computer and see if you can do so without any issues.
6. Make changes to Local Security Policy
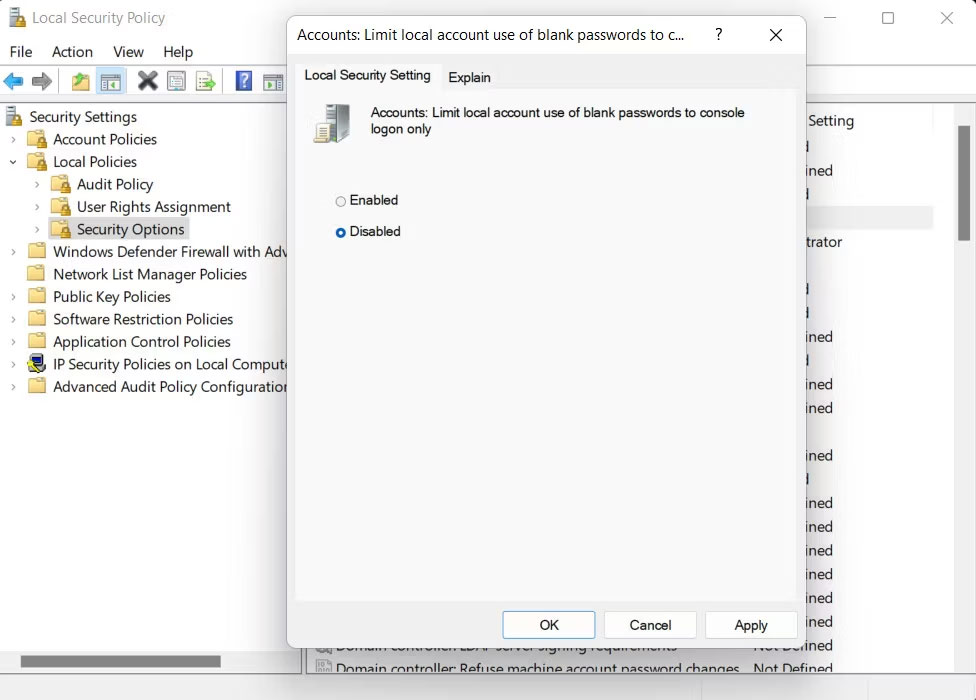
Some users have also attempted to fix the issue by modifying the "Accounts: Limit local account use of blank passwords to console logon only" policy setting. Here is how you can try this:
1. Press the Win + R keys to open Run.
2. Type "secpol.msc" into Run and press Enter.
3. In the window, navigate to the following location:
Local Policies > Security Options > Accounts: Limit local account use of blank passwords to console logon only4. Select Disabled and click Apply > OK to save the changes.
5. Restart your computer and check if the issue has been resolved.
7. Try using Safe Mode With Networking
If the credentials you are entering and all network configurations on the system are correct, a system-level error may have occurred.
In this case, you can boot into Safe Mode to identify the cause of the problem. Safe Mode starts Windows with only the basic drivers and applications-the essentials required for the operating system to function.
There are several types of Safe Mode, including Minimal, Alternate Shells, Active Directory Repair, and Network. In this method, we will boot Windows into Safe Mode With Networking. This mode launches Windows with the drivers and programs necessary to connect your system to the Internet or other devices via a network.
If the current error does not appear in Safe Mode, it is likely that malware or another software issue is causing the problem. Here is what you need to do:
1. Go to the Start menu and click the Power button.
2. Select Restart while holding the Shift key.
3. Wait for Windows to boot into the recovery mode, then select Troubleshoot > Advanced Options.
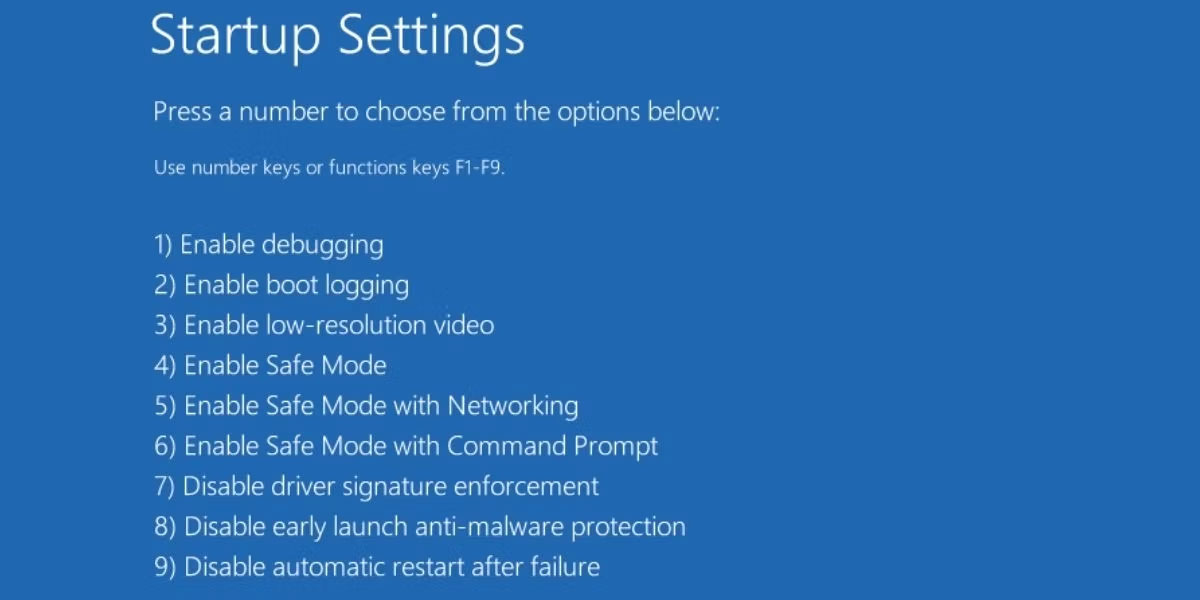
4. Navigate to Startup Settings > Restart.
5. In the next window, press the F5 key on your keyboard to boot into Safe Mode With Networking.
6. After logging into Safe Mode, try connecting to the device you were previously trying to connect to. If the error does not appear in Safe Mode, you may want to report this issue to the official Microsoft support team and wait for them to fix it.
If you cannot access this Windows state using the steps mentioned above, you can try other ways to boot into Safe Mode.











