Do you need to find your laptop model or Windows computer? Perhaps you are looking for device drivers, need manufacturer support, or have just received a new machine and want to verify if the configuration matches what you ordered. Whatever the reason, it is very easy to find, and there are many different ways to do it.
Depending on your Windows version, you can use Windows PowerShell, Command Prompt, the System Information window, Windows Settings, or third-party software. If you are preparing to receive a new machine at a store, the article 15 steps to check a new laptop before receiving it will help you verify the serial number, appearance, battery, and warranty.
1. Use Windows PowerShell to find your laptop model
This is the method recommended by Microsoft and works on all versions of Windows 10 and Windows 11, including recently manufactured machines.
Here are the steps to follow:
1. In the Windows search box, type Windows PowerShell and click its icon to open it.
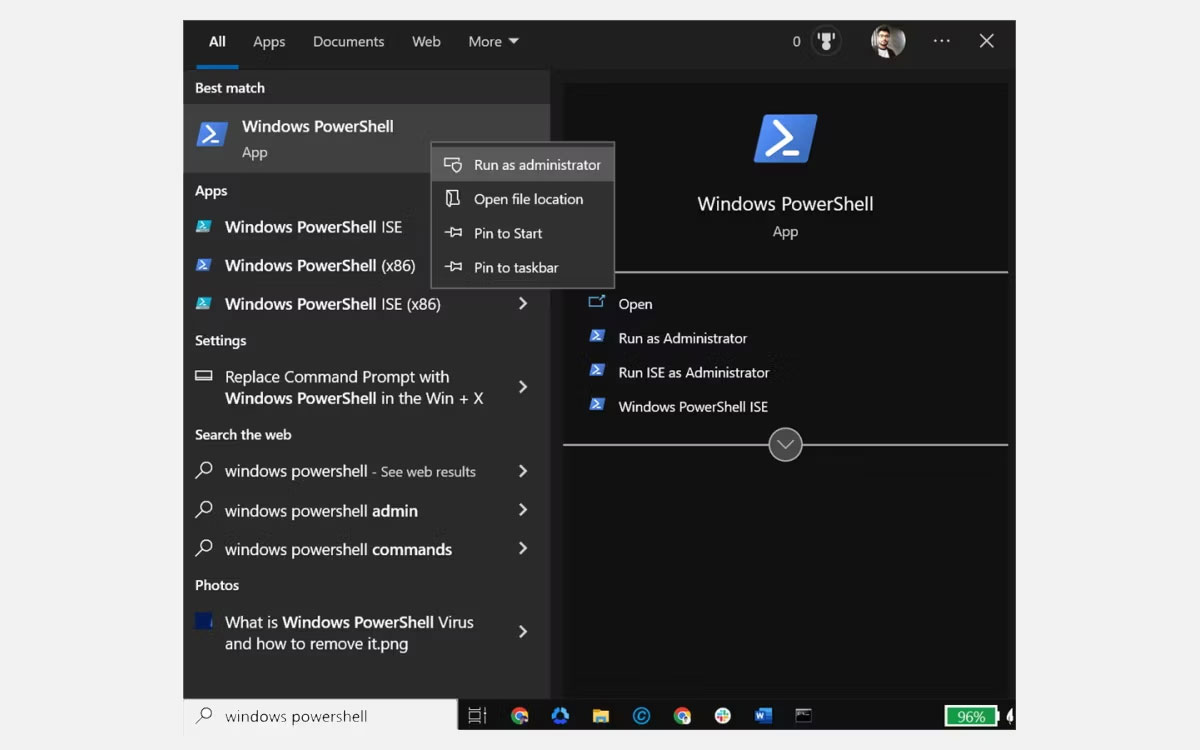
2. Once the PowerShell window opens, type the command Get-CimInstance Win32_ComputerSystemProduct | Select Name and press Enter.
3. Your laptop model will be displayed directly on the screen.
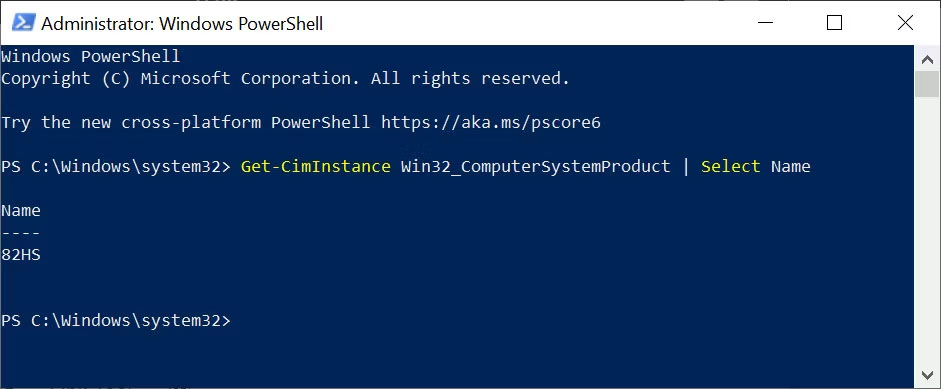
This command only reads system information, so no administrator privileges are required. If you want to see the machine's serial number, replace the command with Get-CimInstance Win32_BIOS; the serial number will appear under the SerialNumber field.
2. Check laptop model using Windows Command Prompt
This method is familiar to many, but you need to know one important change: Microsoft has stopped pre-installing the wmic tool starting from Windows 11 version 24H2. On recently manufactured machines, the command below will return an error; in that case, go back to using PowerShell as described in method 1.
Here are the steps to follow:
1. In the Windows search box, type Command Prompt and click its icon to open it.
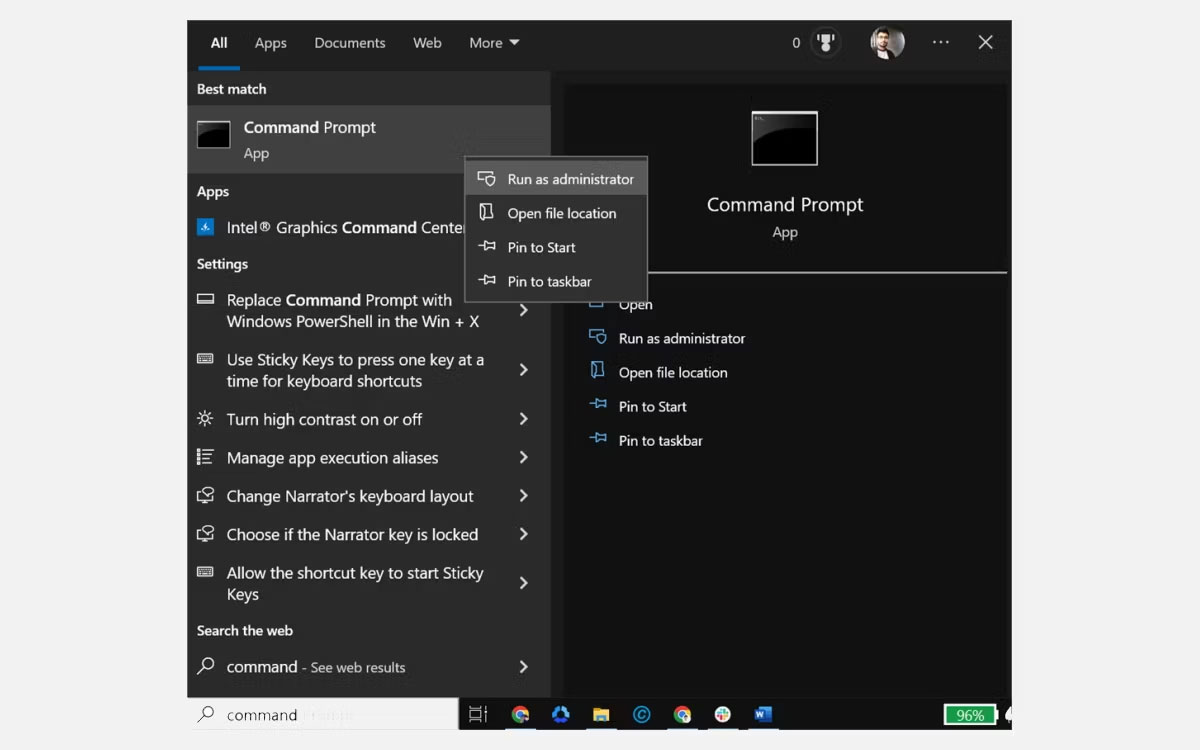
2. When the Command Prompt window launches, type the command wmic csproduct get name and press Enter.
3. The laptop model number will appear on the screen.
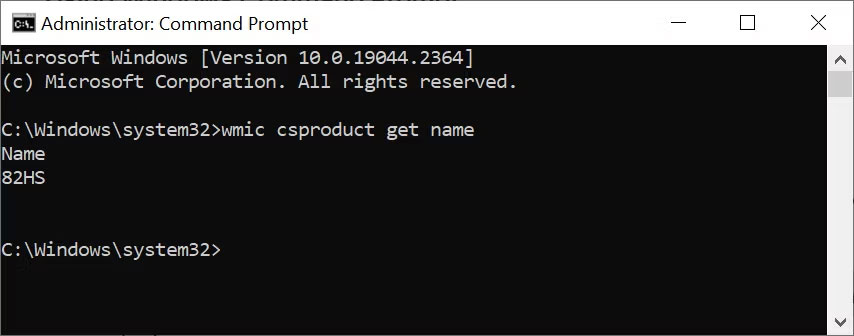
This command also does not require administrator privileges because it only reads information. If the machine displays 'wmic' is not recognized, it is a sign that your machine is running Windows 11 version 24H2 or higher; please switch to method 1.
3. Check machine model using System Information window
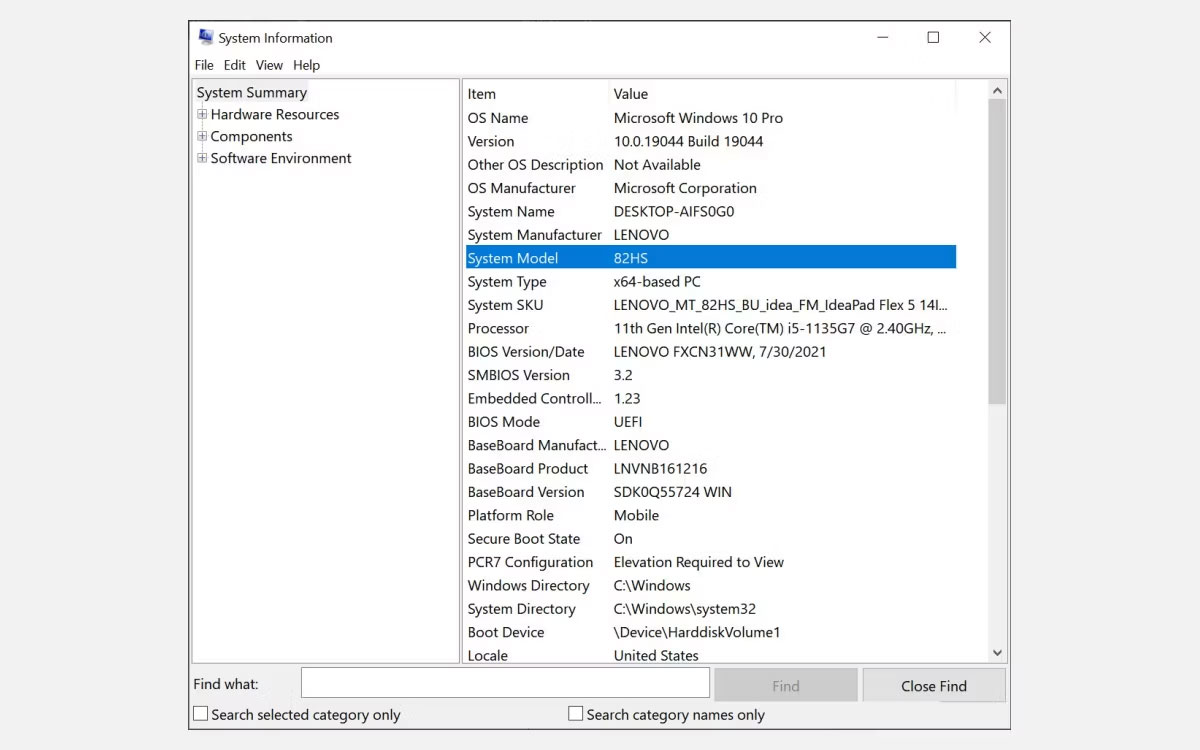
You can also use the System Information window to identify your laptop model. Here are the steps:
1. Open System Information by typing System Information in Windows Search and clicking its icon to launch it. You can also press Windows + R and type msinfo32 for a faster way.
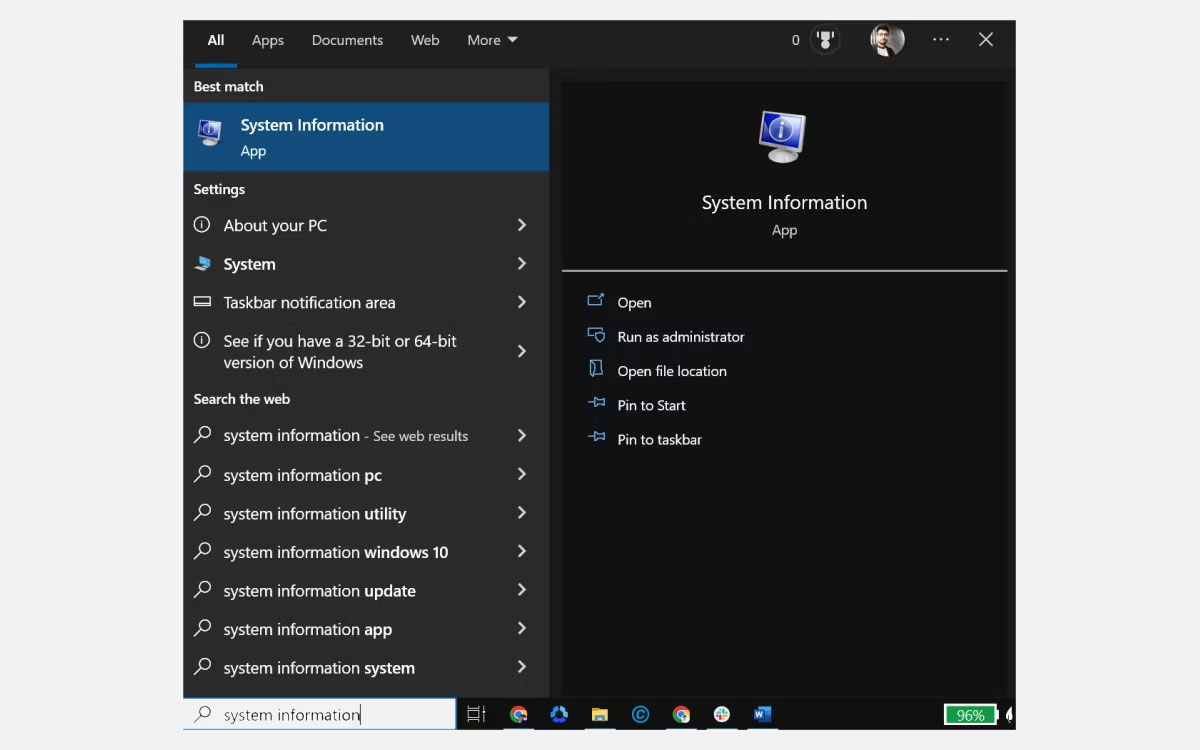
2. When the System Information window opens, switch to the System Summary tab on the left if you haven't already.
3. On the right, look for the System Model entry. That is your computer's model number.
4. Use Windows Settings to find laptop model (only works for Windows 11)
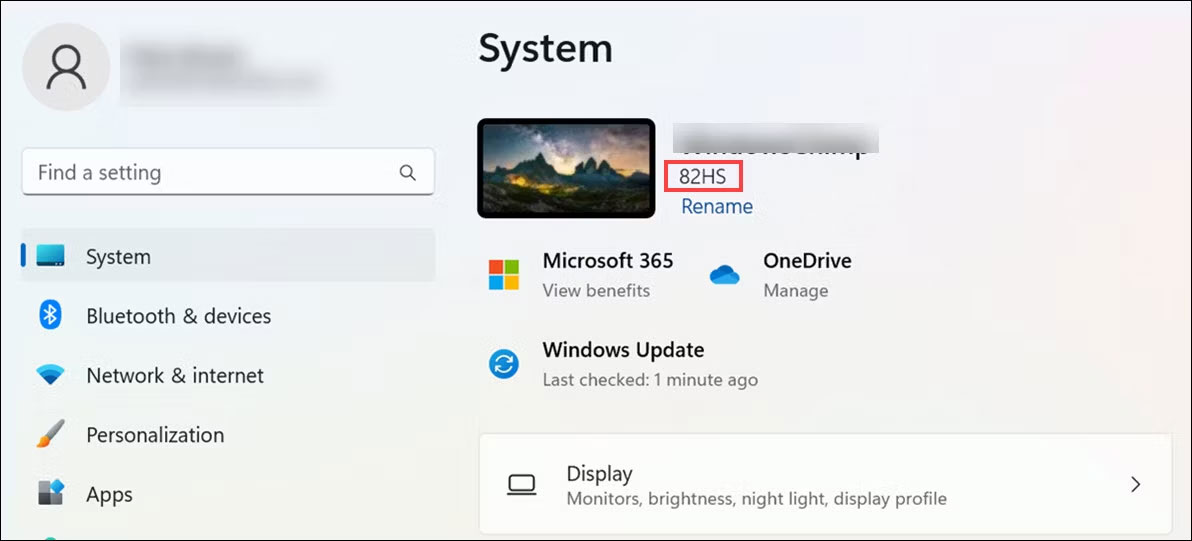
If your laptop or computer is running Windows 11, you can also use Windows Settings to look up the machine model.
Here is how to do it:
- On a Windows 11 system, click the Start button and select Settings from the Start menu.
- On the left, switch to the System tab if you haven't already. On the right, you will see the system model number located directly below the system name.
5. Check laptop model using DirectX Diagnostic Tool
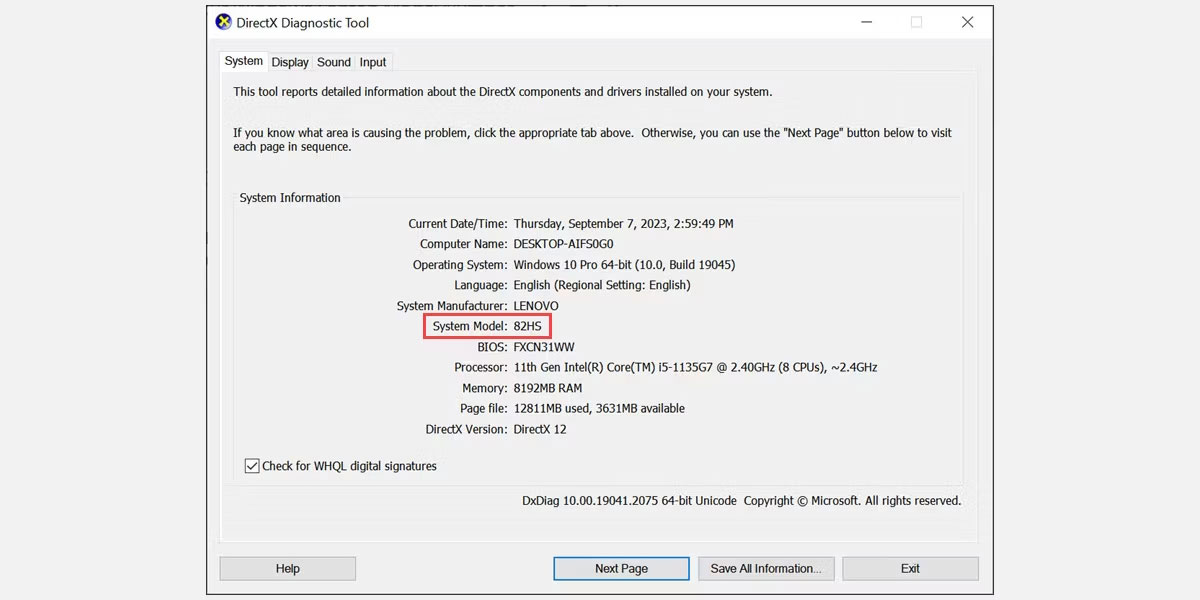
The DirectX Diagnostic Tool, commonly referred to as DXDiag, is a built-in Windows utility that allows you to collect information about the DirectX components and drivers installed on your machine. You can also use it to find your laptop model.
Here are the steps to perform this:
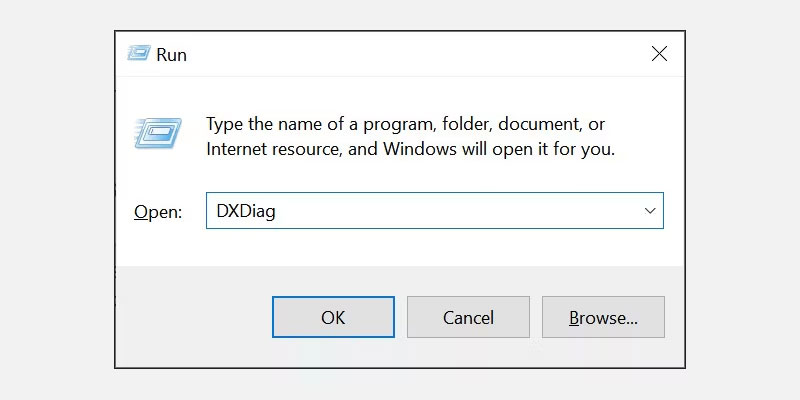
1. On your laptop, press Windows + R to launch the Windows Run dialog.
2. Type DXDiag and press Enter. This will open the DirectX Diagnostic Tool window.
3. In the System Information section of the System tab, look for the System Model line. Next to it is your laptop model number.
6. Check the model number from the manufacturer's website
Popular manufacturers like Lenovo, Dell, HP, and many others have online platforms that automatically identify the model, serial number, and other machine information. You simply need to visit the manufacturer's support page and use the auto-detect feature, or log into your account to view device details. If you are wondering whether your machine is an official product or an imported one, the article distinguishing between official, imported, and refurbished laptops will help you understand the differences in warranty.
Here are the steps on a Lenovo laptop:
1. Visit the Lenovo support website.
2. Next, click on the Detect Product section.
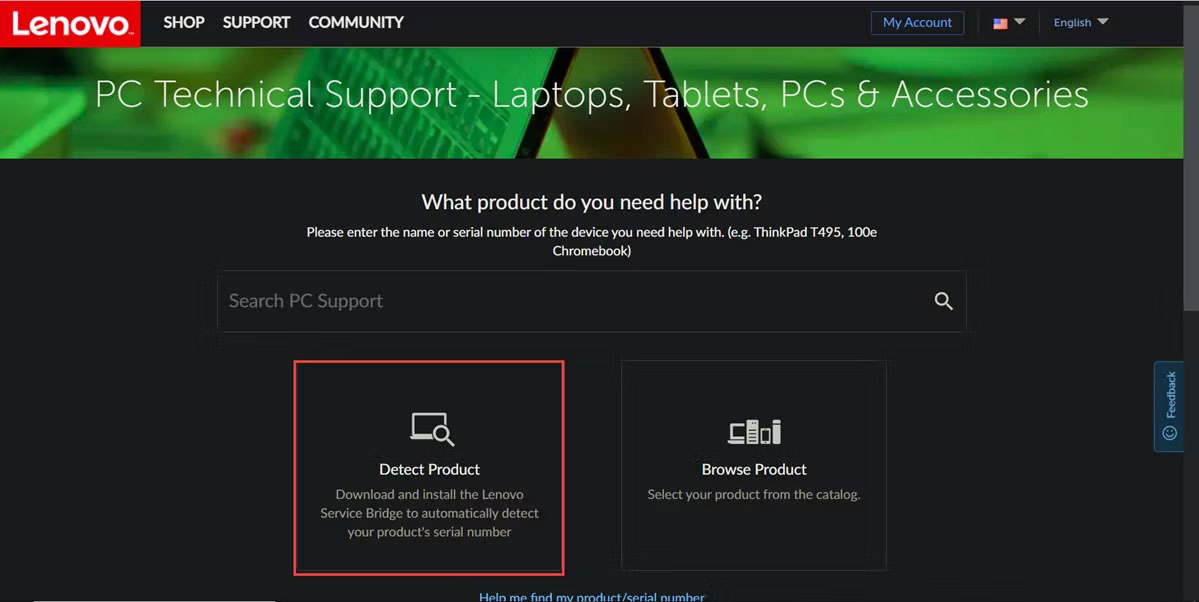
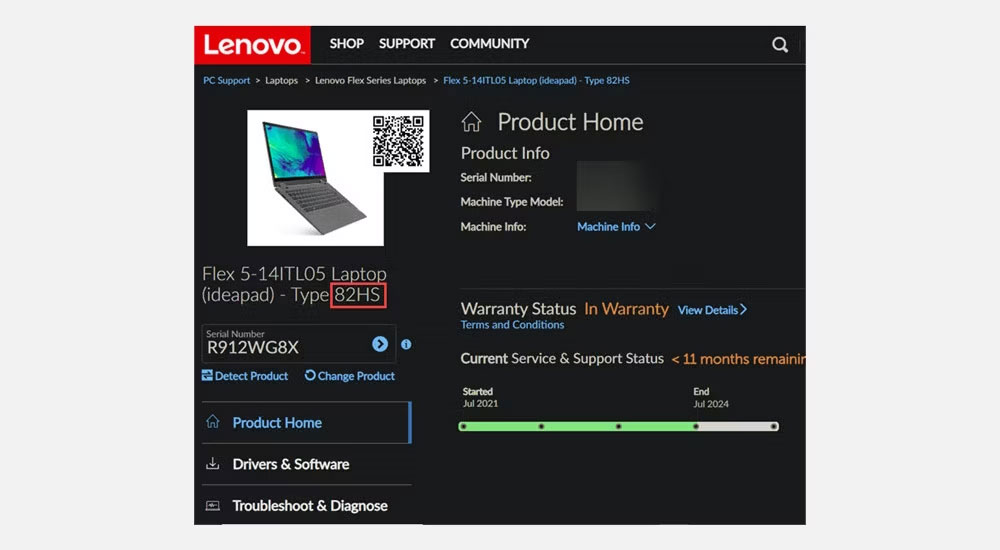
3. The website will automatically detect your device.
4. Now, you can view the machine model in the Product Home section, right next to the device name.
7. Use BIOS to display the model number
You can also find your machine model by accessing the BIOS. Here are the steps:
- Restart your laptop and press the hotkey immediately on the first boot screen to enter BIOS. This key varies by manufacturer, typically F2, Del, F10, or Esc; you can check your user manual or look for the text appearing on the boot screen.
- When the BIOS window opens, look for the System Information section. The laptop model number will be located there.
This method is useful when the machine has no operating system installed, or when you want to verify the model immediately upon receiving a new machine before booting into Windows.
8. Use third-party software to check your laptop model
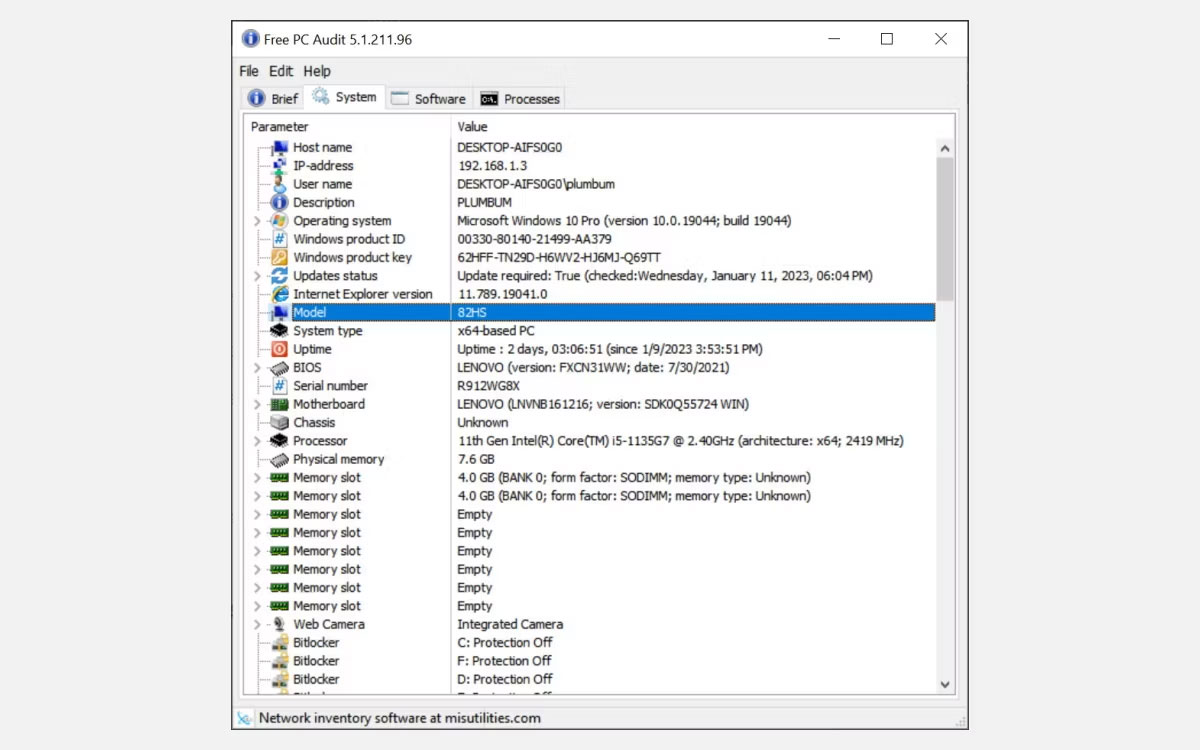
You can also download third-party software like Free PC Audit to find your Windows laptop model.
Here are the steps:
- Download Free PC Audit to your Windows laptop or desktop.
- Upon launching, the software will scan system components and display all information in a report.
- Simply switch to the System tab and look for the laptop model.
You should only download this type of software from the developer's official website. The first four methods mentioned above are built into Windows and are therefore safer; you only need this method if the others are unavailable.
9. Check the back of the laptop
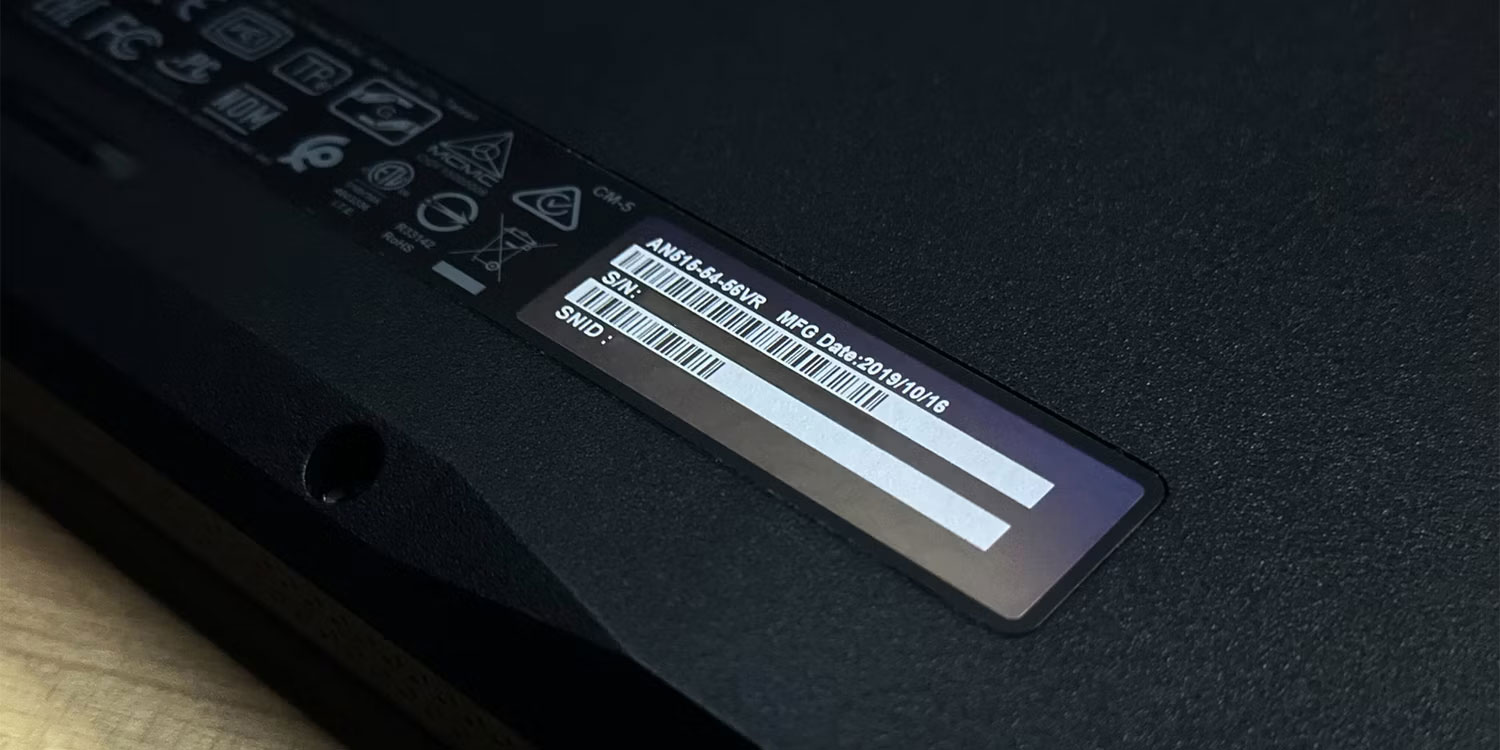
If you cannot use any of the methods above, you can flip your laptop over. Typically, all laptops have the model number printed on this side.
You will find a sticker or label containing the device's identification and model information. Once you have located this label, simply read the model number printed on it.
10. Check the battery compartment
The laptop model may also be printed inside the battery compartment. This method is particularly useful if the sticker on the back has been removed or has faded over time.
To find the battery compartment, first remove the screws holding the bottom cover or remove the laptop's back panel. Then, remove the battery and inspect the area around the battery compartment for the model number.
With these simple methods, you can easily find your Windows computer model. If you need to further verify the configuration after knowing the model, you can refer to Microsoft's guide to viewing Windows device information, or read more laptop buying experiences in Ho Chi Minh City if you are preparing to upgrade your machine.