

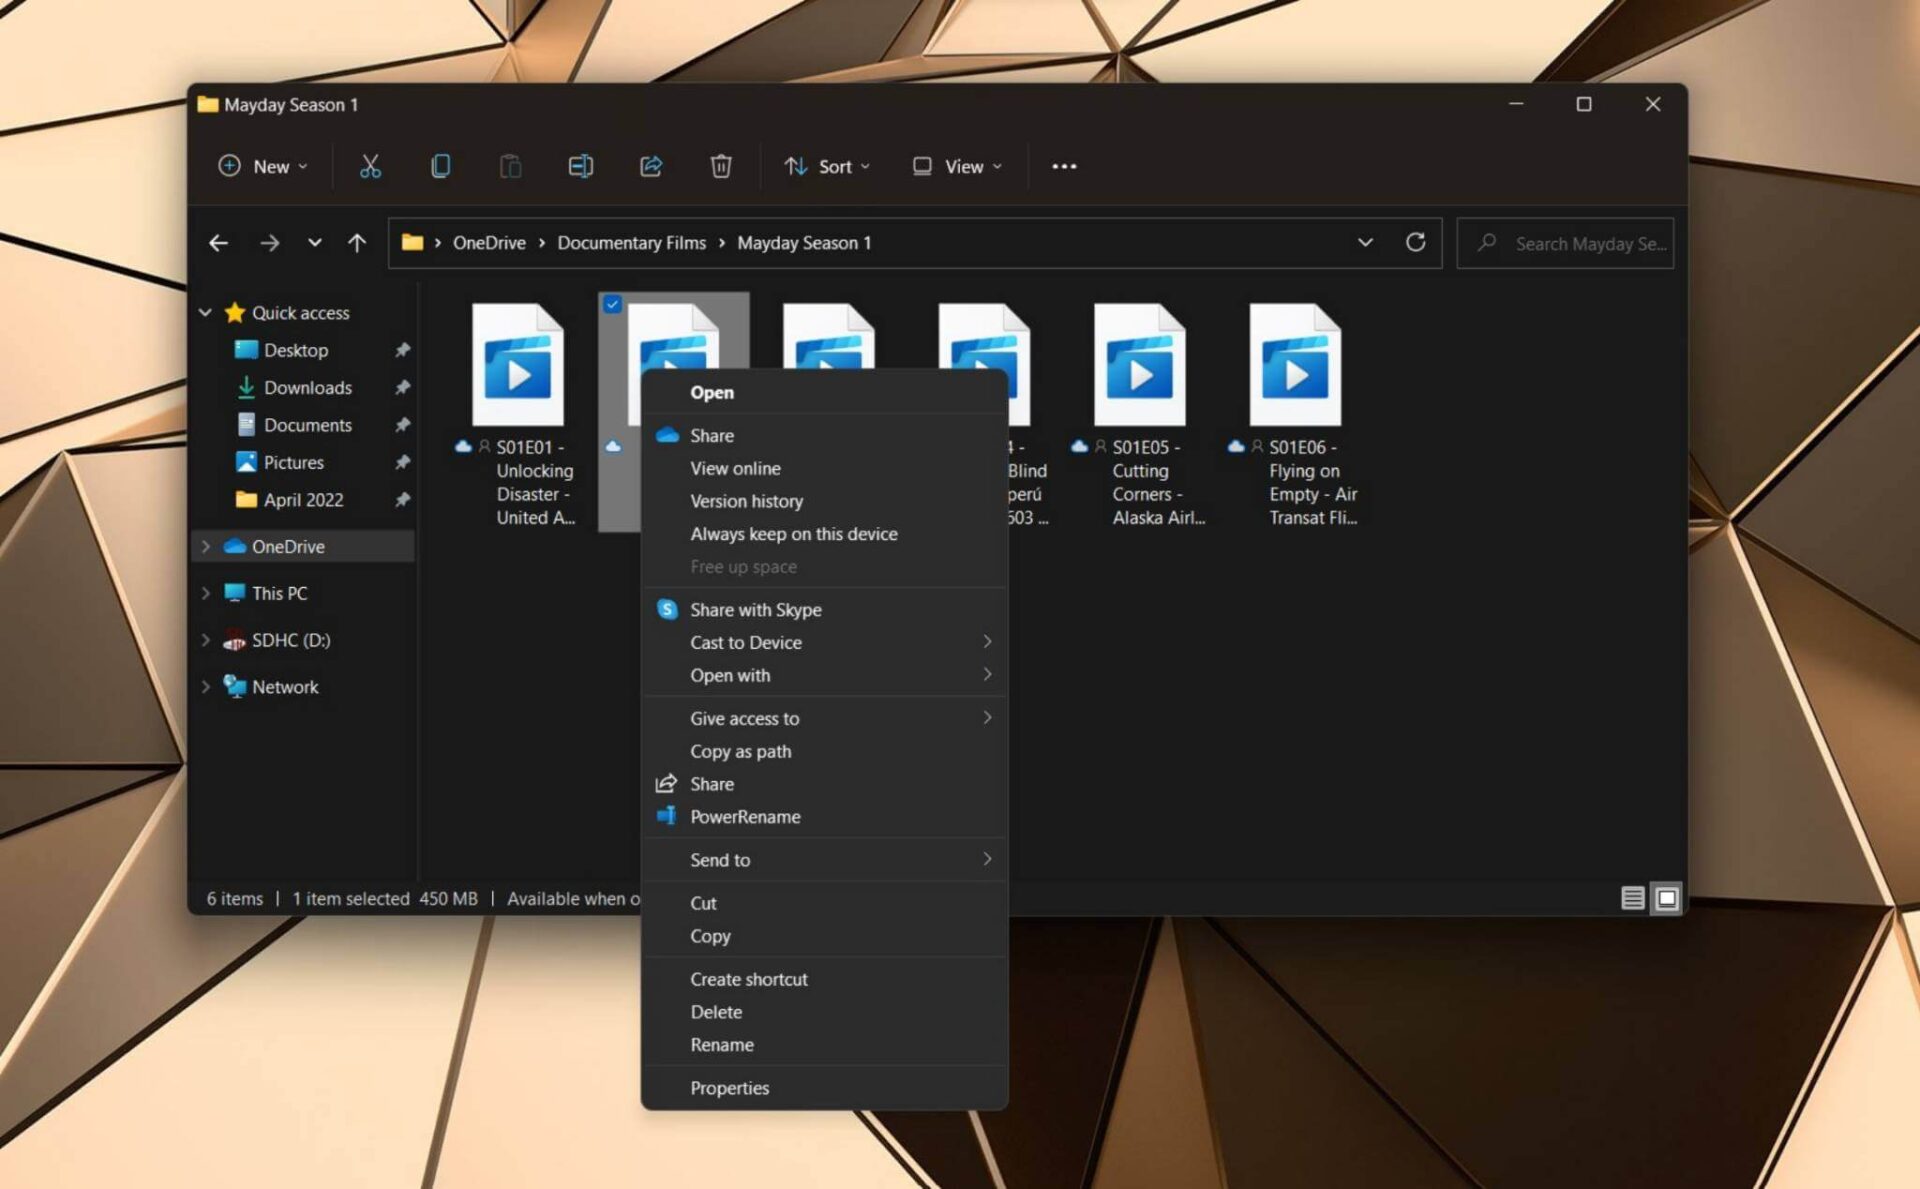
Windows 11 includes many inconvenient changes, including the right-click menu which Microsoft has redesigned in a simplified style. Many options are hidden within a sub-menu; to open the full menu, you must use the Shift + F10 shortcut or click the "Show more options" button.
Below is how to make the right-click menu display all options like the traditional version.
The Fastest Way
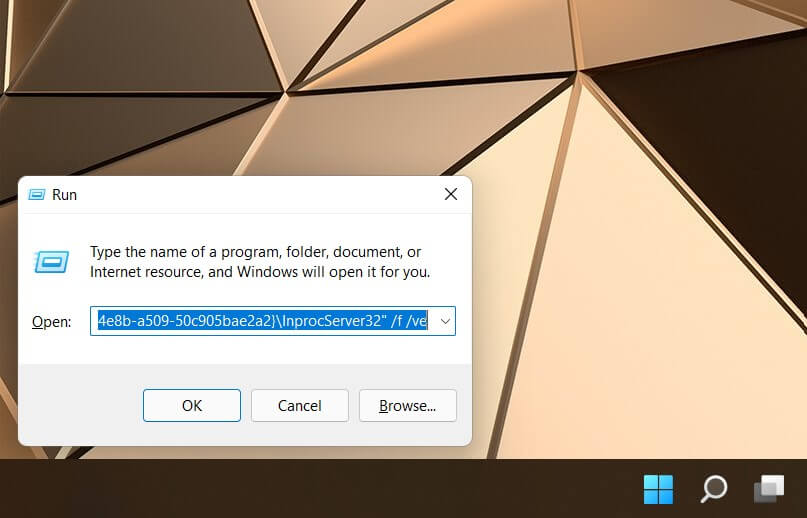
1. Open Run (Windows + R) > copy the code below, paste it into the Open box in Run, and press OK.
[blockquote align="none" author=""]reg.exe add "HKCUSoftwareClassesCLSID{86ca1aa0-34aa-4e8b-a509-50c905bae2a2}InprocServer32" /f /ve[/blockquote]
2. Restart your computer or open Task Manager > Restart Windows Explorer (select the Windows Explorer process > right-click > click Restart).
The Slowest Way
If the method above doesn't work for some reason, try the method below:
1. Open Registry Editor (search in Start or Run > regedit)
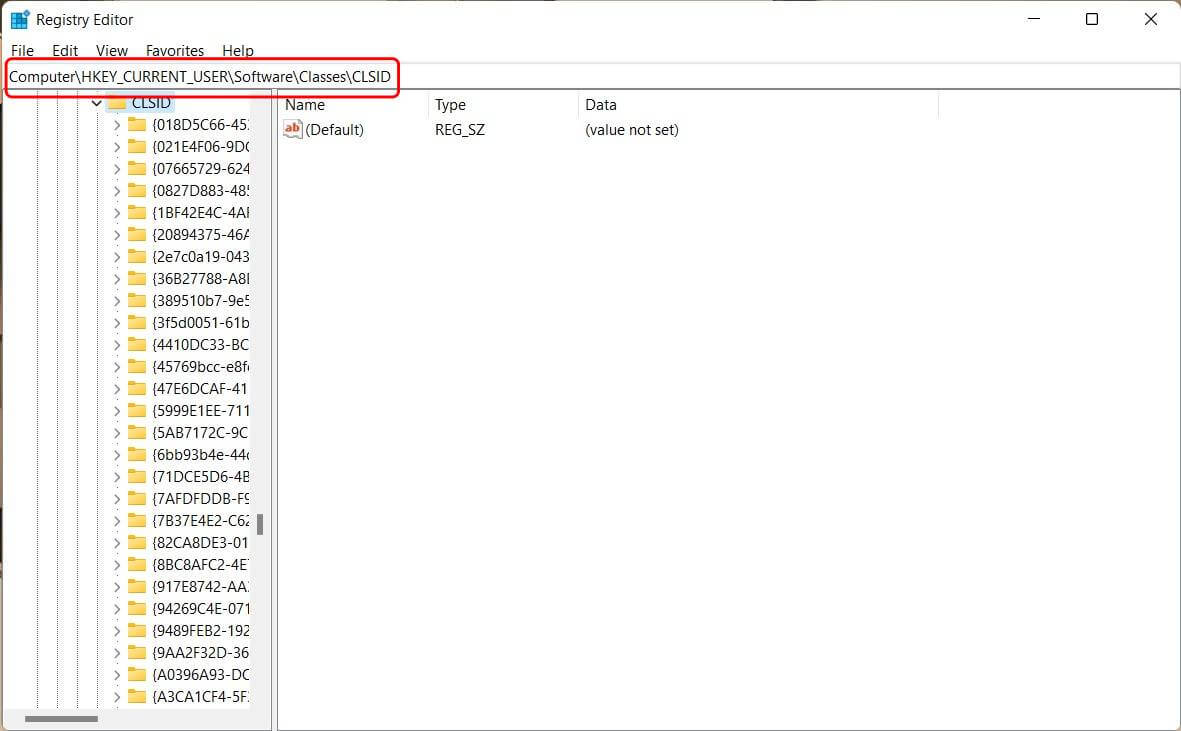
2. Navigate to the folder HKEY_CURRENT_USERS\SOFTWARE\CLASSES\CLSID
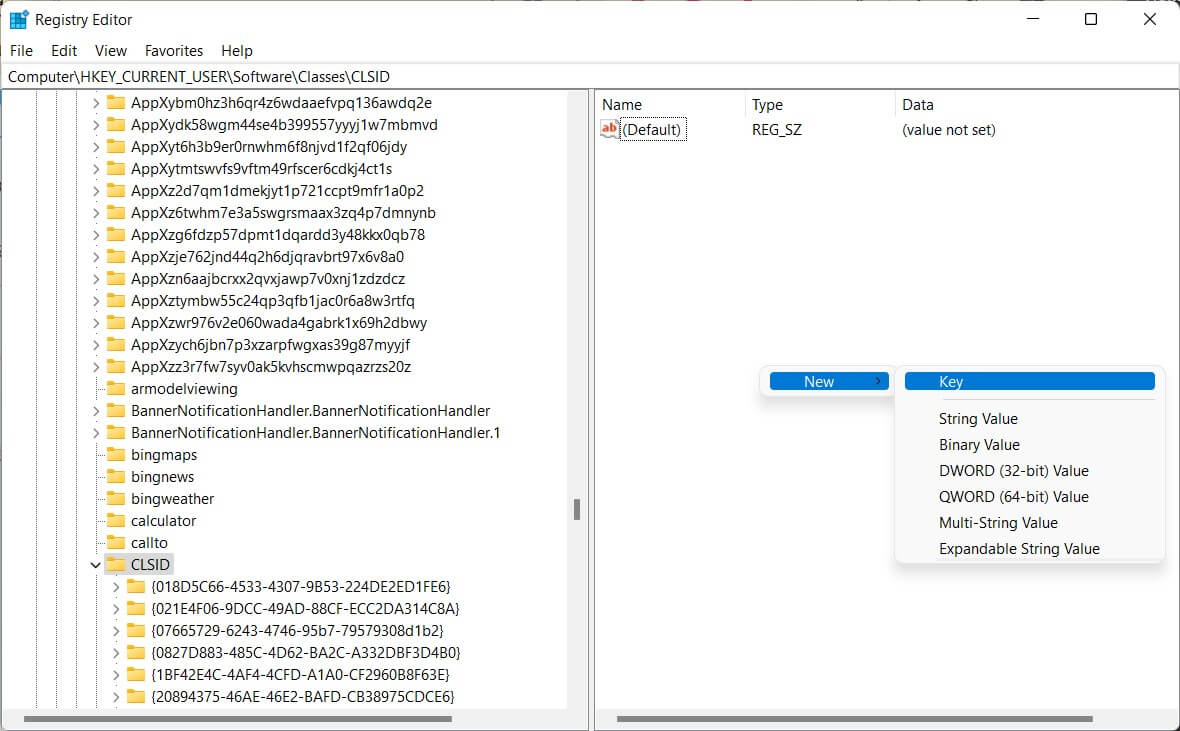
3. Right-click on this CLSID folder, select New > select Key to create a new folder.
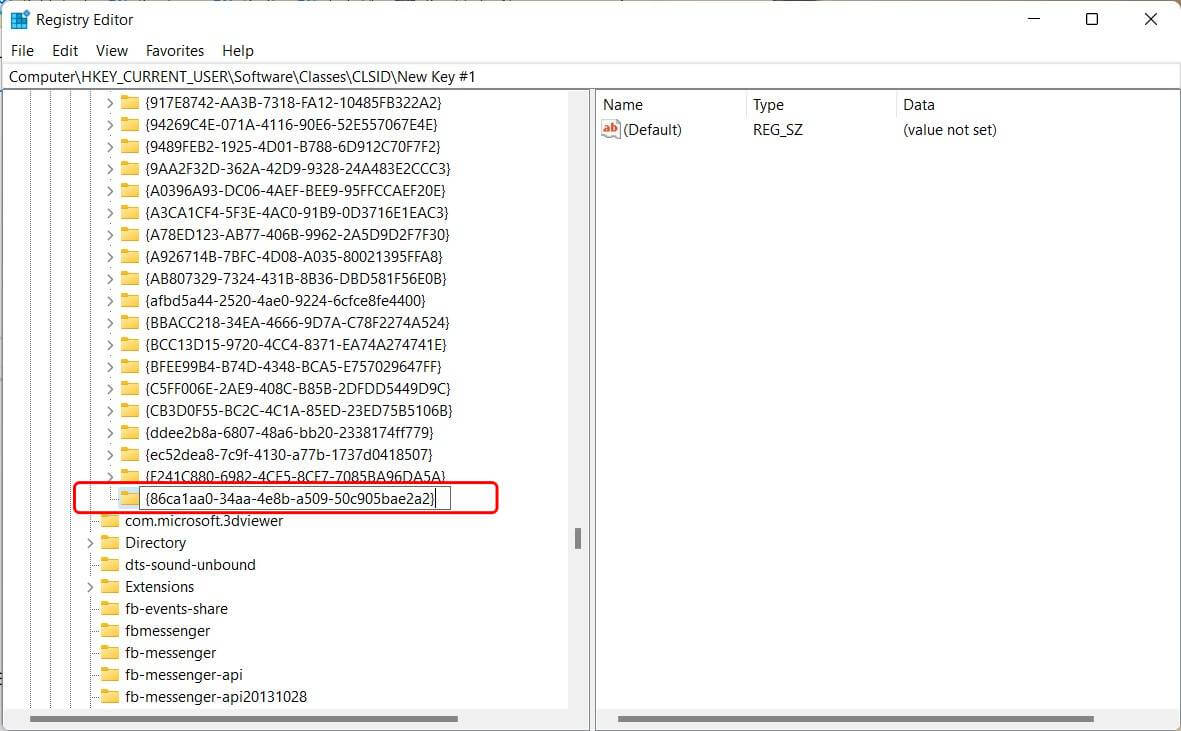
4. Rename this new folder (default is KEY) to the name below (copy/paste it to ensure accuracy)
[blockquote align="none" author=""]{86ca1aa0-34aa-4e8b-a509-50c905bae2a2}[/blockquote]
5. Go into the folder you just renamed, right-click and select New > select Key to create a subfolder.
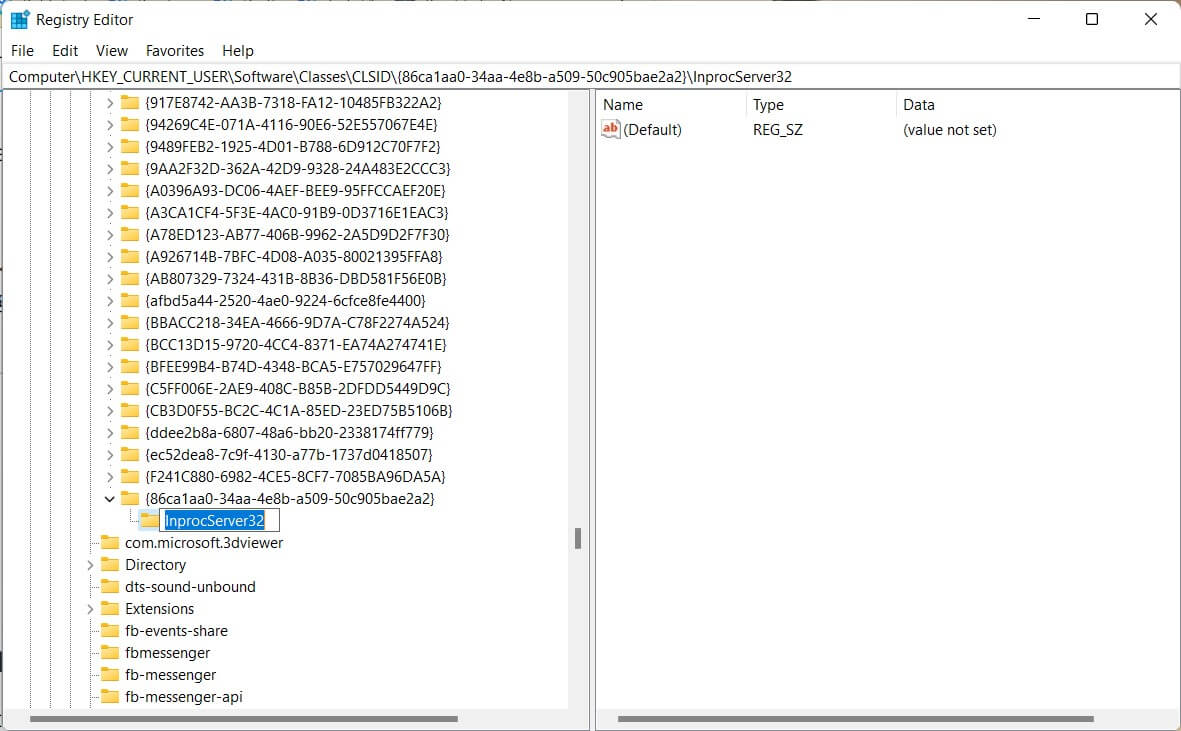
6. Rename this newly created subfolder to InprocServer32
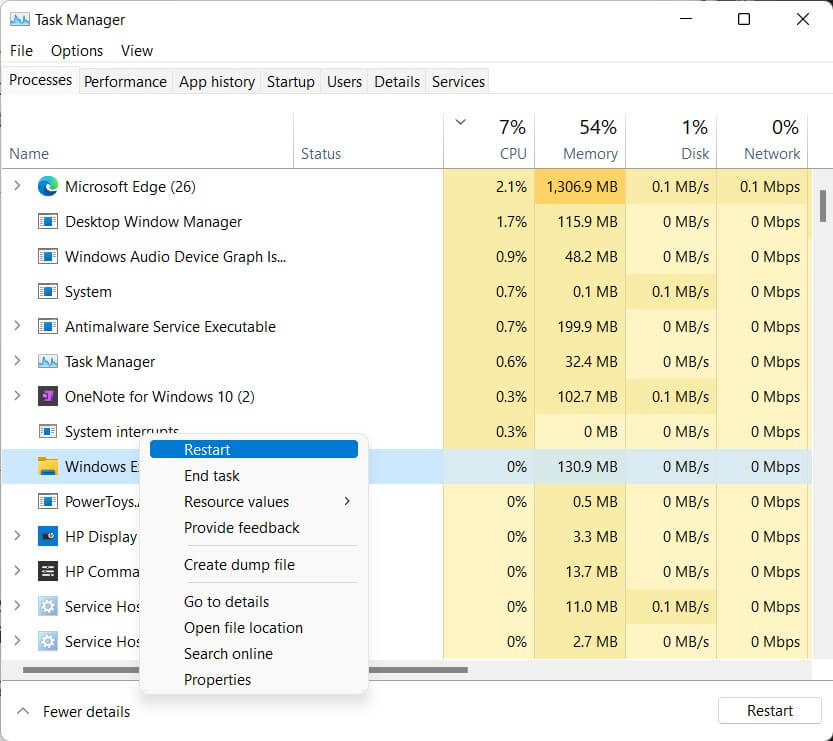
7. Close Registry Editor and restart your computer or go to Task Manager and Restart the Windows Explorer process.
Now you can restore the traditional right-click menu on Windows 11. Good luck!
Source: windowsreport











