

Windows S Mode is a limited version of Windows 11 and 10, where you can only install applications from the Microsoft Store, cannot access Registry or Group Policy Editor, and are stuck with Bing as the default browser. To install an application not available in the Microsoft Store, you must exit Windows S Mode and upgrade. However, sometimes you cannot exit S Mode due to errors.
Try these 9 ways to permanently exit Windows S Mode.
1. Check Microsoft server status
Windows S Mode has both pros and cons; the only way to exit it is through the Microsoft Store. But if the Microsoft servers are down due to any issue, you will encounter problems when trying to exit S Mode. Therefore, check the official Microsoft service status page or the Microsoft Store X page for outage reports.
You can also check third-party websites like Down Detector. If that is indeed the cause, please be patient until Microsoft fixes the issue. If you use a VPN service on your PC, temporarily disconnect from that service and then try to exit S Mode.
2. Check Microsoft Update service
The Microsoft Update service handles all update-related tasks on your PC. If there is any malfunction, you must restart it to get it working again.
1. Press Ctrl + Shift + Esc to open Task Manager.
2. Click on Services.
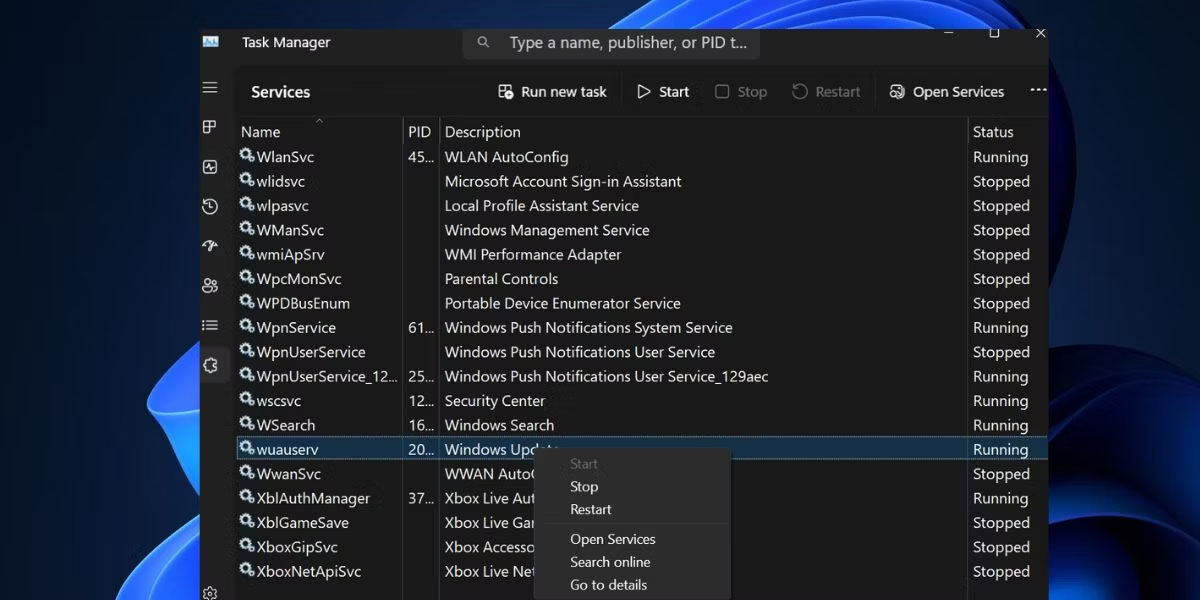
3. Find the wauserv service in the list, right-click it, and select Restart.
4. Close Task Manager.
3. Sign out and sign back in
You can try signing out of the Microsoft Store and then signing back in. After that, you can try exiting S Mode again.
1. Launch the Microsoft Store.
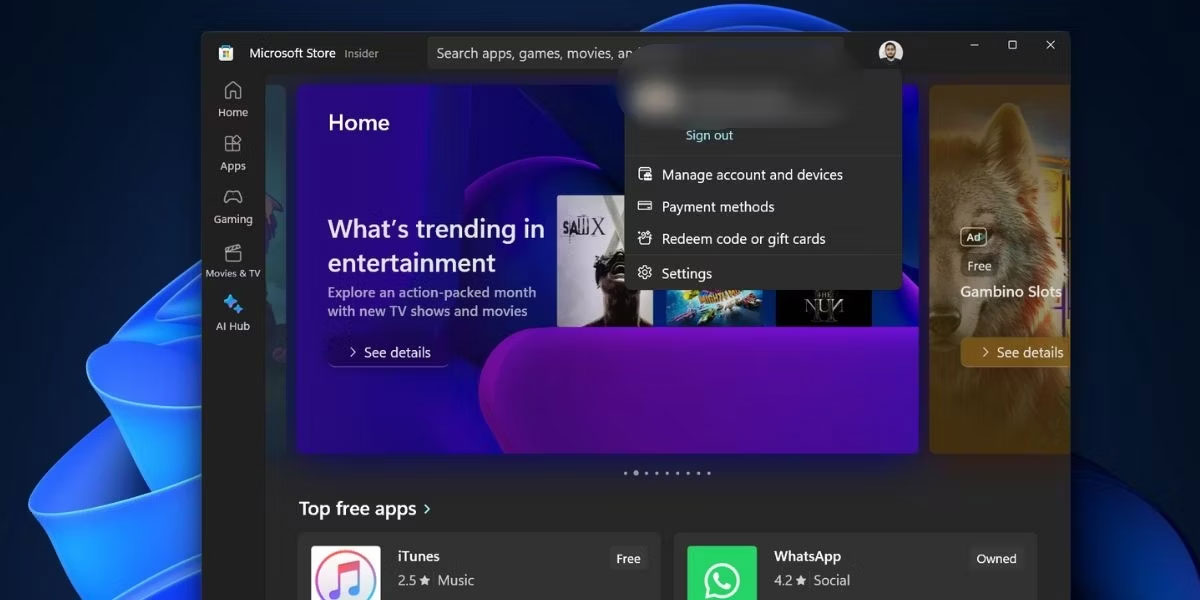
2. Click on Profile > Sign out.
3. Close and relaunch the Microsoft Store app.
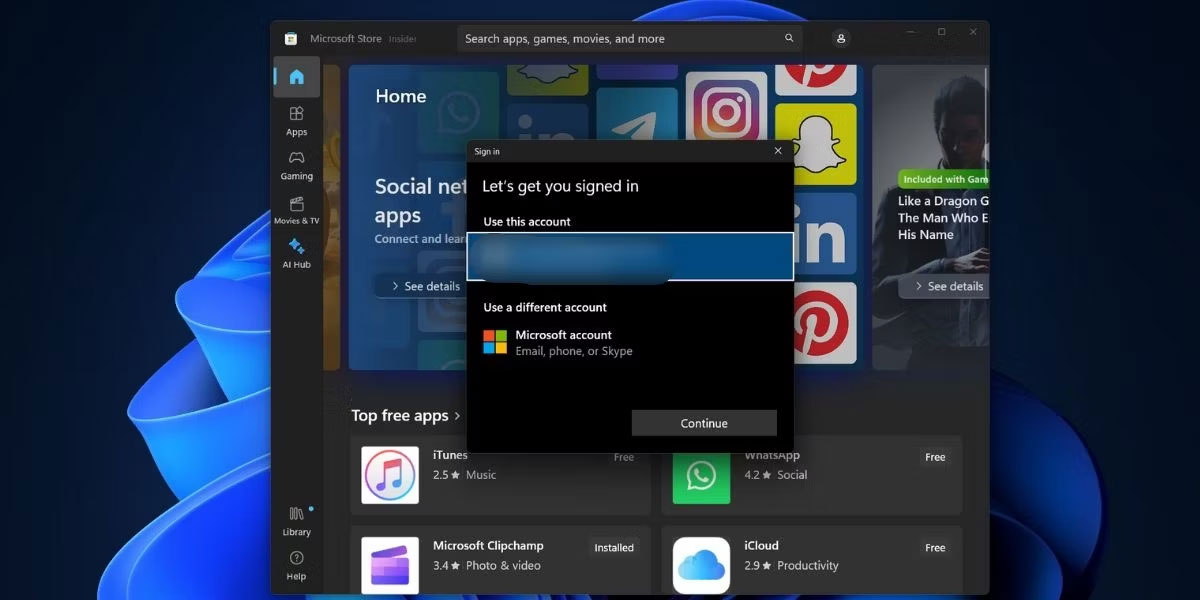
4. Click on Profile > Sign in, select your Microsoft account, and click Continue.
5. Enter your PC PIN and then complete the sign-in process.
6. Try exiting S Mode again.
4. Update all apps on the Store
Outdated applications, including the Microsoft Store itself, can cause issues when trying to exit S Mode. You must update all of them using the Microsoft Store update section. Even updates for the Microsoft Store app are available here.
- Launch the Microsoft Store app.
- Navigate to the bottom left area and click the Library icon.
- Click the Get updates button to check for all available updates.
- Click the Update all button.
- Wait for the updates to install, then close the Microsoft Store app.
- Restart your PC.
5. Set the correct date and time
Incorrect date and time settings on your PC can cause issues when installing or removing Windows features. Therefore, you must manually sync your date and time settings with the Windows server.
1. Go to the notification area on the system tray, right-click the Date and time icon.
2. Click the Adjust date and time option.
3. Scroll down to the Additional settings section and click the Sync now button.
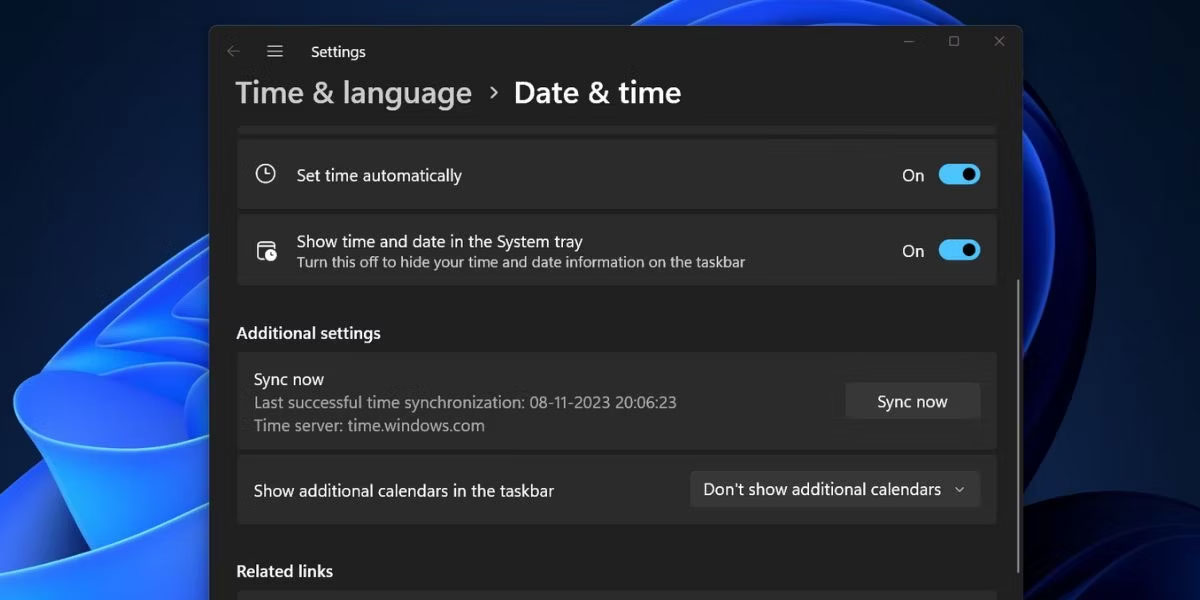
4. Close the Settings app.
6. Rename the SoftwareDistribution folder
The SoftwareDistribution folder contains temporary Windows update files. Rename the folder if you encounter issues with Windows apps or updates. Windows will recreate the folder when you attempt to check for and download updates.
1. Open the Command Prompt as an administrator.
2. Enter the following commands and press Enter to stop the Windows Update Service and Background Intelligent Transfer Service:
net stop wuauserv
net stop bits3. Execute the following command to rename the SoftwareDistribution folder:
rename %windir%\SoftwareDistribution SoftwareDistribution.bak4. Execute the following commands to restart the Windows Update Service and Background Intelligent Transfer Service:
net start wuauserv
 net start bits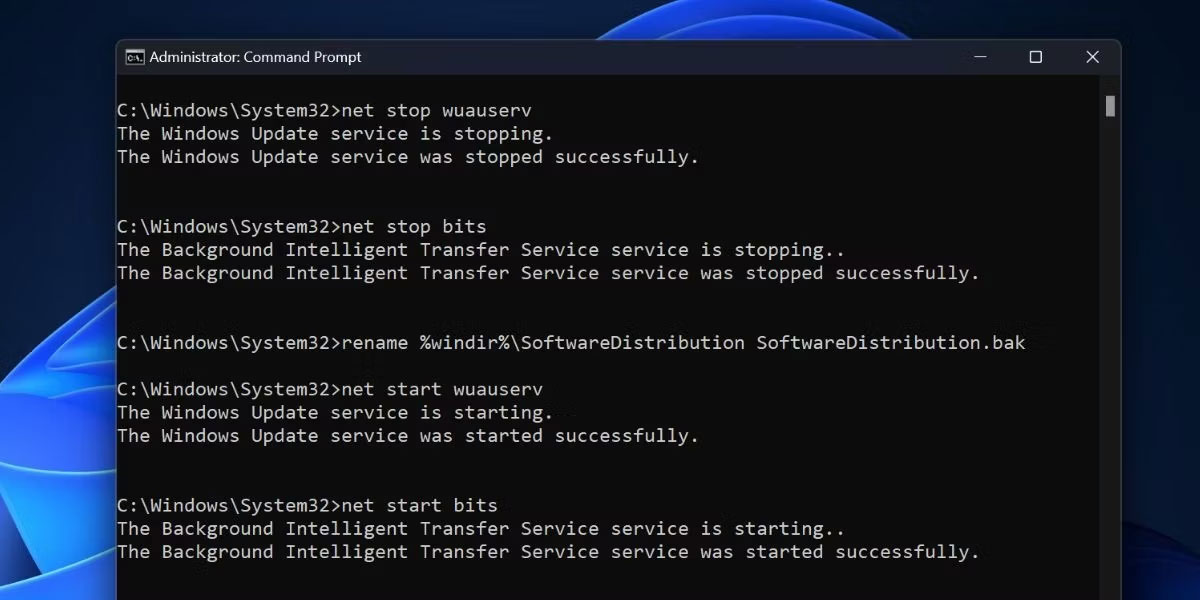
5. Close the Command Prompt window.
6. Restart your PC.
7. Reset Microsoft Store
The Microsoft Store app may stop functioning properly due to corrupted cache files. Therefore, you must reset the Microsoft Store via Settings or Terminal.
8. Re-register all system apps
If resetting the Microsoft Store does not resolve the issue, you must re-register all system apps, including the Microsoft Store. Here is how to do it:
1. Open PowerShell as an administrator.
2. Enter the following command and press Enter to execute it:
Get-AppXPackage -AllUsers |Where-Object {$_.InstallLocation -like "SystemApps"} | Foreach {Add-AppxPackage -DisableDevelopmentMode -Register "$($_.InstallLocation)AppXManifest.xml"}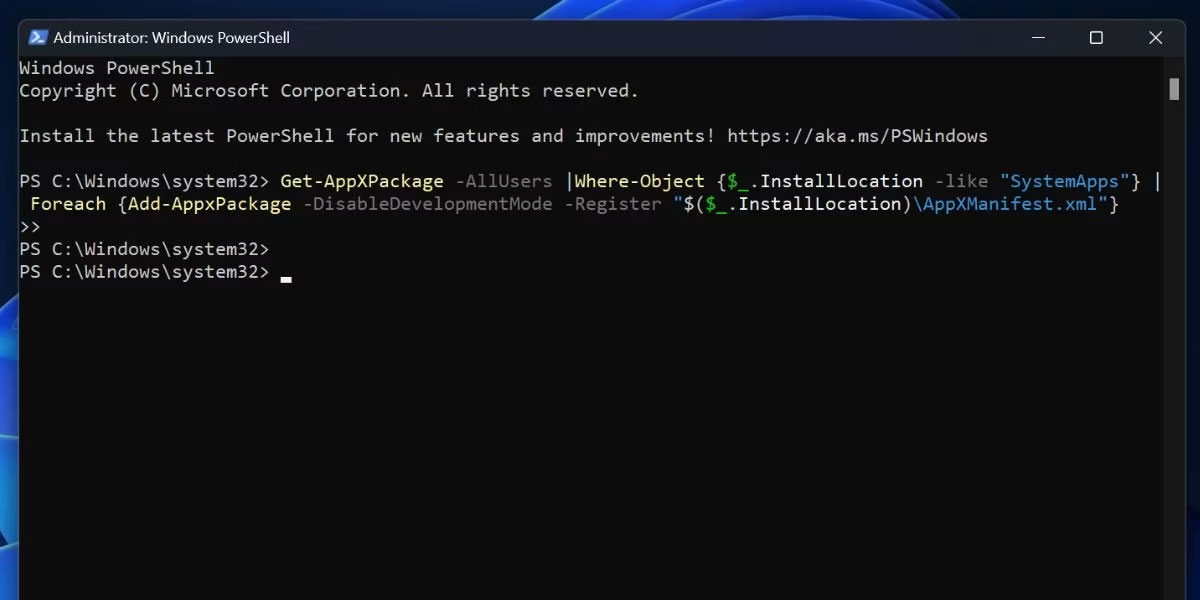
3. Close the Command Prompt window and restart your PC.
9. Perform an in-place upgrade
You can perform an in-place upgrade on your Windows PC to exit S Mode. This is better than resetting your Windows PC because an in-place upgrade preserves all files, applications, and data stored on the C drive.











