


When applying Local Group Policy to a PC, you may not want it to apply to all users. The answer is simply to apply Local Group Policy to a specific user or group of users. This way, you can control which features are accessible to specific user accounts.
It also helps you easily apply and modify controls as well as interfaces for individual users, and you will quickly see which policy applies to which user. Below is how to apply Local Group Policy to specific user accounts on Windows 10 and Windows 11.
What is Local Group Policy?
Group Policy is a Windows feature that gives you more control over what user accounts can do and what they have access to. Changing group policy will change how the system operates for different groups of users.
How to apply Local Group Policy to a specific user account
First, you must have Windows 10 Pro, Enterprise, or Education edition to access the Local Group Policy Editor. Here is how to set up what is called a Microsoft Saved Console (MSC) for a specific user.
1. Press Win + R, type “mmc” into the box, and press OK. This will open the Microsoft Management Console.
2. You will see a UAC prompt. Click Yes.
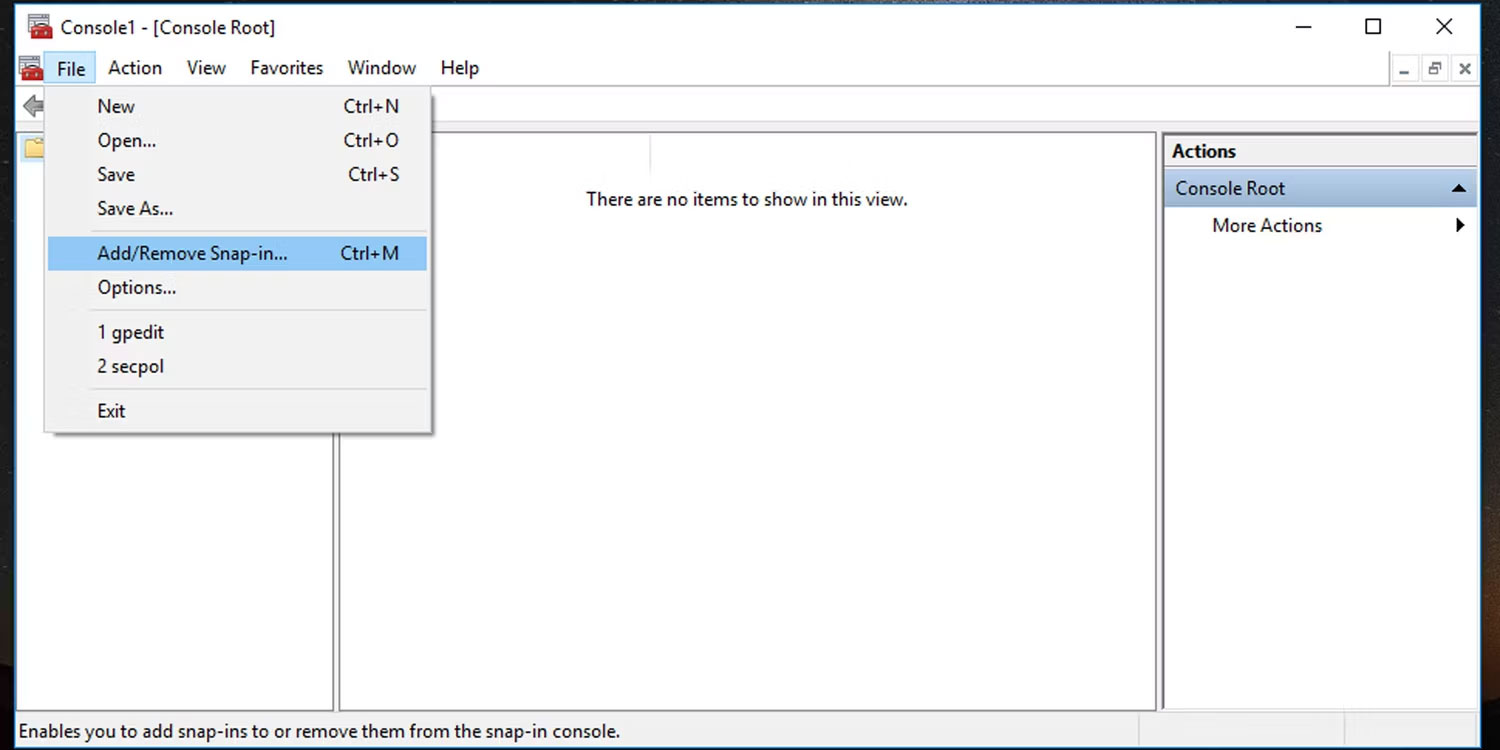
3. In the Microsoft Management Console window that opens, go to File > Add/Remove Snap-in.
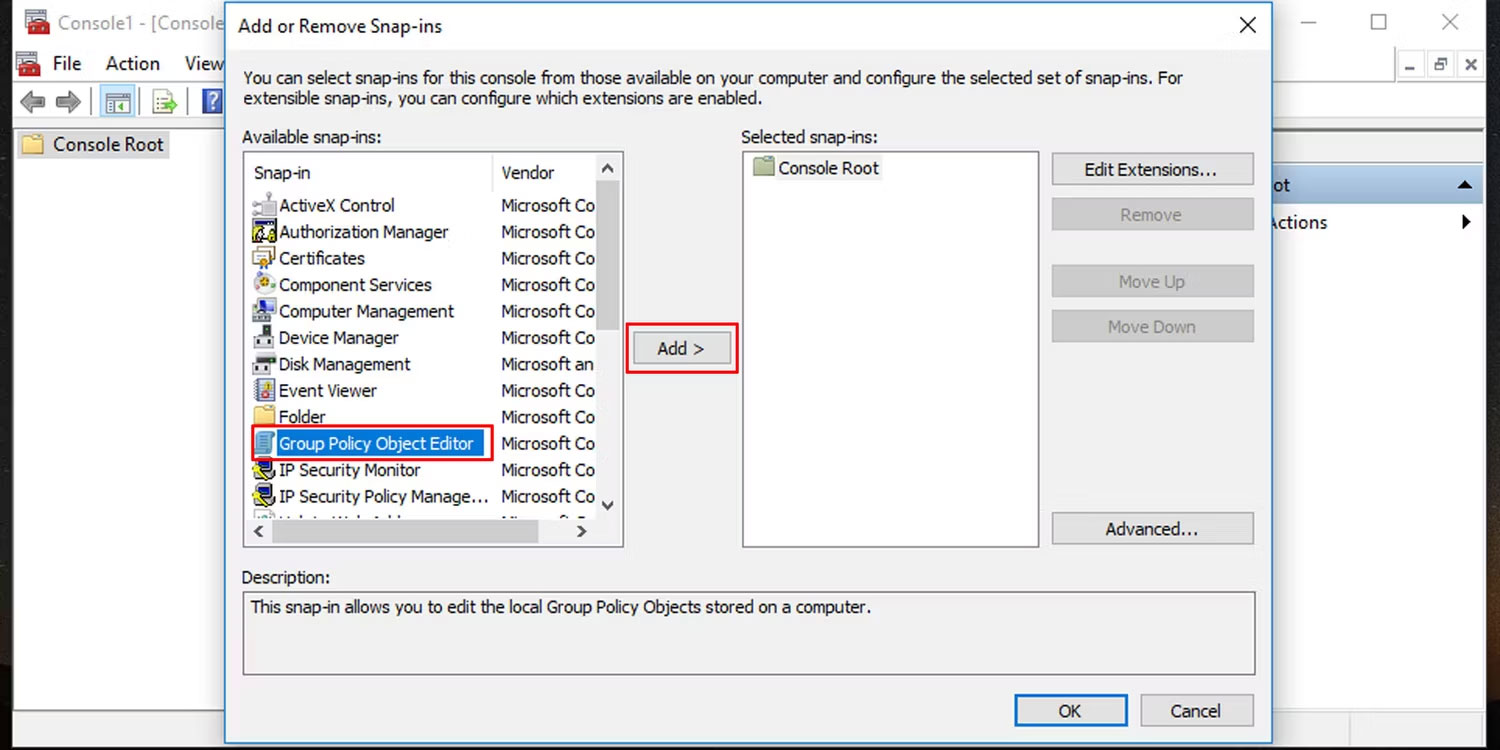
4. Find and select Group Policy Object Editor; click the Add button to add it to the Selected snap-ins list; and press OK.
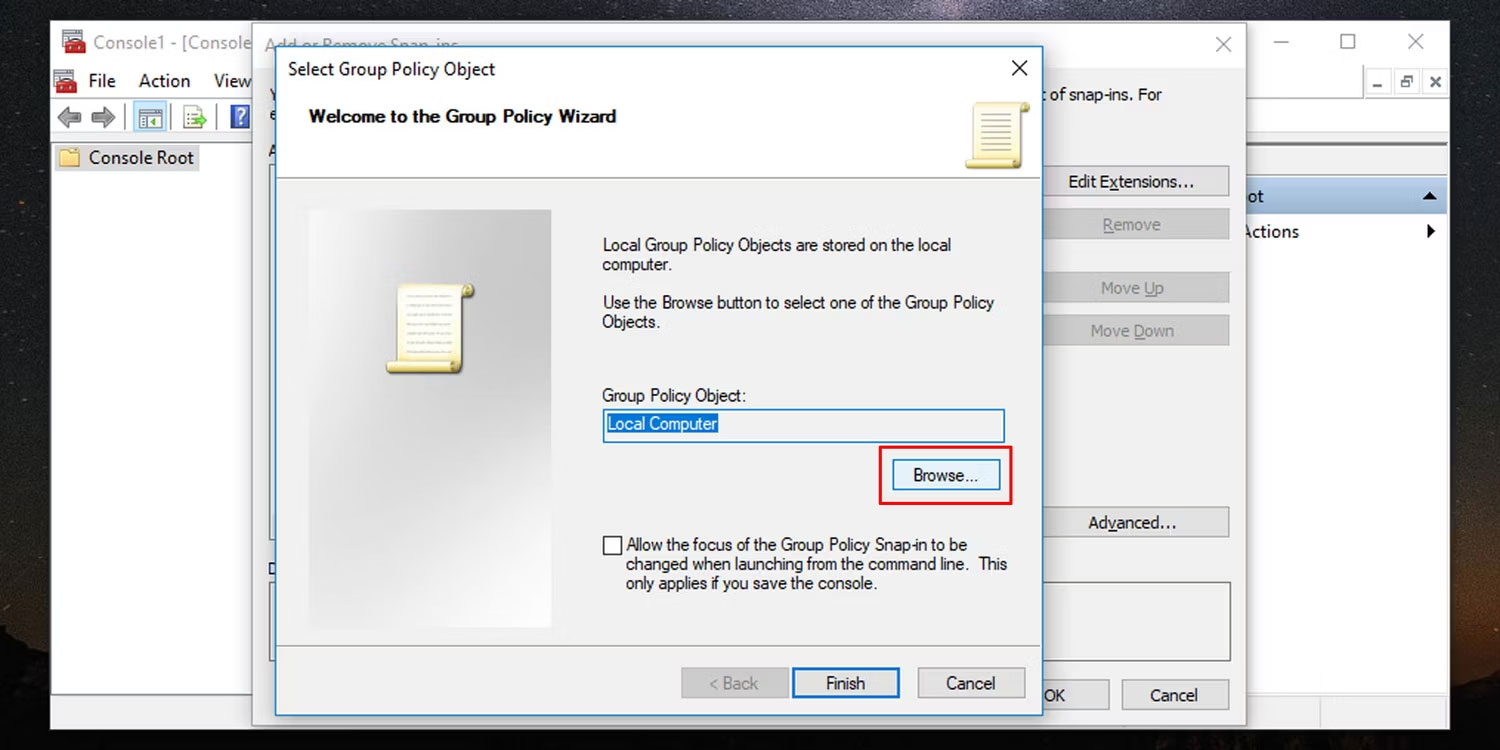
5. Next, you will be prompted to select a Group Policy Object. Click Browse.
6. Switch to the Users tab in the pop-up window.
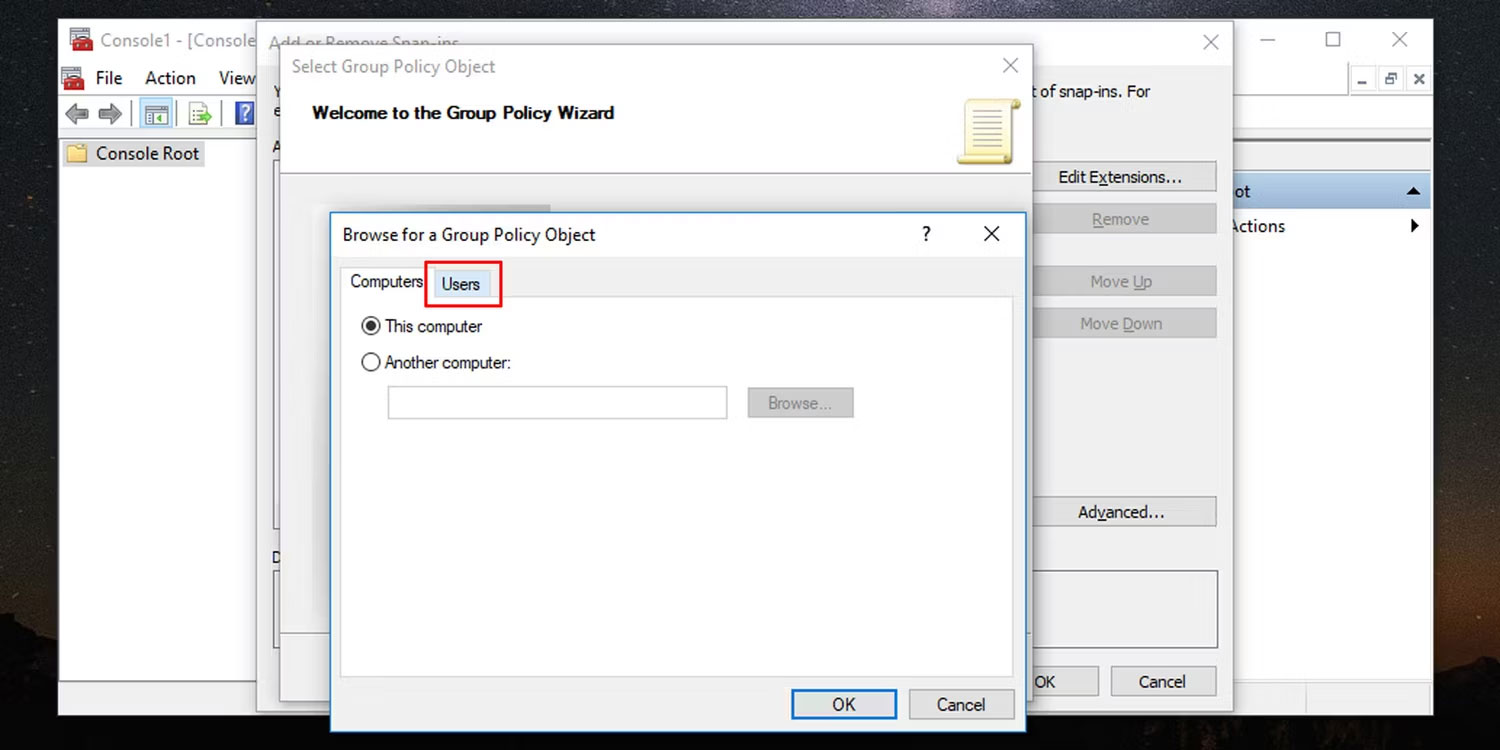
7. Select the user account for which you want to create a custom Local Group Policy, then press OK.
8. Click the Finish button, then in the Add or Remove Snap-ins window, click OK at the bottom right.
9. The group policy for the specific user will appear in the console window.
10. Go to File > Save As and choose the location where you want to save the MSC. You can rename it here.
11. Once you are finished, click the Save button.
Now, you have created a user-specific MSC Local Group Policy. Whenever you need to configure policy settings that apply only to this specific user, double-click the file you just created and make the necessary policy changes. Don't forget to save the console settings when finished.
By using Local Group Policy, you have better control over which functions you assign to a specific user or group of users. A simple change at this level can make your work much easier when applying restrictions and granting freedom to Windows users.











