

Because Windows occasionally receives buggy updates, you may frequently encounter issues with the Windows Camera app. Whether it is because the camera is not detecting anything or the app refuses to launch, these disruptions can prevent you from taking photos or recording videos using the Camera app.
So, how can you fix such frustrating issues on your Windows device?
Don't worry! This article will guide you through all the common fixes for issues related to the Camera app on Windows 10 and 11.
1. First, try some quick Windows Camera fixes!
Before moving on to in-depth troubleshooting methods, you should try these quick and easy tips:
- First step, if you are using a webcam, please remove the cover (privacy shutter). Sometimes, due to rushing, people forget to open this cover, resulting in a completely black screen in the Camera app.
- Try restarting your PC and checking for any available Windows updates after restarting.
- If you are using a third-party webcam, try unplugging its USB cable and then plugging it back in.
- Launch the Microsoft Store and ensure that the Windows Camera app is up to date.
- Some manufacturers like Logitech, Razer, and Creative provide dedicated setup applications for their webcams. You should visit their official websites and download the appropriate setup software to install.
Trying the quick tips listed above can resolve many minor glitches in the Camera app. However, if you still cannot use the Camera app, check out the following troubleshooting methods to fix it.
2. Adjust Windows Camera privacy settings
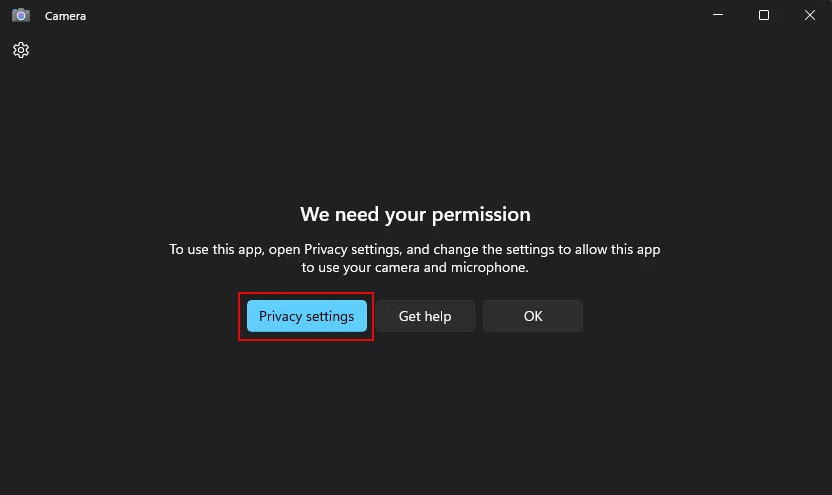
Issues when launching the camera often arise from incorrect privacy settings. You may have accidentally denied permission to the Windows Camera app when your system previously requested it. In this case, you will see an error saying "We need your permission".
Here is how you can reset your Camera privacy settings to normal on Windows:
1. Open the Camera app and click the Privacy settings button. If this button is not on your screen, search for camera privacy settings in Windows Search and click the first relevant result.
2. Enable Camera access, then select Camera options to resolve permission issues.
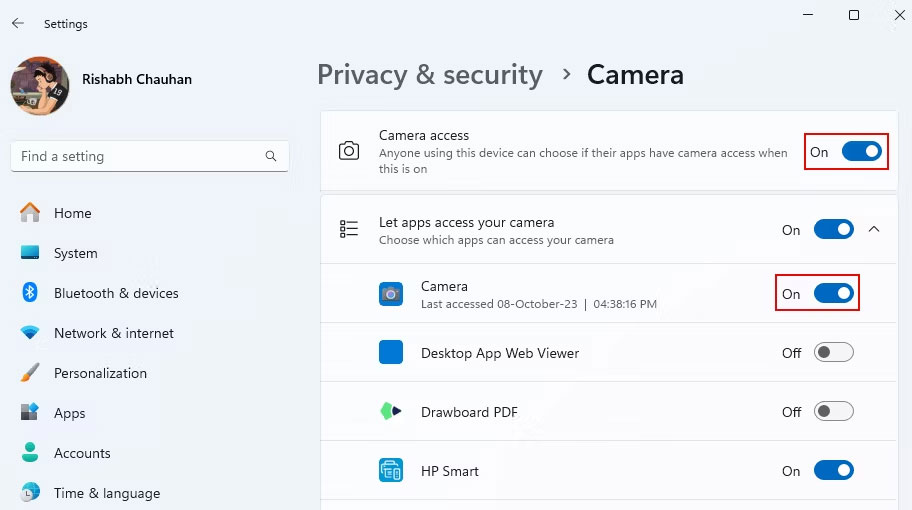
3. Once you have granted permission, reopen the Windows Camera app.
This will work if the Camera app opens normally but still requests permission. Besides the Camera app, you can toggle permissions for any other trusted application you want to use your Camera with.
3. Restart or enable Windows services related to the camera
Windows includes many different services that help the system function normally. When one or more Windows services stop working, certain features may immediately malfunction. The Camera app is no exception.
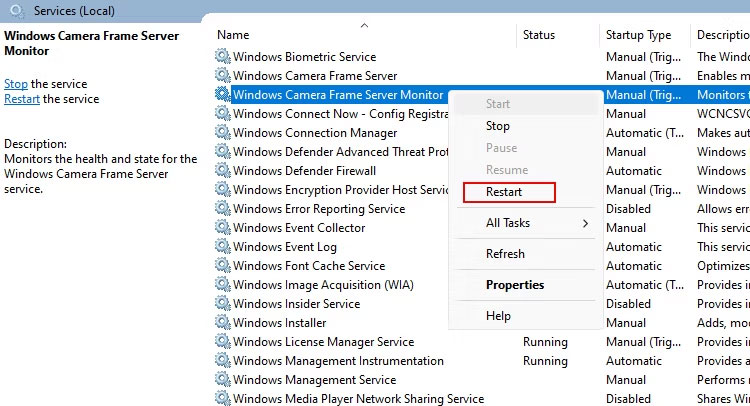
Services such as Windows Camera Frame Server, Windows Camera Frame Server Monitor, and Windows Image Acquisition support the camera backend in Windows. See how to restart the mentioned camera-related services with the steps below:
1. First, start or launch the Windows Services app.
2. You will see a long list of services in the app. Scroll down and find the Windows Camera Frame Server service.
3. Right-click on the service name and click Start. If the service is already running, select the Restart option.

4. Repeat similar steps to restart the Windows Camera Frame Server Monitor service as well as Windows Image Acquisition (WIA).
5. After starting all related services, restart your computer.
Hopefully, the Camera app will now work normally. You can try taking a quick photo or recording a video to check.
Sometimes after resetting, the app may have difficulty connecting to your webcam and report an error. To fix that issue, see how to fix the “We Can’t Find Your Camera” error.
4. Install or update compatible camera drivers
As mentioned earlier, some manufacturers provide setup utilities for their webcams. After purchasing a webcam, users can download the appropriate version of the setup utility. Once you install the necessary software, the driver will be installed automatically.
Additionally, you can try using Driver Booster, a free software that makes updating drivers easy. I will have a separate guide on how to use Driver Booster on Windows to help you.
Outdated drivers are a cause for the Camera app refusing to open. However, when you update the driver, it can resolve many camera issues caused by faulty drivers.
5. Modify Group Policy settings
If you have recently used some types of Windows tweaking tools, such as O&O ShutUp10++, it is very likely that Group Policy settings have also been modified. This could be the main reason why the Camera app shows you a blank screen.
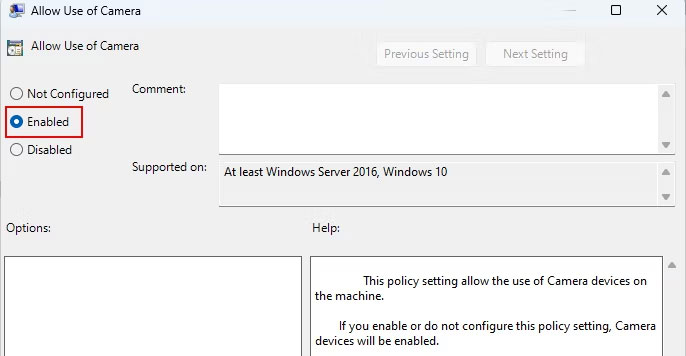
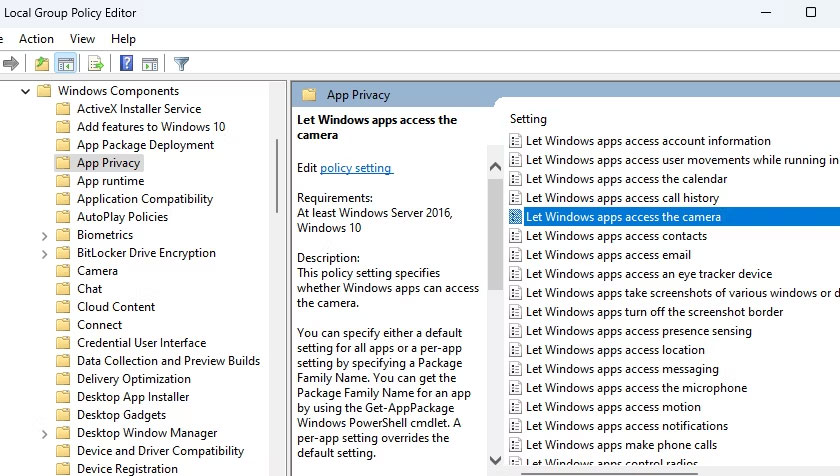
If you didn't know, there are two Group Policy settings associated with camera functionality in Windows: Allow Use of Camera and Let Windows apps access the camera. You need to re-enable both using the steps below:
1. Open Group Policy Editor on your PC.
2. From the left pane, go to Computer Configuration > Administrative Templates > Camera.
3. Double-click the Allow use of Camera setting.
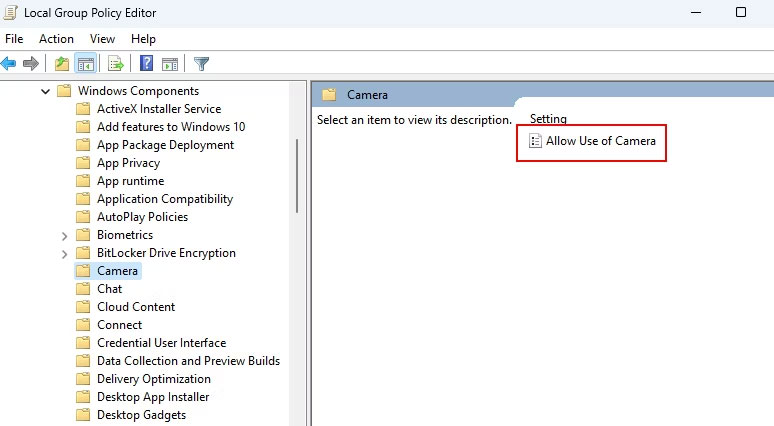
4. Then select the Enabled option and click OK to apply the selected settings.
5. Similarly, go to App Privacy under Windows Components and enable the Let Windows apps access the camera setting.
6. Use the "Get Help" app to troubleshoot
Starting from Windows 10, Microsoft introduced a new app called Get Help. This app is a centralized hub for anyone wanting to fix any Windows-related issues.
Note: If the Get Help app is not pre-installed on your computer, first download this app from the Microsoft Store.
To get started with Get Help, follow these steps:
1. First, open the Get Help app and search for Troubleshoot camera issues in the Windows Search box.
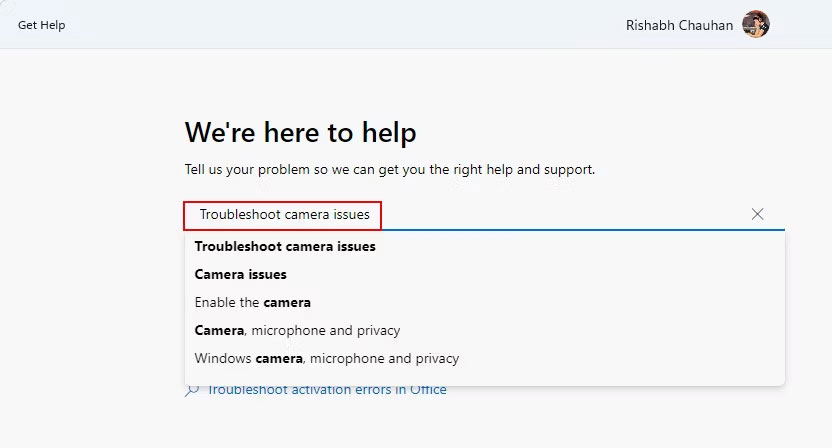
2. Once completed, it will guide you through several automated steps to troubleshoot the camera issue. You need to click on any option that you think is best.
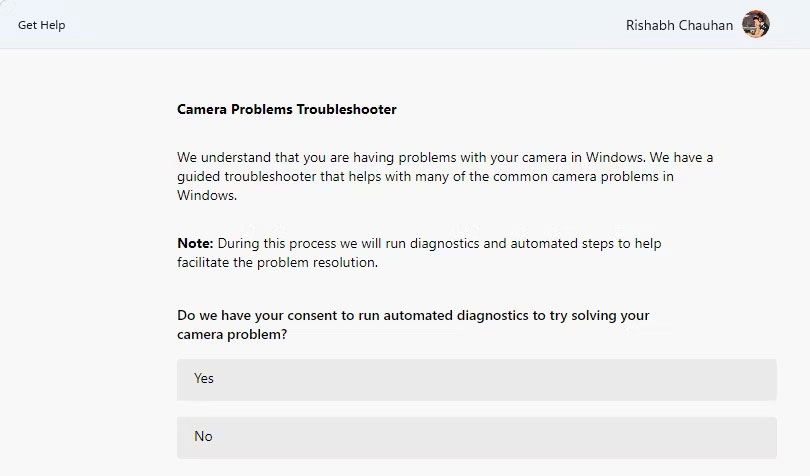
3. After the final question, restart your computer.
The best thing about Get Help is that it automatically performs the necessary troubleshooting measures. You don't have to do anything technical yourself.
7. Repair or reset the Windows Camera app
If the Windows Camera app issue persists, you can try another way: repairing (or resetting) the app using Windows Settings.
Follow the steps below to repair the Windows Camera app on your device:
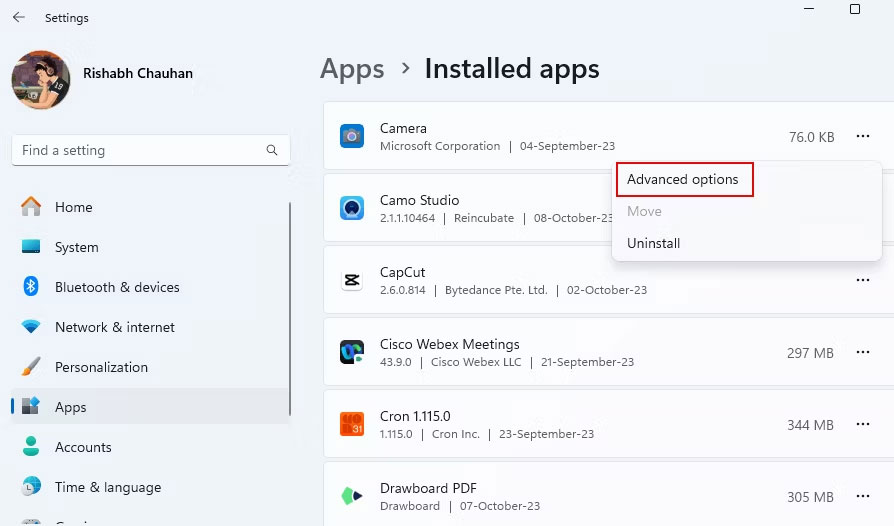
1. Open Windows Settings (Win + I) and navigate to Apps > Installed apps.
2. From the list, find the Camera app. Next to the Camera app, click the three horizontal dots and then select Advanced options.
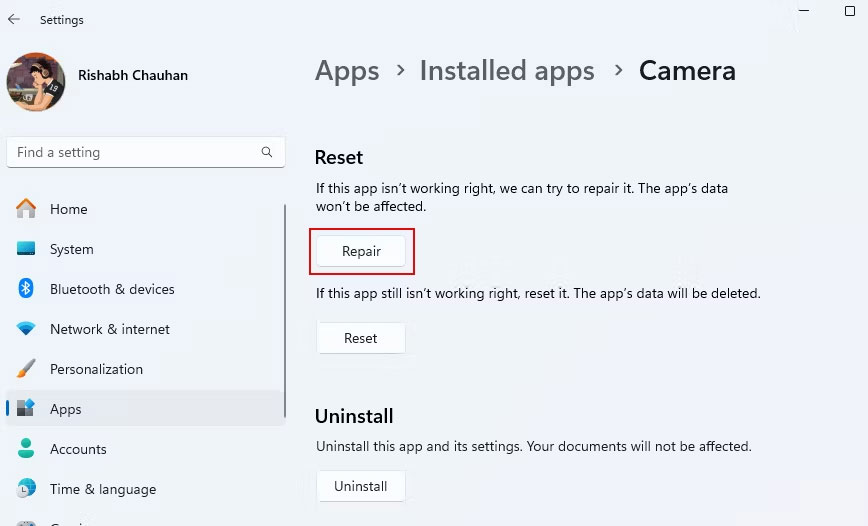
3. Scroll to the bottom and click the Repair option.
4. When you see the checkmark, click Reset to reinstall a fresh copy of the app and clear all previous data and settings.
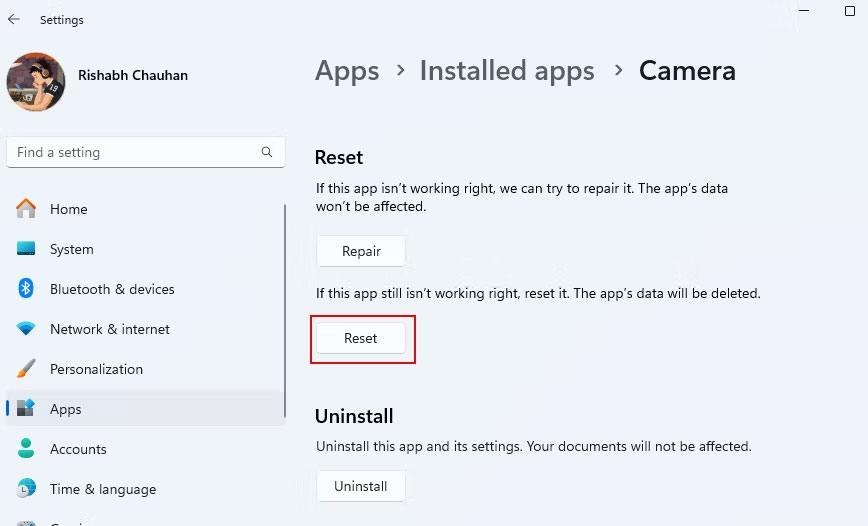
5. After resetting, reopen the Camera app and check the issue you previously encountered.
Tip: The Camera app is great for taking casual photos and recording short videos. However, if you need more than basic features, try any of the best webcam apps for Windows.
8. Set up your smartphone as a Windows Camera
If you have tried the previous methods and Windows Camera still doesn't work, your webcam might have a hardware problem. In this case, you should repair the webcam, buy a new webcam, or use a smart trick to use the camera feature.
If you need a webcam for an urgent meeting, you can easily set up your phone as a webcam. In most cases, you can use your Android device as a computer webcam. If you don't have an Android phone, I will have a guide on how to use an iPhone as a webcam.
After setting up your device with the computer, you will be able to use the Camera app for all tasks related to Windows Camera. However, as mentioned before, this is only a temporary method, so in the long run, you will definitely need a good quality webcam for your computer.











