

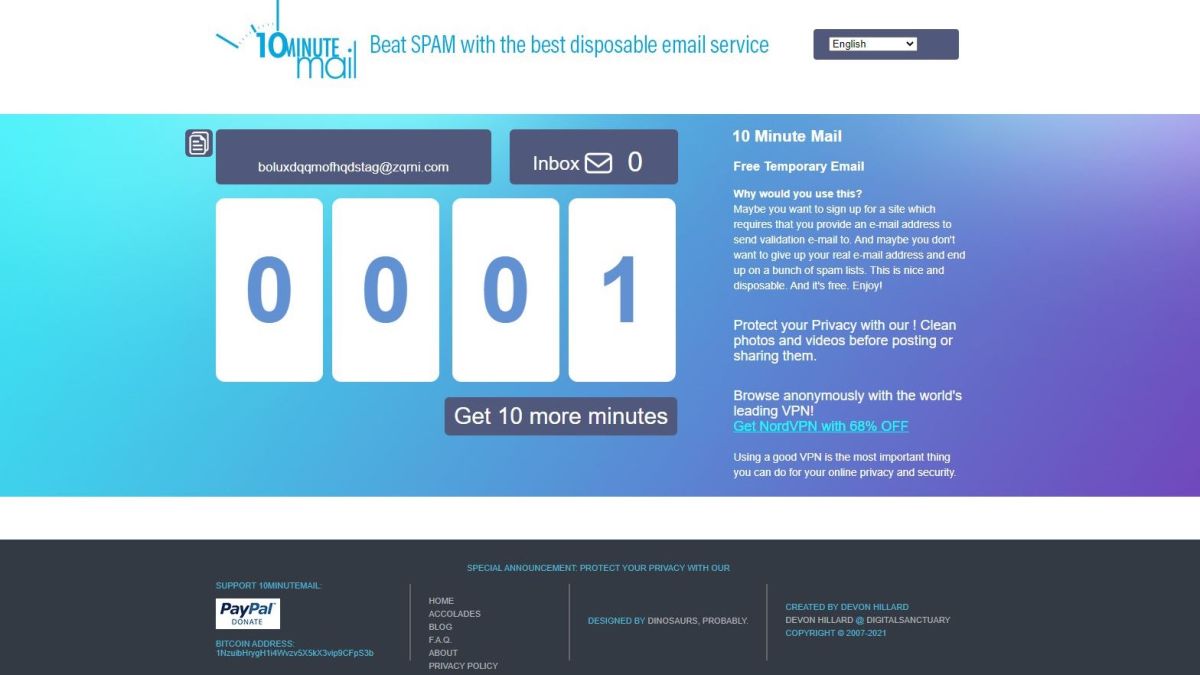
Have you ever heard the term “10-minute email”? And what exactly do we need them for? In this article, we will dive into the details and explore how to use these temporary mailboxes effectively!
If you have never used virtual addresses or fake accounts, you likely haven't encountered this concept yet. Let's explore it together in this guide.
What is a 10-minute email?
A 10-minute email can be simply understood as a virtual mailbox that is generated instantly without requiring the user to provide any personal information. For instance, when creating a Gmail account, you are required to enter personal data such as your full name, date of birth, phone number, and more. However, with these temporary mailboxes, you simply copy a pre-existing address and start using it immediately.
The term “10 minutes” refers to the fact that these mailboxes only exist for about 10 minutes, rather than being permanent like Gmail or Yahoo Mail. However, the functionality is quite similar: you can still receive and send emails from this address. You might wonder: what can you actually do with a mailbox that only lasts 10 minutes?
Uses and how to use temporary mailboxes
Due to their "quick in, quick out" nature, these temporary mailboxes are best suited for non-critical purposes, such as:
- Creating temporary accounts on websites that require a login to access content.
- Avoiding spam and promotional junk mail.
- Protecting your personal information and primary email address, while saving time on creating new accounts.
- Securing the contents of private correspondence.
- Note that incoming and outgoing messages are still stored on the system for a short period.

How to create a 10-minute email quickly and easily
Currently, there are many websites that support temporary mailbox creation, but I find Mail1s to be the most stable, easy to use, and supportive of Vietnamese. Additionally, you can search Google using the keyword “email 10p” to find many other options.
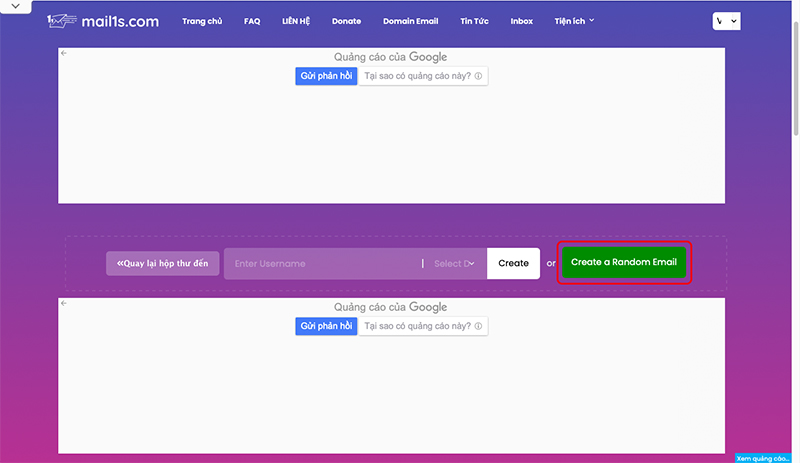
Step 1: Access the Mail1s website. On the main page, you will see a bar for creating a temporary mailbox. There are two ways to do this:
- Method 1: Enter your desired name > select a domain from the available list > click the Create button.

- Method 2: Click the Create a random email button and let the website generate one for you automatically.
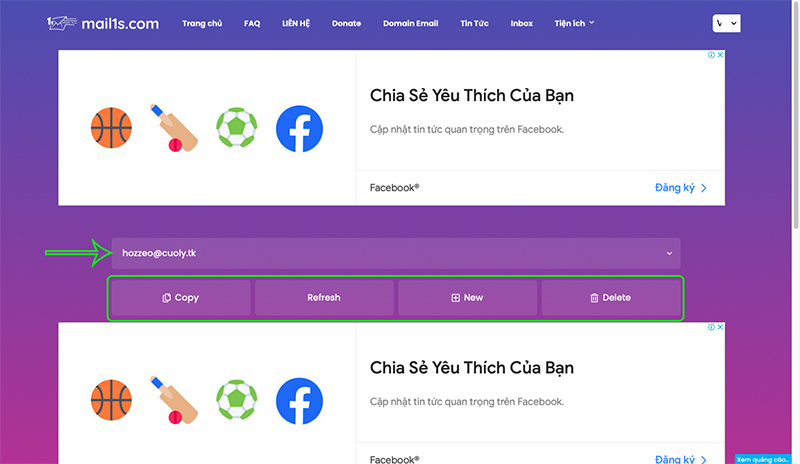
Step 2: Once selected, the website will take you directly to your "inbox." You will see your email address along with several functional buttons such as copy (copy), refresh the inbox (refresh), create a new address (new), and delete received messages (delete).
Step 3: Scroll down on this page to view the emails that have been sent to you.
Popular temporary email services available today
Besides Mail1s, there are many other platforms providing 10-minute email services that you can try when you need a quick address to receive mail. The common denominator is that they are ready to use immediately without requiring account registration:
- 10 Minute Mail: The most well-known original name; it generates a pre-set address and starts a countdown for you.
- Temp Mail: Offers both mobile apps and browser extensions, which is convenient when frequently testing new services.
- Guerrilla Mail: Allows you to both receive and send emails, making it suitable when you need to reply to a confirmation email.
- YOPmail: Allows you to set your own mailbox name, and the address lasts slightly longer than the standard duration.
Risks and security limitations of temporary mailboxes
While convenient, it is important to understand the downsides. Most temporary mailboxes are public, meaning anyone who knows or guesses the address can open and view the contents. Therefore, absolutely never use these mailboxes for important accounts such as banking, e-wallets, or primary social media profiles.
Another limitation is that emails are automatically deleted after a few minutes. If a website sends an OTP (One-Time Password) late, you might lose the information and be unable to log back in. These types of addresses are also frequently blocked by many major websites during the registration process. If you are interested in filtering mail and securing your primary inbox, you may want to read our article on Gmail users facing difficulties due to system errors and spam filters.
Tips for using temporary mailboxes safely
To take advantage of the convenience while maintaining security, keep these small points in mind:
- Only use 10-minute emails for temporary registrations, receiving trial documents, or one-time file downloads.
- Copy confirmation codes to your device immediately before the mailbox self-destructs.
- Never enter real passwords or card information into services associated with a temporary mailbox.
- For accounts you wish to keep long-term, stick to your primary Gmail and enable two-factor authentication.
Frequently Asked Questions about 10-minute email
Is 10-minute email free? Yes, almost all of these services are completely free and do not require registration or payment.
Is my information exposed when using a temporary mailbox? While the temporary address itself is not linked to your identity, because the mailbox is public, do not reveal sensitive information within it.
Can I recover emails after the mailbox expires? Generally, no. Once the temporary address expires, all the emails inside it disappear as well.
Conclusion
We hope this article has provided you with a new tip, allowing you to use 10-minute emails when needed instead of entering all your personal information to create a new account. Good luck!











